Activity 3: Trying out online games
You have done some activities related to games you play offline or
in the real world. Now try some online games!
Play a few games on the smartphone or computer or laptop,
and try out different kinds of games.
On the basis of your try outs of the online games, respond to
the following questions:
1. Do all the games have rules? Yes /No
2. Did they all have characters, such as cartoons, Micky
Mouse, etc.? Yes/ No
3. Did the characters interact with each other in all the
games? Yes/ No
4. Was there a colour background in all the games?
Yes/ No
5. Was there music in the games? Yes /No
6. Did you find any game interesting and challenging? If yes,
why? If not, how could it be made more interesting and
challenging? Yes /No
...........................................
..............................................
.....................
.........................
Activity 4: Preparing to make your own game with animation
You have thought about your favourite games; both offline and
online. You have identified the rules, players, the interaction
between these players and challenges in both online and offline
games you played. Online games and a few offline games, include music and a background that make them attractive and
interesting. Now look for some interesting online games and
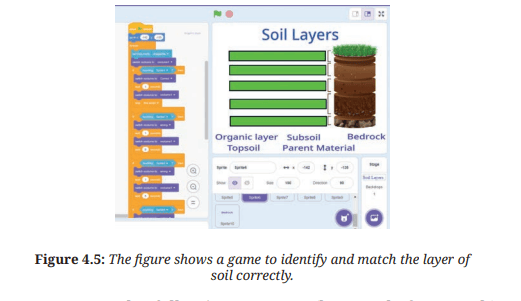
animations created using Scratch. You can look for match the pair
game (Figure 4.5).
You can use the following prompts (keywords for search) to
find games and animations:
1. Play animations using Scratch
2. Educational Scratch games for school students
3. Scratch games for practicing math skills
4. Creative Scratch games with music and sound effects
5. Scratch games for teaching history or geography
6. Adventure games made in Scratch
Creating an account on Scratch
1. You will have to login to the Scratch website to create an account.
2. Open your Scratch account using an email address. You can use
the email address of your teacher or a family member.
3. To start creating, click on the ‘Create’ button.
You can find tutorials for making animations and games using Scratch.
Type the following keywords:
• Scratch game tutorials for beginners
• How to make a maze game on Scratch
• Interactive storytelling on Scratch
• Creating multiplayer games on Scratch
1. Did you face any difficulty in creating your account on
Scratch? Yes/No If yes, how was it solved?
.......................................
......................................
......................................
You can now begin using Scratch
Activity 5: Build characters, objects and a backdrop of your
game
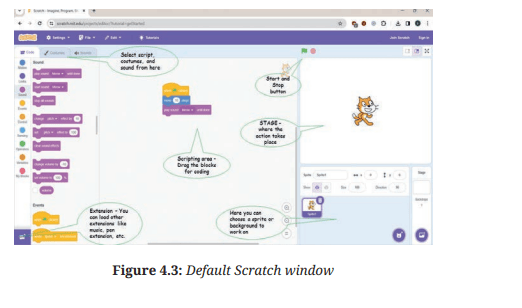
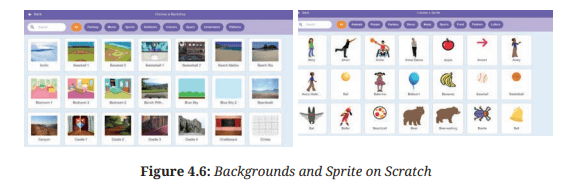
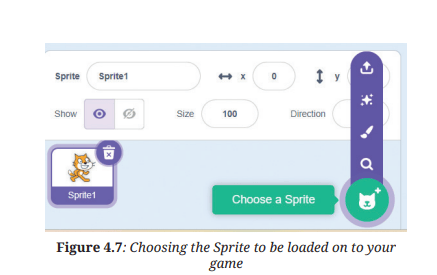
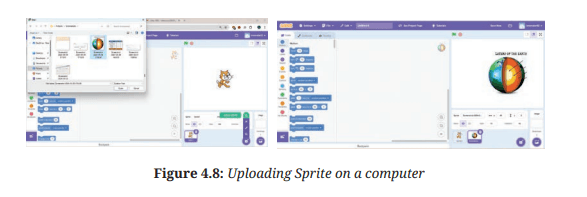
Try out a few things with Scratch. Figures 4.6 to 4.10 show some
of the things you will see on the screen.
As you begin using Scratch, keep responding to the questions
given below. They will help you think about things you can do.
You can look at your responses the next time you plan to create
something using Scratch.
1. Were you able to select and import Sprite?Yes No
2. Were you able to use the in-built Sprite or did you use
some image from the Internet or a photo you had taken?
Or did you use both?
..............................................
..............................................
..............................................
3. Did you attempt creating your own Sprite by drawing? Yes/ No
4. Were you able to change the costumes of the chosen? Yes/ No
5. Were you able to identify and import objects? Yes/ No
6. Were you able to identify and use appropriate backdrops
for the chosen Sprite? Yes/ No
Creating your own images
You can create your own images using an AI image generator. An AI
image generator that takes a keyword, also called as ‘text prompt’,
processes it and creates an image that best matches the description
given in the text prompt.
You can do the following to generate AI images for this project:
1. Choose an AI image generator: You can ask your teacher and
others for help.
2. Input your ideas: Describe what you want in simple words. For
example, if you are thinking of a flying cat, say, “A cat flying in
the sky.”
3. Explore options: Apply different styles and see how the tool
reworks the images.
4. Refine and Experiment: If you want changes, describe them. For
instance, “Make the cat smaller” or “Change the background to a
forest.”
5. Download or Save: Download or save the image to your device.
6 You can now use it for whichever purpose you want .
Activity 6: Programming your characters and objects
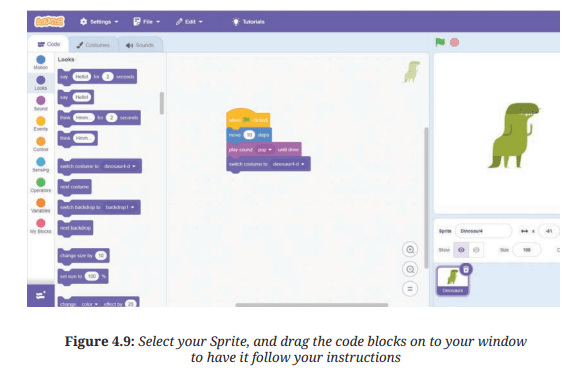
Now you need to animate your Sprite (Figure 4.9).
The following questions will help you think of what you can
do and also help you maintain a record you can refer to later:
1. Were you able to use a combination of ‘Motion’ and ‘Looks’
blocks to animate your Sprite? Yes No
2. Were you able to animate Sprite using ‘Control’ and ‘Events’
blocks? Yes /No
3. Were you able to include music in your animated block?
Yes/ No
4. Were you able to select multiple Sprite? Yes/ No
5. Were you able to change their costume? Yes/ No
Activity 7: Create an animated birthday card for your friend
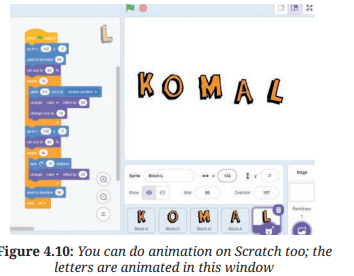
Now make an animated birthday card for a friend, using his/her
name and/or image (Figure 4.10)
The set of questions given below will both guide you and help
you keep a record of what you are doing.
1. Were you able to import and use your friend’s picture as a
Sprite? Yes/ No
2. Were you able to use a combination of ‘Motion’, ‘Looks’,
‘Control’ and ‘Events’ blocks to create an animated birthday
message using your friend’s Sprite? Yes /No
3. Were you able to use your friend’s favourite song as
background music for the animated card? Yes/ No
4. Were you able to save the card and share it with your
friend? Yes/ No
5. Did you face any challenges in designing this animated
birthday card? Yes /No
If yes, how did you resolve them?
...............................................................
...............................................................
...............................................................
6. Did you try creating something else using Scratch?
Yes /No
..................................................
...................................................
Activity 8: Designing your game
You are now ready to design your own game.
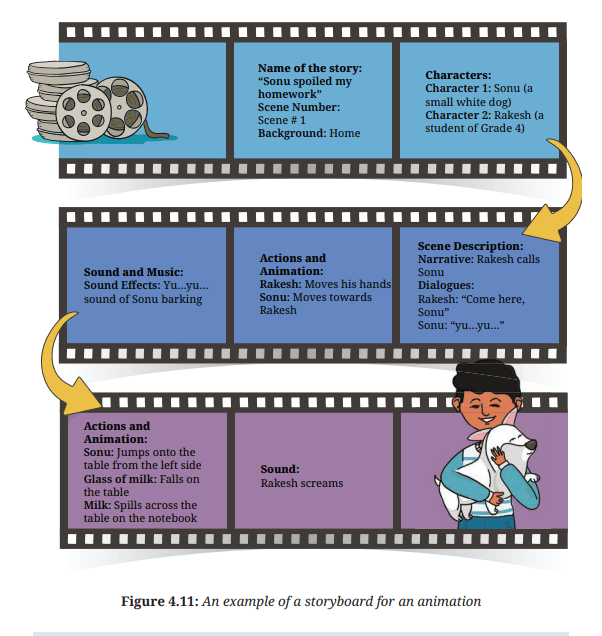
The first thing you need to do is plan the details of your game.
This is known as making a ‘storyboard’ (Figure 4.11).
Storyboard
A storyboard helps in planning what will be shown on the screen during
a game or animation. It is like a roadmap. You can make it on paper or
use the computer to create a document with the details of your plan. You
can sketch your characters, detail how they will respond to commands,
and show the sequence of actions, in short. Everything that is in your
head can go into the storyboard
Making a storyboard is important to ensure a detailed plan so that
you do not have to stop and think as you start making your game or
animation.
Notes:
Special Instructions: Make sure Rakesh is sitting on a study table and a
glass of milk is placed on his table.
Finally, you can show that Sonu jumps towards Rakesh, causing the
glass to fall, spilling milk on table
Present the game idea to your peers; did you receive any
suggestions? Yes/No
If yes, how did you use them?
........................................................
........................................................
Activity 9: Coding your game
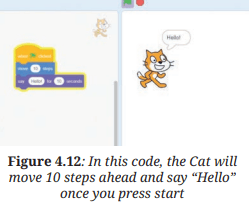
With the help of your teachers or any other person, write the code
(Figure 4.12) for the designed game by:
• Creating characters and
scenes
• Animating characters
• Using dialogue and text
• Using event blocks to
trigger different events in
the story
• Using sound blocks to add
background music
1. Write a script for the game you designed in Activity 5
using in-built blocks, such as motion, looks, sound, events,
control, sensing, operators, variables, etc. and control
structures that include loops and conditional statements.
..............................................................
..............................................................
2. Prepare a logo with the name of your game and paste the
photograph of the same in the space given below.
3. Were you able to do the following?
a. Setting the stage
• Choose or create a backdrop for the game’s stage by
importing image. Yes/ No
• Design or import Sprite Yes/ No
• Design or import object Yes/ No
b. Code your Sprite
• Use a combination of ‘Motion’ and ‘Looks’ blocks to
programme the movements of your Sprite. Yes/ No
• Experiment with different code blocks to control
movement, interactions, animations and game logic.
Yes/ No
c. Implement game mechanics
• Define the rules of game using ‘Control’ blocks.
Yes /No
• Use conditional (if else statements), loops, variables
and sensing blocks to create interactive gameplay
elements Yes /No
• Use ‘Event’ blocks to trigger actions in response to
specific events. Yes/ No
• Enhance the gaming experience by adding
background music using ‘Sound’ effects. Yes/ No
4. Did you face any challenges in designing the game?
If yes, how did you resolve them? Yes/ No
Activity 10: Trying it out
Check if your game is working.
1. Publish your game by clicking on the ‘Share’ button in
Scratch.
2. Request other group members to play the game.
3. Are there any issues or ‘bugs’ that need to be removed for
smooth working? Yes/ No
Activity 11: Sharing your game
Now imagine if someone you have not worked with were to play
the game. You would have to introduce the game to them and give
basic instructions. You can do that by either making an audio or
video clip or creating a document.
The questions below will help you develop these instructions.
1. What is the name of your game?
........................................................
........................................................
2. What are the different components of the game?
........................................................
........................................................
3. What are the rules of the game or instructions to play?
........................................................
........................................................
What did I learn from others and how did I
use it?
You saw videos on Scratch and discussed with others how to
create the games.
1. Did you watch any tutorials or observe how others coded
their projects?
.............................................
.............................................
2. Did you work on any project with classmates? What did
you learn from them?
...............................................
...............................................
3. Did you ask for help or advice from your teacher or peers?
What was the most helpful piece of advice you received?
...............................................
...............................................
4. What new techniques or blocks did you discover with the
help of peers?
...............................................
...............................................
5. Did learning from others inspire any new ideas or features
in your projects?
...............................................
...............................................
6. Have you had the opportunity to teach or help others with
Scratch? What did you teach them, and how did it help you
reinforce your own understanding?
...............................................
...............................................
What did I do and how long did it take?
It is important to understand how much time is required for an
activity to be completed.
Calculate the approximate number of periods you spent on
each activity. Mark them on the timeline below. If you did more
than the activities suggested in the book, please add the number
and time taken
Activity 1 2 3 4 5 6 7 8
—————————————————>
Time taken --- --- --- --- --- --- --- ---– – – – – – – – – – –
(Periods)
What else can I do?
1. You can create a game/animated story related to your
daily life, using photographs of people and objects around
you. Please remember to take permission first. Discuss
your favourite folk story with your family members and
elders in the community. Prepare a storyboard detailing
the characters, plots, important scenes, etc. Translate
this story into Scratch by creating characters and scenes;
animating characters; using dialogue and text; using event
blocks to trigger different events in the story; and using
sound blocks to add background music.
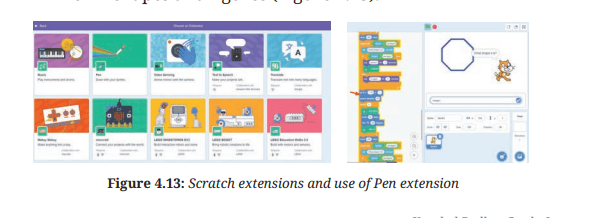
2. You can use the Scratch extensions to make different games.
For example, you can use the Pen extension to create your
own shapes and figures (Figure 4.13)
Think and Answer
1. What did you enjoy doing?
2. What were the challenges you faced?
3. What will you do differently next time?
4. Compare online and offline games. State three things you
like about each.
5. What jobs are related to the project? Look around, speak
to people and write your answer. A few examples of jobs
related to the activities you just did, are programmer,
software developer, game developer and 3D animator.