Note to the Teachers
Classroom and Resources
1. Adequate space for students to sit comfortably and work.
2. Sufficient light and ventilation in the classroom.
3. Option of sitting outdoors if the weather is suitable.
4. Provision of art materials, tools and basic stationery.
5. Space for safely storing materials, as well as students’ artwork in an organised way.
6. Display boards for showcasing and sharing work, which can be changed regularly.
7. Facilities for taking students on field trips, visits to museums or conducting art workshops in the school premises.
8. Projector, computer, speakers and other such facilities for showing relevant images, videos and other art resources.
Pedagogy
1. Encourage students to express their own ideas, imaginations, emotions and curiosities, and allow their originality and innocence to reflect in their work.
2. Prioritise activities that allow students to explore, investigate, experiment and have dialogue in the classroom.
3. Include outdoor activities, field trips to museums, CBCS, art galleries, art studios as well as local parks, gardens, markets, festivals, and fairs where students get opportunities to observe the life and culture around them.
4. Invite local artists and craftspeople for interactive sessions, workshops for hands-on experience.
5. Inculcate simple habits of cleaning up after working, putting back materials that have been used and maintain art materials with care.
6. Students should participate in taking decisions in selecting and displaying artworks.
7. Avoid drawing on the board or in notebooks to show students how something is drawn.
8. While reading, students underline the elements of Art — line, shape, form, colour, value, texture and space.
9. Activities under the heading ‘Continue’ are extensions of the exercises and can be done at home or at school.

Chapter 1
Objects and Still Life
Welcome to the first chapter where your visuals in art will narrate a story through the world of objects and still life. You will learn to add life to the still objects.
Still life
How?
• By learning how to connect with them.
• By building a story around them.
• By observing the compositional arrangement.
• By observing how the light falls on them creating shades and shadows.
• Even if they appear seperate from one point, how do they overlap from another point of view.
Each drawing will deepen your observation and you will start depicting objects in your surroundings as you perceive them.
Each activity will sharpen your skills of shape recognition (two-dimensional). You will understand how to create forms by adding depth to the objects, making it look three-dimensional.
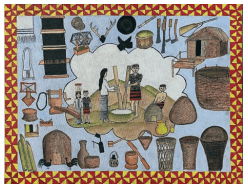
A student’s painting showing variety of objects
You will also find exciting activities like creating flipbooks. So get ready to ignite your creativity and nurture your artistic talents.
Activity 1: Explore Objects from Surroundings
Look around you and observe the various objects. What material is each object made of? Pause and think about why they are of a particular shape. Is there a reason behind their shape and form? Also, observe the space around these objects. Move around and observe the objects from different angles. After spending some time observing, select two or three objects you would like to draw.
Activity 2: Draw Objects in Different Ways
Every person draws differently. This makes their expressions unique. Here are some ideas you can try:
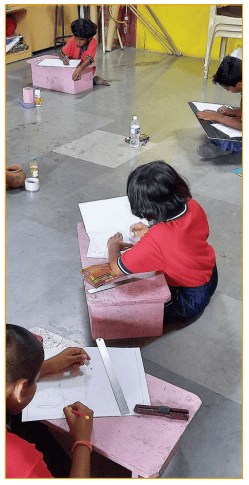
1. You can draw an object using one continuous line. This means, you cannot pick up your pencil from the paper while drawing the object. Ask your classmates if they can identify the object from this drawing.
2. You can draw different parts of the object. For instance, while drawing a water bottle, draw each part (cap, container and so on) separately. Notice the difference in proportions.
3. Try and draw the same object from three different angles. Change your position or move the object around. You can place the object on the floor or even hang it. After you finish your three drawings, share them with your classmates. Which of the three angles do they find the most interesting?
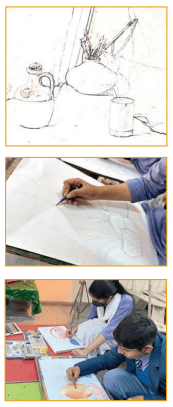
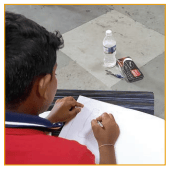
Students drawing objects in different ways
Riddle
Who am I? Wherever you go, I follow I have no face or form You can see me But cannot touch me. Who am I?
Answer of the Riddle: Shadow
Continue: Draw objects of different materials found at home. Find objects made of wood, metal, clay, plastic, cloth, etc. Place them where there is some light. Create an outline drawing and try to map the dark and light areas. Notice the colour and shape of shadows, and include these in your drawing.
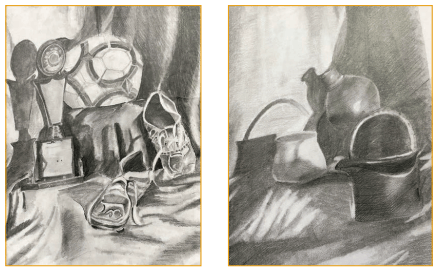
Student’s artwork showing light and shade
Activity 3: Light and Shade
Place different objects in front of you.
• Observe their shapes, shades, shadows and how the light falls on each of them.
• What is the shape of their shadows?
• On which side of the objects do you see their shadow?
Use a pencil and try a few experiments. Vary the pressure as you create rhythmic strokes in any direction. Are you able to create light and dark tones?
After you have practiced this on a separate paper or drawing book, draw the objects in front of you.
Within the outline of the objects, create pencil strokes from light to medium to dark tones. Also, observe the shadows and show it in your drawing.
DO YOU KNOW

Amrita Sher-Gil is an important modern Indian woman artist. She was born in 1913. Her mother was from Hungary and her father was from India. She studied art in Paris. When she was 21 years old, she returned to India. She travelled around the smaller towns and villages with her canvases, oil paints and brushes. Her paintings have rich earthy colours. She was deeply affected by observing the life and conditions of common Indian people, and created paintings based on these themes.
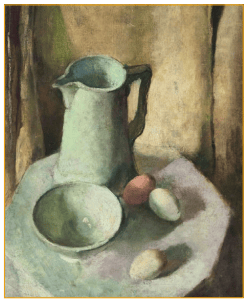
Still life painting by Amrita Sher-Gil
Discuss and talk about the objects, arrangement, light, shade and shadows seen in this painting.
Activity 4: Through the Eyes of an Artist
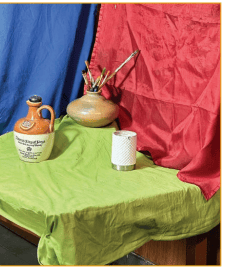
Artists have a practice of studying objects. They arrange them in a group to create drawings, paintings, sculptures and photographs. Such artworks are called still life. In a still life, a lot of thought is given to the choice of objects and how they are arranged.
Flowers, plants, vegetables,fruits, food items, clothing, tools and other household objects are also included in a still life arrangement.
Why do you think it is called a still life? If an object doesn’t have life, would it be a still life?
Still life artworks depict things that are ‘still’ and do not move. In the process of making the artwork, the objects get a new ‘life’. Look at still lifes made by well-known artists and discuss them in your class.
Activity 5: Create your own Still Life
Make groups of four to five and sit in a circle. In the centre of the circle, place two to three objects. Try and put objects made of different materials like a bottle, fruit, metal compass, wooden ruler, piece of fabric or anything that interests you. Discuss in your group different ways the objects can be placed and arranged. The objects can touch each other or you can scatter them around. Make sure everyone in the circle can see the arrangement of objects clearly.
Observe and draw the objects to create your own still life.
Activity 6: Drawing Furniture
What are the different types of furniture you see in school and at home? Observe and draw any two or three furniture objects. Compare your drawings with the actual objects. Compare the straight lines, angles and shapes you drew with straight lines, angles and shapes in the object.
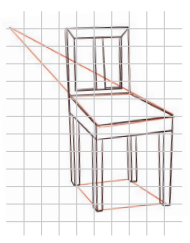
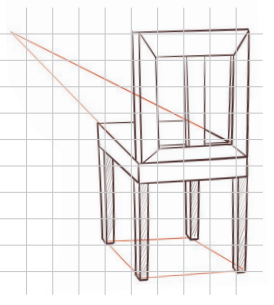
Edit your drawings so that it conveys dimension and depth around the object. This is called perspective. It gives us a feeling of three-dimensional space as though we are seeing it in front of us.
In small groups, look at your peer’s work and analyse whose work has perspective. Identify the lines, shapes and forms that are helping in showing the perspective.
Continue: Observe and draw objects that are a part of buildings — doors, windows, pipes, taps, shutters, fans and lights.
Activity 7: Make a Flipbook
Wouldn’t it be fun if you could make your objects move in your drawings? You can do this by making a flipbook. Follow the instructions below:
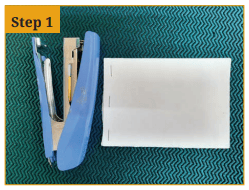
Step 1: Cut an A4 sheet into eight equal pieces and make a pile. Staple the pieces together from the shorter side. Your book is ready!
Step 2: On the last page of the flipbook, choose an object and draw it close to the right edge. Draw with a pencil and add other details if you like. When you are happy with your drawing, outline it with a marker.
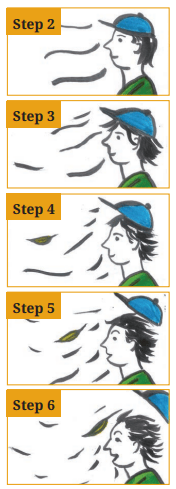
Step 3 – 6: Now, it’s time to add movement to your object! On the second last page of the flipbook, trace the first drawing with a pencil. Change the position of the object very slightly. Repeat this step till you have drawn on all pages, each with a slight change.
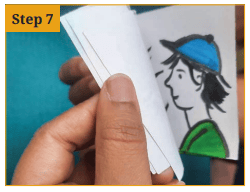
Step 7: Flip the pages of your flipbook quickly. You will see your object moving.
You can increase the number of pages in the flipbook to have more movement!