Chapter 2
Changing the Typical Picture
This chapter will immerse you in the wonders of nature. You will step outdoors to discover many beautiful shapes, forms, colours, patterns and textures in other life forms. You will learn to record these details through drawing and painting activities.
You will also learn the fascinating process of making your own natural colours, along with techniques of creating colour tints and shades. This chapter will inspire you to think creatively and change the way you see the world.
Activity 1: Nature Walk
How do you feel when you are surrounded by trees, plants, hills, streams, sea and sand? Spend two to three minutes imagining that you are surrounded by nature. What all do you see? How do different things feel when you touch them? What do you feel under your feet? How far can you see? Is anything moving? What do you hear?
Make small groups of four to five students and share your imaginations with one another.
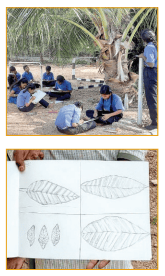
Take your drawing book and a pencil, and step outdoors to explore your surroundings.
1. Look up at the sky and feel its vastness. Make a note of the colours you see or the form of the clouds.
2. Look at the ground. Observe the colour of the soil, the different kinds of stones, pebbles and small rocks. Touch and feel their texture. Are they smooth, rough, bumpy, grainy or of some other texture?
3. Find a spot where there are some plants and trees. Gently touch the plant and feel the texture of its leaves, stems, barks, flowers, seed pods and anything else that you see. Try to draw those textures or note it through words.
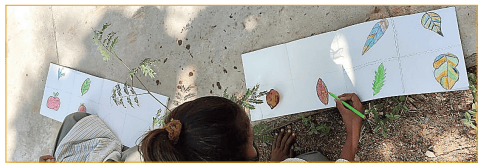
4. Closely observe the shapes of leaves, and the lines and patterns you see. Draw three leaves which have different shapes, lines and patterns. Make a note of their colours.
5. Closely observe any animals, birds or insects. Are they sitting, sleeping, standing or moving? Try to draw their form.
Gather in a group, and share your drawings and observations.
Continue: Start a visual journal and make drawings every day of the different things you see.
Activity 2: Field Trip
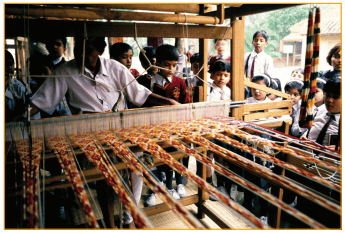
Visit a museum, artist studio or any place where artists work. Note down your observations based on these questions:
1. What kind of visual artworks do you see?
2. What are the materials used in making the artwork?
3. Who are the artists? What tools and techniques do they use?
4. How is the space arranged for making or displaying artwork?
5. What new ideas or experiences did you get?
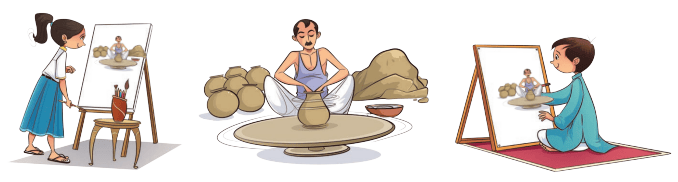
Draw from your own experience or you can use these images as reference.
Activity 3: Make Natural Colours
Have you ever wondered where colours come from? How are they made? What did artists use before we had colour pencils, crayons and paints in ready-made boxes?
Think of the food you eat. When dal is cooked at home, what is added to make it more yellow?
Turmeric! What do you call it at home in your language?
Now, think of other food that you have eaten. Some of their colour stain your fingers, your tongue and even your clothes if you spill.
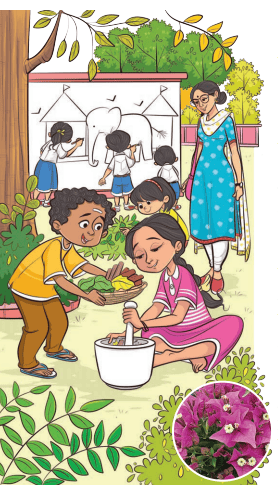
Similarly, flowers can also be used to extract colour.
Apart from plants, colours can also be made from soil, stones and mineral deposits. These processes have been used by people to prepare colours for various artistic purposes.
Write a list of some fruits, vegetables, leaves and roots in your food, which give colour when you crush or cook them.
1.________________
2.________________
3.________________
4.________________
5.________________
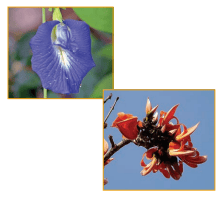
Let’s learn to make our own natural colours
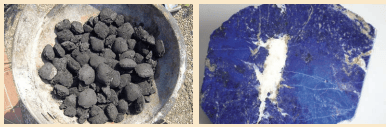
Step 1: Source raw materials from soil, minerals, vegetables, flowers, fruit, roots, charcoal, etc. (See the images of black charcoal and a blue lapis lazuli stone.)
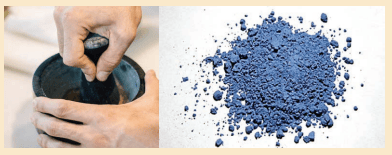
Step 2: The sourced pigments are finely powdered and filtered to remove impurities.
Step 3: A binder is added to the powder in the correct proportion. This helps the colour stick to the surface they are painted on. Gum arabic (sap from the bark of a babul tree), oils, milk, egg white and egg yolk are some natural binders.
Step 4: The prepared colour is applied to the artwork.
Activity 4: Make an Artwork with Natural Colours
Step 1: Source some materials from the Earth or plants.
Step 2: Discuss the process of preparing colour with your teacher and peers, and prepare your colours together.
Step 3: Plan and experiment with differentcolourcombinations from the colours you have prepared.
Step 4: Think about a colour which can be used in your artwork.
Step 5: Create your artwork using the natural colours.
After everyone has completed their artwork, have a classroom display of the artwork. Label your artwork with a title and details of the material you have used.
You can also display and share some of your preparatory sketches or experiments that show the process of your work. Discuss the process and colours that are seen in everyone’s artwork.
Activity 5: Creating Colour Tints and Shades
Do colours also change like our moods?
Have you observed how your moods change throughout the day? Spend five minutes recollecting your moods and talking about them:
1. What is your mood when you go home after school?
2. What is your mood at dinner time?
3. What is your mood before going to bed?
4. What is your mood when you wake up in the morning?
5. What is your mood now?
Moods and feelings last for some time and gradually change. They might feel strong and intense, or mild.
Colours are like that too. We can make them vibrant, intense, dark, pale, light, mild … and so on.
Think of how colours change in the sky during a sunrise or sunset.
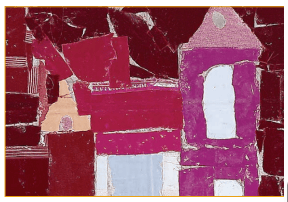
Collage with waste fabric
Have you observed the colours of your clothes fade over time due to sunlight and repeated washing? They change from bright to dull or dark to light.
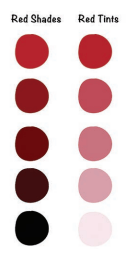
In art, these variations in colour are called tints and shades. We create colour tints by adding white to any colour. We create colour shades by adding black to any colour.
Colour + White = Colour Tints
Colour + Black = Colour Shades
Let’s practice!
Material: Plain paper to draw and colour (water colours, poster colours or powder colours) — black, white, and two or three other colours.
Alternative: Take colour pages from old newspapers or magazines, and find the different shades and tints of colours to create a paper mosaic.
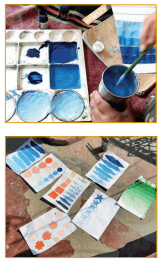
Nature’s Palette
Have you ever marvelled at the variety of colours in nature?
Step outside and look for three leaves that are of three different shades or colours.
Try mixing various colours to get the closest shade you see.
Extension —Mapping Tints and Shades
Use the colour tints and shades you have created as a reference. Find pictures of artworks from a museum website or illustrated books that also have the same colour tints and shades in the pictures. Observe how the tints or shades are enhancing the moods and emotions of the artwork. Repeat this exercise with four to five different colours, and their tints and shades. Note down a short description of the moods and emotions you have experienced with the colour tints and shades.
Activity 6: Surfaces and Material Used by Artists
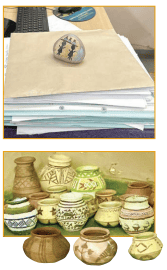
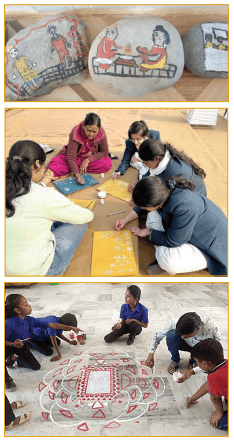
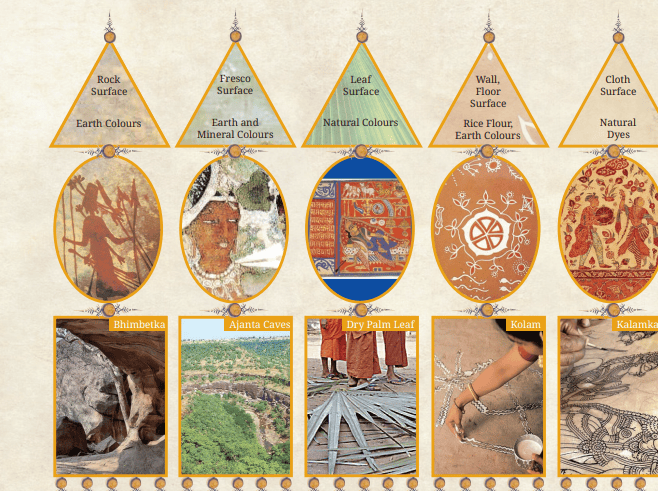
You have learnt that colours can be made from nature. Before the invention of paper, artists used to paint on natural surfaces like rocks, walls of caves, mud plaster, palm leaves, wood and cloth.
They also used terracotta, stone, animal bone, leather, wood, metal and fibre to craft a variety of three dimensional objects and sculptures.
They invented special tools and developed techniques for working with each material and surface.
If you did not have paper, which surfaces and materials would you choose for your artwork? Carry out your own experiments and make your artwork.
Look at the examples in the page below. You can learn about the variety of materials and surfaces that artists have used since pre-historic time.
Activity 7: My Inspirations from Nature
Now, you know that artists observe their environment closely and capture the finer details. Each artist has their own imagination and makes their own choices in the material, tools and techniques they use. This is what makes their work unique.
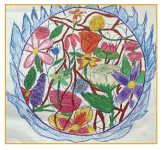
Like an artist, you can also use your own imagination. You can choose material and tools that are suitable for your own ideas. Nature is your inspiration and you are the creator. Include your own experiences and observations.
It doesn’t have to be a mountain or a river, or the sun. You decide what represents nature for you. It could be something much closer from your immediate surroundings. Remember, the picture should be through your eyes!