Part 3: Work in Human Services
Human Services are about serving people and interacting with them in different ways. Projects on Work in Human Services will help you learn how to work with people. You can take up projects related to taking care of your health and that of your family and others, you can make interesting videos and audio clips on various topics, such as making a budget for your family, applying Mehndi on people’s hands, or developing a comic book; it is up to you to imagine all that you can do with your peers.
Two examples of projects are given in this section, which are Storytime with Puppets and Family Health Handbook. You must take up only one project. You can either choose one of these projects or you can design a project of your own choice with the help of your teacher

Project 5: Storytime with Puppets
This project will help you learn about telling stories with puppets. You will learn to write a script, make puppets and put up a puppet show with backdrops, props, sound and light.
As part of the project, you will be able to:
- Identify a story
- Write a script
- Make puppets
- Design and present a puppet show
Everyone, young and old, likes to listen to stories. Storytelling
has been prevalent from ancient times and different forms of
storytelling have evolved over time. The paintings in the Ajanta
caves in Chhatrapati Sambhajinagar in Maharashtra, made
between the second century BCE and fifth century CE, are one
form of storytelling—they depict stories from the Jataka tales
through paintings.
India also has a tradition of oral storytelling, which has
continued until today, through Baul songs in Bangla, Dastangoi
in Urdu, Katha in different languages, Kavad in Rajasthan,
Yakshagana in Kerala and Karnataka, and Ram Leela across the
country. Kavad is narrated using a wooden shrine that opens as the
story unfolds. Yakshagana and Ram Leela use music, masks, and
costumes, along with dialogues. Traditionally, these performances
were done without a written script.
The forms in which stories are told keep changing—for example, in modern times, writing is a popular form of storytelling. Along with writing, photography, cinema, animation, and many other forms are used for storytelling.
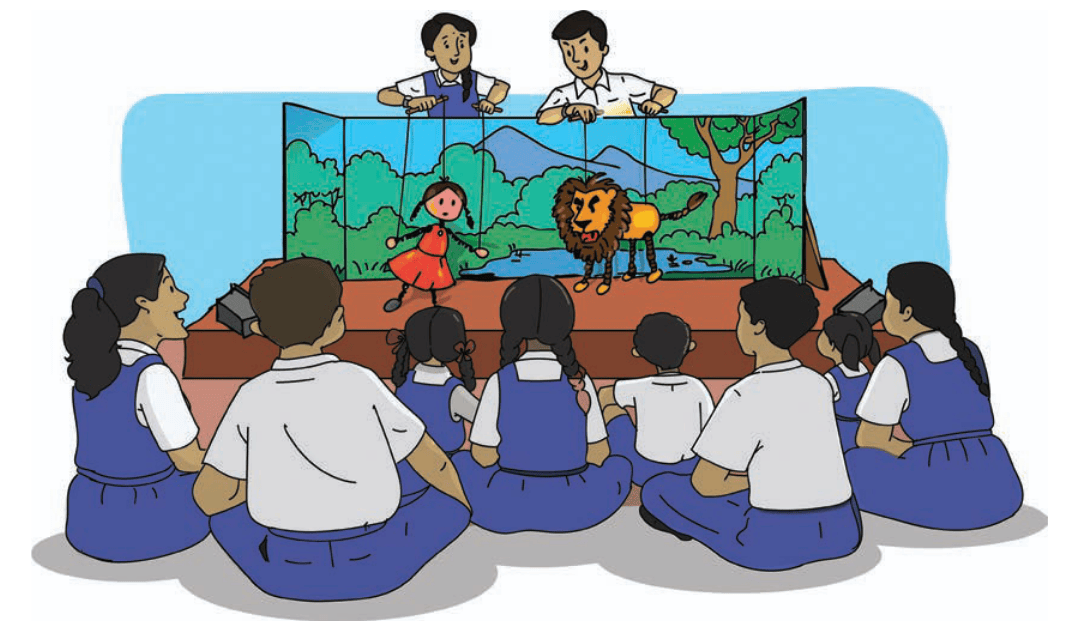
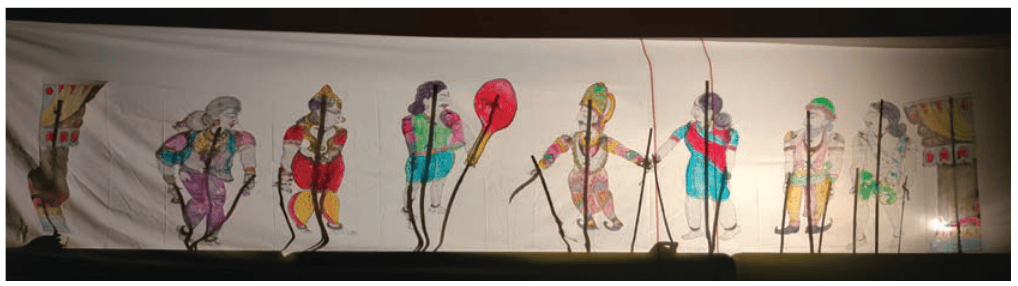
Sadly, some of the traditional forms are not as popular as they were till a few decades back — some people prefer more modern forms of storytelling. But one form that has persisted is using puppets to tell stories (Figures 5.1 and 5.2).
Puppets are human or animal figures that can be moved by the puppeteer. Therefore, a clockwork doll will not be considered a puppet but a simple sock with eyes, nose, and mouth stitched on it will be considered a puppet if it moves with the help of the puppeteer.
Puppetry is the art of moving puppets either by hand, rods or strings to narrate a story. You may have already learnt about puppets in Art Education. You might have also learnt about the different kinds of puppets used in our country.
The advantage of puppetry is that you can put up a show with even one or two humans and a few puppets. This show can be easily taken from place to place and used to narrate a variety of stories.
Puppet shows have been used to share sensitive social messages that people may hesitate to discuss otherwise or even to involve people who may otherwise stay aloof. Since the puppet, and not the human is speaking, the audience will listen and laugh about things that would otherwise make them angry or upset. For example, puppets have been used to discuss addiction, superstition and other ills in society. They have been used to motivate people to act against injustice.
Did you know?
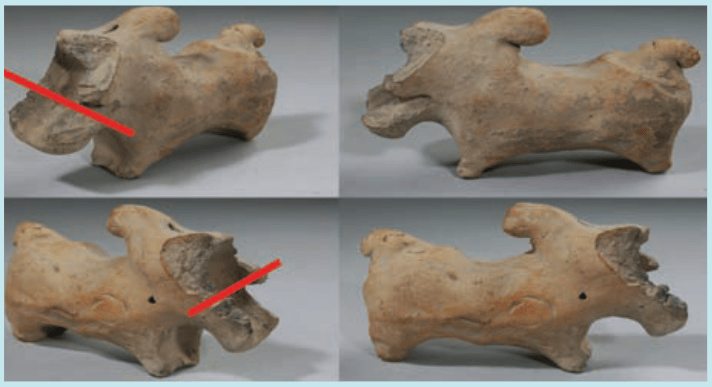
Between 2012 and 2014, archaeologists excavated a site belonging to the Sindhu–Sarasvati civilisation at Karanpura in Rajasthan, situated along the river Chautang.
Among the many discoveries was what appeared to be a puppet-headed bull (Figure 5.3). Although its head is missing, archaeologists have observed that the shape of the artefact is such that a detachable head could be placed on it. There are also two shallow grooves through which a string could be passed to make the head move.
What will I be able to do?
At the end of the project, you will be able to:
- Write a script based on a story.
- Make puppets using different types of materials.
- Use music, sound, light, and voice modulation as per the story.
- Narrate a story through a puppet show.
What will I need?
You will need the following materials:
- To make puppets: Slippers, spoons, twigs, leaves, husk, bamboo, old cloth, ribbons, forks, tennis ball or any other ball, colours, brushes, palettes, cutter, scissors, thread, needle, glue, tape, paper tape with a writable surface, or any other available material.
- To move puppets: String, broomsticks, chopsticks, or any other available material.
- To make props: Aluminium, cardboard, chart, or any other available material.
- For the performance: Cardboard, wood (preferably waste), hammer, nails, chart, bedsheet, paint, tablecloth, torch, diya, table lamps, musical instruments, sound system, or any other available material.
How do I keep myself and others safe?
Precautions you need to follow while designing and putting up the puppet show are:
- Please use the tools as per instructions and follow necessary safety precautions.
- It is possible that your workspace will have lots of raw materials, and semi-finished work. Sometimes semi- finished work is delicate; you must store it safely to avoid accidental or unintended damage.
- Work in a properly ventilated and well-lit room.
- While writing the script and during the performance, be sensitive to others’ sentiments and spread positive messages. In case you are drawing inspiration from real life for your story, ensure you get permission from the people concerned.
Internet safety: Ask your teacher for help while using the Internet. Be careful and do not upload or download anything. Do not share personal information online.
What do I need to know before I start?
Before you start thinking of the story you will narrate and the puppets you will make, it is important to think about what will interest people in your puppet show.
Activity 1: What makes stories work?
Think of the stories you have heard from various people or seen on a stage or in a film.
Remember the story you most enjoyed hearing, the one you wanted to hear again and again. Think of what you liked about that story.
- Who told the story?
- How did they tell the story? Did they recite it, or keep changing their voice? Did they use any props, modulate 114Kaushal Bodh— Grade 7 their voice, use actions and change expressions as they told the story?
- What did you like about the way they told the story?
The most important thing for a story is holding the listeners’ attention. Discuss your responses with your peers and see if you identified some common elements that made storytelling interesting.
On the basis of this discussion, what would you do to make astory exciting for listeners?
Activity 2: Watching a puppet show
Check if there is any puppet show taking place near you. If not, you can invite a puppeteer to school to put up a show.
Discuss the types of puppets with the puppeteers. Observe the puppet’s mechanism—how the puppeteer moves it, who he/she looks at, their dress, style of holding the puppet and most importantly, voice modulation. If it is a live performance or a play with human actors or a puppet show, observe the stage arrangement, background, sound and light.
After watching the puppet show, please respond to the following questions:
- What was the name of the puppet show? Where did you watch it?
- What kind of puppets were used in the show (e.g., king, lion, bird)? What do you think the puppets were made of?
- What was the puppeteer doing? How was he/she moving the puppet? Did the puppeteer interact with the audience or with the puppet? If yes, how?
- What was the most interesting scene in the puppet show? Why did you find it interesting?
- Were elements, like sound, light, backdrop or anything else used that made the show interesting?
In case you are not able to see a live puppet show, you can search for a video of a puppet show online using the keywords ‘puppet show + language’ (your choice).
What do I have to do?
The first step towards putting up a puppet show is to identify a story and write a script. Once that is done, you have to make puppets according to the characters in the story and then design the puppet show. Finally, you have to set up the stage and put up a show.
Activity 3: Selecting/writing a story
Before you start making puppets, you should be clear about the story you want to present.
You can go to the school library and read books to get ideas. Or you can use something you are learning about in other subjects, e.g., a story or poem from language or a historical event in science or social science. You can also select a story your grandparents tell you. Alternatively, you can think about designing a puppet show around social issues, e.g., Swachh Bharat , polio vaccination or on the rights and responsibilities of citizens.
Remember, you have to make puppets, write a script and put on a show. Therefore, your story must be short and simple, but with some drama and/or action in it.
Which story did you select and why?
Next, you need to identify the key elements of the story. Table 5.1 will help you in doing so.
| Questions | Answers based on the story |
|---|---|
| What is the story about? | |
| What is its title? | |
| Who are the characters in the story? Describe them briefly. | |
| Where is the story set? | |
| Does the setting of the story change as it progresses? | |
| What is the plot of the story? | |
| Write the sequence of the main events. | |
| What is the central message of the story? |
Activity 4: Writing a script for the puppet show
When you see a live performance or watch a film, there are dialogues, changes in scenes, music, action, and many other things. It is much more than just narrating a story. Translating a story into a show is done using a script.
A script has the step-by-step flow of scenes, dialogues and emotions of the characters. It also contains details, like the position and movement of the puppet(s) during each scene. Elements like short songs or poems, light and sound effects, and so on must be mentioned in the script. The style of speaking has to be made clear, e.g., natural, casual, formal, authoritative, submissive, and so on depending on the character and the scene.
Try and select a story that has at least 2–3 characters. These characters can be animals, humans, aliens – as per the story.
To help you understand how to write the script, an example of a story called ‘Gopal and the Hilsa Fish’ is given in Table 5.2. This story is about a king who does not like people talking about the Hilsa fish in the court. He challenges Gopal, his courtier, to buy a huge Hilsa fish and bring it to the palace without anyone talking about it. Gopal accepts the challenge. He shaves half his beard and smears ash on himself. People are so surprised by his appearance that they do not talk about the big Hilsa fish in his hand.
| S. No. | Character | Dialogue and style | Props required | Special effects (e.g., light and sound) |
|---|---|---|---|---|
| Scene 1: Durbar scene with king on a throne and Gopal standing in front of him. Backdrop showing a beautiful hall with paintings on the wall. |
||||
| 1 | King | (Complaining): I am tired of people talking about the Hilsa fish. | Throne for king (made of cardboard and painted with gold paint) | |
| 2 | Gopal | (Patiently): They will get tired and stop. | ||
| 3 | King | (Impatiently): When!! | ||
| 4 | Gopal | (In a soothing voice): As soon as anything else comes along. | ||
| 5 | King | (Angrily): Gopal! Do not argue with me. I challenge you to bring a big Hilsa fish to the durbar without anyone talking about it. | Sound of hand striking a wooden surface | |
| 6 | Gopal | (Bowing low): I accept the challenge, your majesty. | Sound of a trumpet (can be a toy trumpet or sound made by a person) | |
|
Scene 2 |
||||
|
Market place Backdrop showing a busy market place with lots of people looking towards the stage. Gopal with half his beard shaved and ash smeared on his body, holding a large Hilsa fish. Another person from the town standing and looking at him in surprise. |
||||
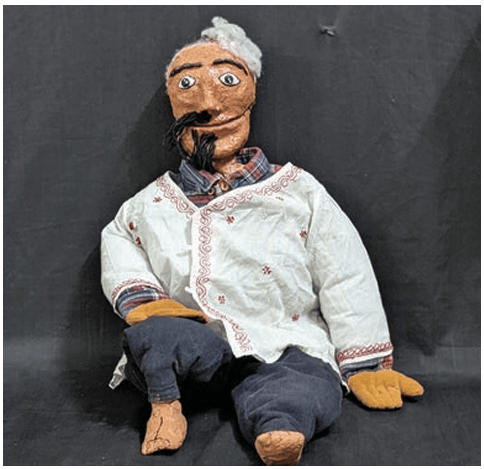
Please note that props are objects other than puppets (Figure 5.4) used on stage. They are used to clearly show the setting (e.g., the king’s throne) and can easily be moved around (e.g., Hilsa fish, sword, ball, car, newspaper). While some of these are placed on the stage, others can be moved around if attached to a string or stick.
Now, use table 5.3 to write a detailed script for your story.
| S. No. | Character | Dialogue and style | Props required | Special effects (e.g., light and sound) |
|---|---|---|---|---|
| Scene 1 | ||||
| 1. | ||||
| 2. | ||||
| 3. | ||||
| Scene 2 | ||||
| 1. | ||||
| 2. | ||||
Activity 5: Character sketch
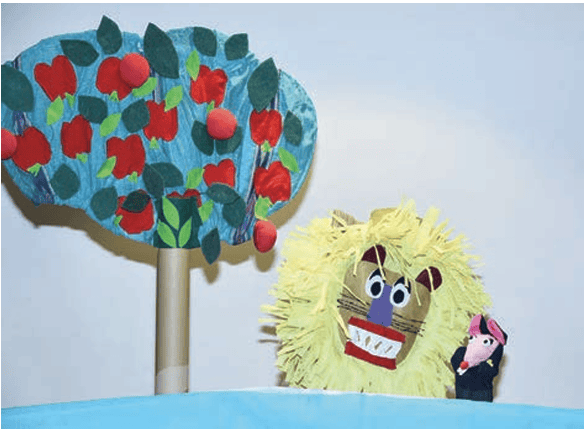
Before you make your puppets, you have to imagine how they would be as people. Would they be tall or short? Would they be cheerful or grumpy? Would they be outgoing or shy? These are known as characteristics. Deciding the characteristics of your puppet is known as making a character sketch. This is necessary for deciding the face and body of the puppet, its expression, its voice, and mannerisms, for example, jumping up and down when excited, slumping when sad (Figure 5.5). You need not make the puppet exactly like an animal or human figure – often, puppets have elongated bodies, arms and hands. However, to get a complete idea of the puppet, you need to imagine both its body and its personality.
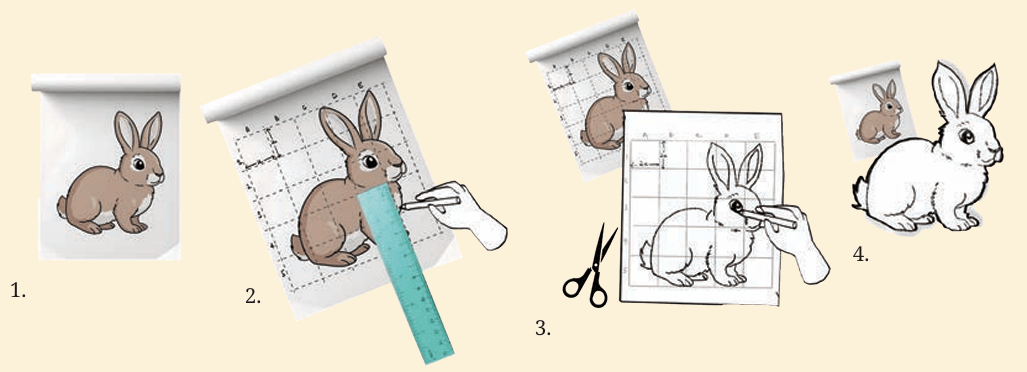
Using graph paper makes drawing easier
Suppose, your story has a rabbit. You can draw a rabbit on paper and paste it on cardboard. You can then attach a stick to the cardboard to move your rabbit puppet.
To draw the rabbit, take a picture of a rabbit, tracing paper and graph paper.
Draw the rabbit on the tracing paper and paste it on the graph paper. Next, draw lines proportionate to the graph on the chart paper you want to draw the rabbit on – this will help you make a larger rabbit. You can now copy each part of the rabbit onto the chart paper. Erase the lines once you are done and colour your rabbit (Figure 5.6). Once the stick is pasted to the body of the rabbit, your puppet is ready.
These questions will help you plan how to make the puppets.
- Which puppets will you make? Draw them in the space below.
- What are their main characteristics?

Activity 6: Making puppets
You can make puppets with materials available around you – clay, soft wood, grass, wastepaper, used bottles, thermocol, cardboard or any other suitable material. For example, you can stick cutouts of fish drawn on chart paper around a broomstick and move them to narrate a simple story set in the sea. You can stick a piece of chart paper around a broomstick and then paste nose, eyes, ears made of chart paper or of materials like wool.
Some examples of materials and objects that you can use to create puppets are given in figures 5.7 to 5.13. Do try out other materials and see what you can do.
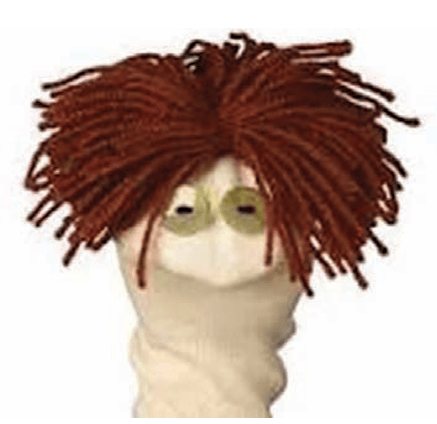
1. Sock puppets
You can make sock puppets simply by taking old socks and sewing eyes, nose and mouth on them. You can even sew some old wool to the sock to create hair.
You can move sock puppets by wearing them over your hand (Figure 5.7).
2. Spoon and fork puppets
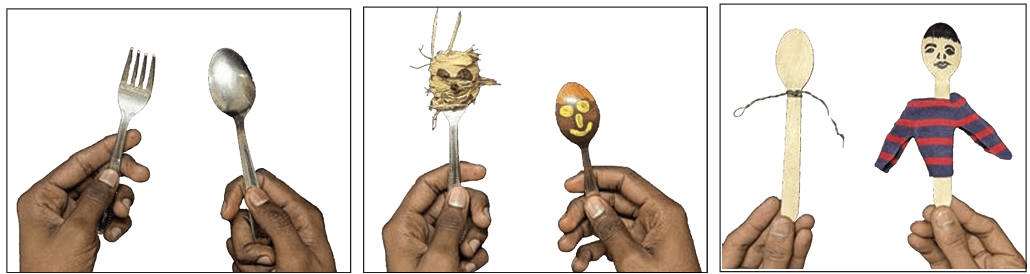
You can make puppets using steel or wooden spoons and forks (even ice cream spoons and disposable forks). You can simply paint a face on the spoon and wrap some husk on the fork and then paint a face on it (Figure 5.8).
You can also decorate these puppets with clothes made of paper and colour them using sketch pens or pencils.
You can move these puppets using the handles of the spoon and fork.
3. Slipper/shoe puppets
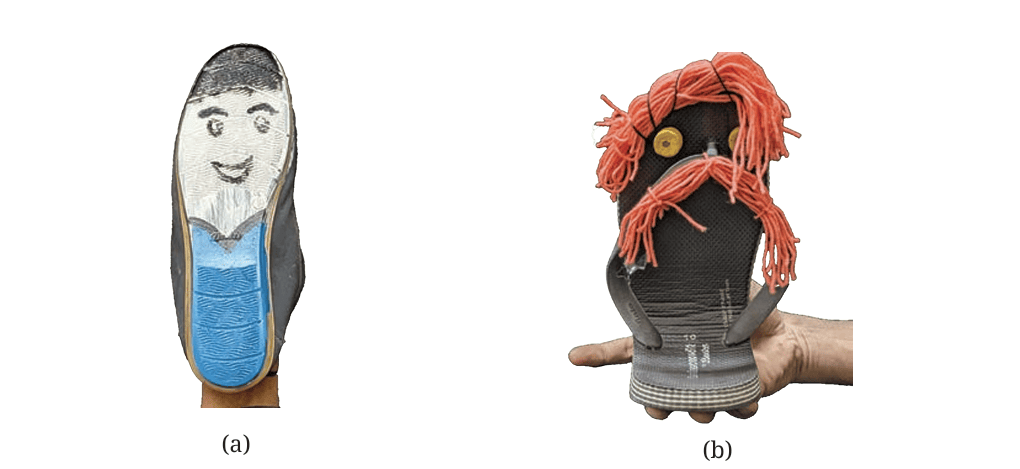
You can paint the sole of a shoe or tie/paste wool for hair and moustache. You can stick buttons for eyes or simply paint them (Figure 5.9).
You can move these puppets by holding the sides of the slipper or wearing the shoe on your hand.
4. Ball puppets
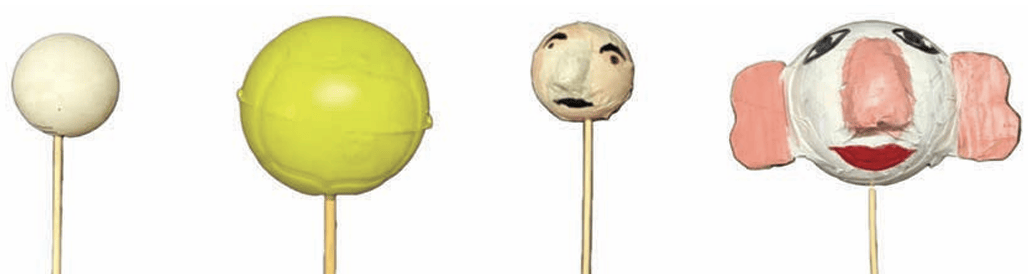
You can create faces with balls—just insert a broomstick into the bottom of a ball so that you are able to move it. You can paint a face on the ball puppet or stick pieces of paper cut to resemble noses and ears to the sides of the ball (Figure 5.10).
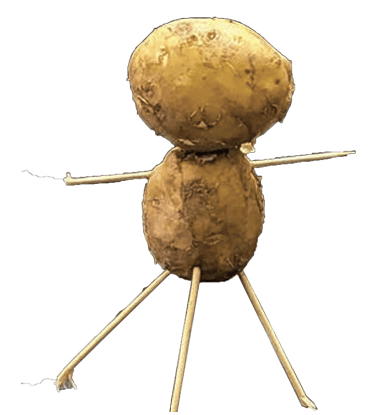
5. Vegetable puppets
You can also create puppets using vegetables, like potatoes, and toothpicks. You can use other vegetables, like radish and carrot to create a nose, mouth and eyes (Figure 5.11).
You can move these puppets using the sticks.
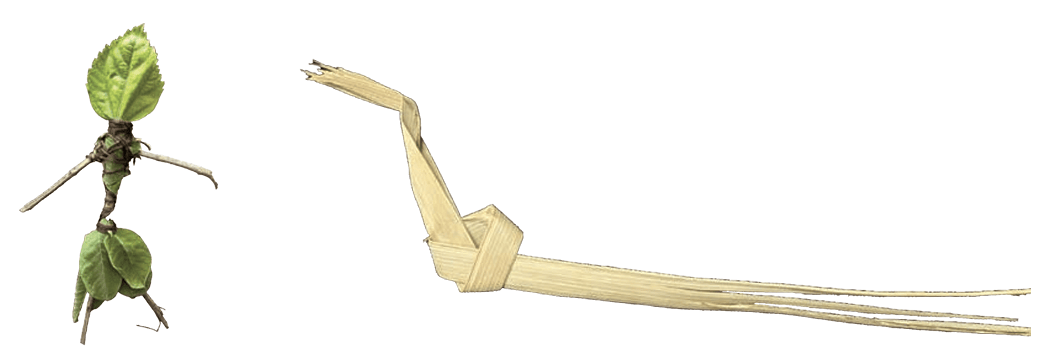
6. Leaf puppets
You can create puppets with leaves too. These can either be dried leaves that do not break easily or green leaves. If you are using green leaves, you can use the attached twigs to create hands and arms (Figure 5.12).
You can move these puppets holding them where you want.
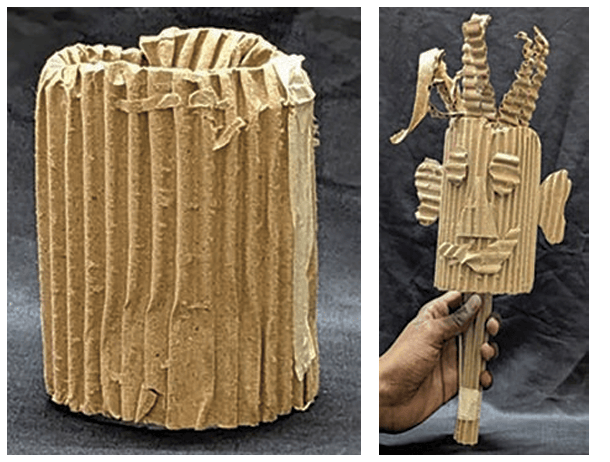
7. Cardboard puppets
You can create puppets with discarded cardboard too (Figure 5.13). Besides the body, you can cut and stick small pieces of cardboard to resemble eyes, nose, mouth and even a moustache.
8. Making puppet heads
You can try and make a puppet with a head and dress. Figure 5.14 shows how you can make the head. Gather the materials as shown in the figure and get started.
Materials: Twigs, husks, newspapers, thread, cloth, and water-glue solution.
 |
||
|---|---|---|
Step 1

Take two small twigs and tie them in a plus sign. |
Step 2
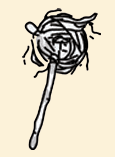
Take straw or husk, whichever is available and make a ball. Tie it with a thread around the plus sign to make a round or an oval shape (alternatively, if you cannot find husk or straw, you can use newspaper). |
Step 3
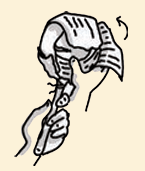
Wrap newspaper around the ball. |
Step 4
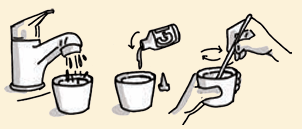
Now take a bowl with some water and add glue to it (3:1 :: water:glue). Mix it well and keep it aside. |
Step 5
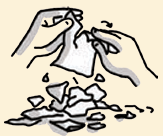
Tear scraps of paper into small pieces. |
Step 6
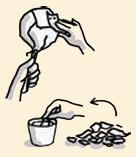
Take a torn piece of paper. Dip it in the water-glue solution and paste it on the round ball (from Step 3). Continue this process till the entire surface is covered in water-glue solution dipped paper. |
Step 7

Let the ball dry. |
Step 8
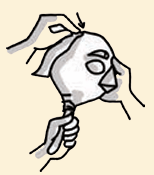
Add nose and eyes to the head using newspaper or other material. |
Step 9
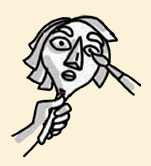
Paint the head. |
Learning from Online Resources
You can also make the head with papier-mâché. Search online to learn making papier-mâché using the keywords ‘how to make papier mâché (Figure 5.15).
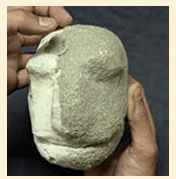
Painting the face
There are various ways in which you can finalise your puppet head. You must imagine a combination of eyes, nose, lips and ears that express the emotion (Figure 5.16). For example, smiling face, frowning face, laughing face, and so on.
Once you decide the expression, paste paper on the head – you can use paper tape to do this. Draw the expressions of the puppets on the paper tape. Draw/paste a photo of the puppet head in the box.

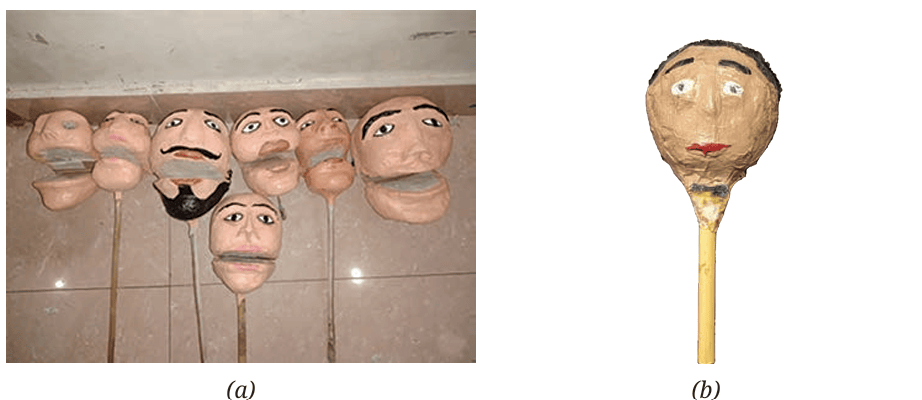
It is not necessary to paint the skin colour exactly the same as our skin colour. As a puppet is an imaginary character, the colours can also be imaginary. You can use different colours to paint the face.
Making the body
There are different ways in which a puppet’s body can be built. Figure 5.17 shows one way to make a human puppet.
Step 1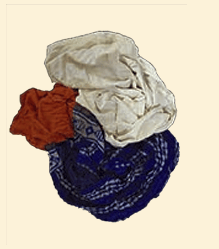
Take an old fabric and cut it in the shape of a long dress. The dimensions should be such that the rod or stick attached to the puppet head is covered. |
Step 2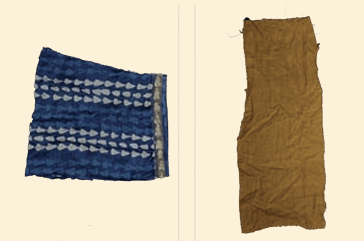
Stitch the cloth using thread and needle. |
Step 3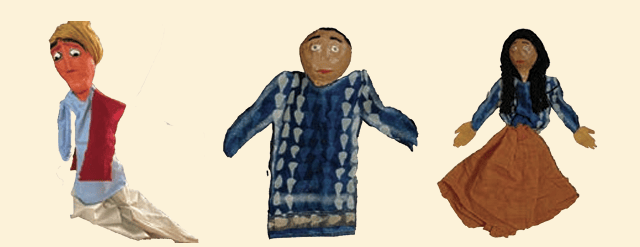
You can also make a shirt and long skirt or pants and attach it to the puppet if you wish. |
|
Step 4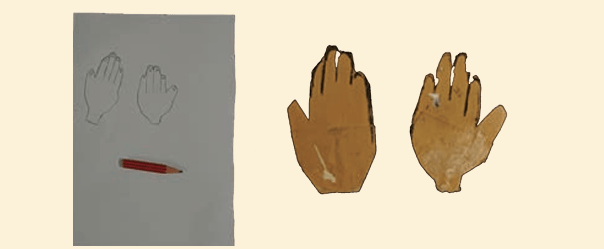
You can draw hands on a piece of cardboard on the paper. Then you can cut the cardboard appropriately. Attach the hands to the sleeves of the puppet’s dress. Now have fun with your puppets. |
|
|
|
|
You can make as many puppets as you need with different kinds of clothes (Figure 5.18).
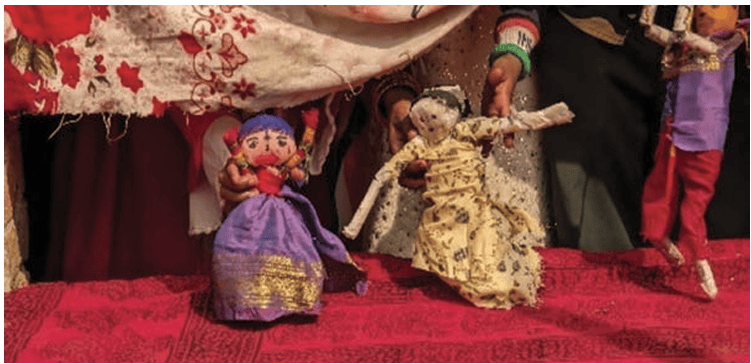
Movement
While performing, movement of the puppets will make the story come alive. You need to be creative to give movements to the puppet. For example, you can attach string to the back of the neck of the puppet and/or its hands. You can make the puppet laugh by opening its jaw using your hands, you can make the puppet fly using the stick attached to its body, you can ‘wear’ the puppet over your hand (Figures 5.19 and 5.20).
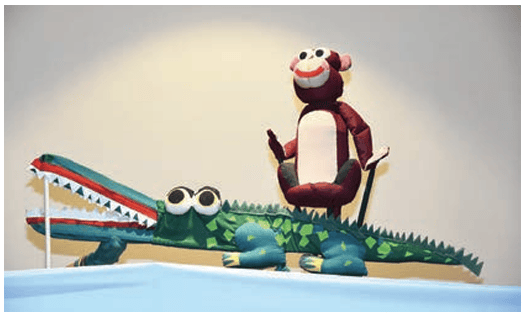
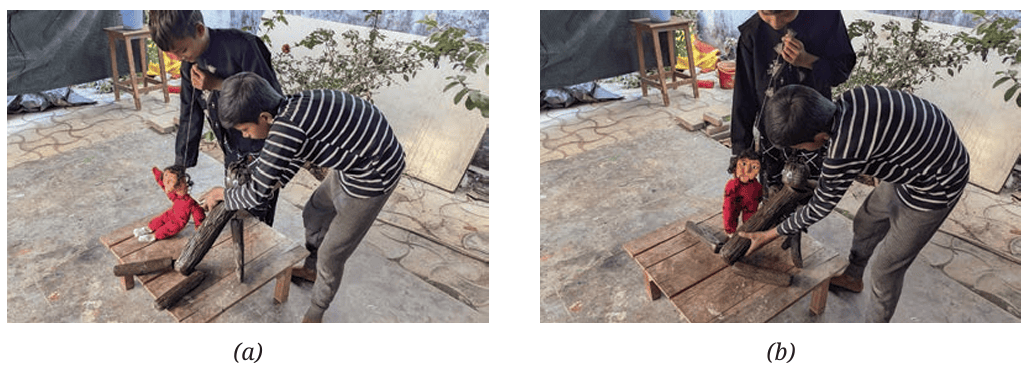
How will you make your puppet move?
According to the script, you may need to change the expression on the puppet’s face (e.g., smiling face, frowning face, sad face) or the way its body is positioned (e.g., standing tiger, lying down tiger). This is possible by making more than one puppet for each character with different expressions and positions.
Finalising your puppets
You have experimented with various puppets. Now, start working towards making the puppets for your show.
Please fill table 5.4 as this will help you plan your puppets. An example is given in the table to help you add details about your puppets.
| Types of puppet (e.g., human or animal) and their names | What materials did you use? | What did you do? | How will the puppets move? | How will you use these puppets? |
|---|---|---|---|---|
| Two human heads made of balls, named Rajesh and Geeta | Ball, broomstick, sketch pen |
Ball gives the shape of a head. I drew the eyes and mouth using a sketch pen. Its smiling face is like an ‘emoji’. |
A broomstick is attached to the ball to move the head around. |
These puppets can be used to narrate a story of two people talking to each other about something. The dialogue can be funny and ridiculous. |
|
||||
|
||||
|
Did you get the puppets right the first time or did you need to make any improvement in the puppets/remake any puppet? If yes, explain why and what you did.
Now you are ready to prepare for the show.
Activity 7: Puppet show
Start rehearsing with the puppets. Make sure everyone is clear about their responsibilities to ensure a great show. Some of you can be puppeteers, others can give light and sound effects, and can change the backdrop as the scenes change. There might be other things that need to be done based on your story.
It is extremely important to have the following elements to have a great puppet show:
a. Stage
The space where the show is performed, is very important. First, there must be scope to create a ‘stage’ so that the audience can clearly see the puppets. Second, there must be space for the audience to sit. There are different ways to set a stage (Figures 5.21 to 5.23).
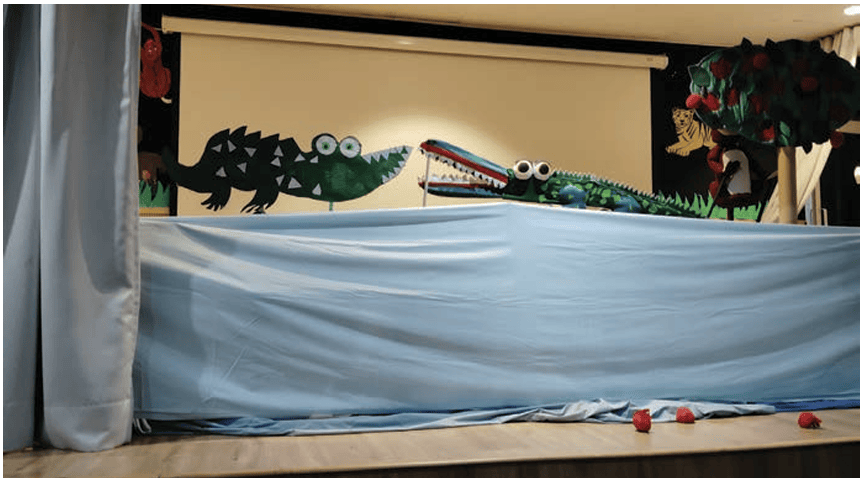
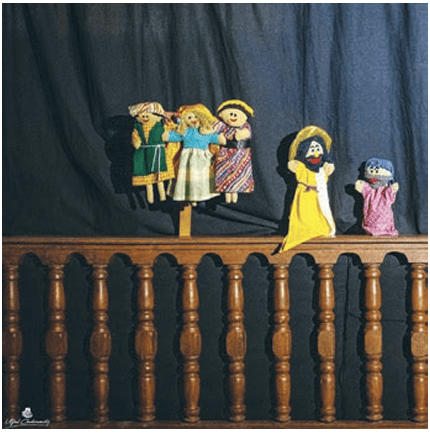
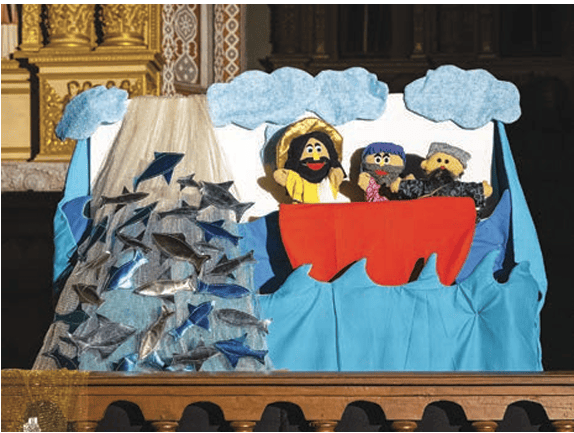
Remember, you need to keep the puppets which you will use for the show, close to the stage where the audience cannot see them. For example, you can keep the puppets behind the cloth used to cover the table.
- Where will you do the puppet show?
- Where will you keep puppets during the show?
b. Backdrop
The backdrop is very important since it shows the setting of the story. The setting may change as the story progresses from one scene to the next, and therefore, the backdrop may change. You can draw or paint these different settings on a chart pape or an old bedsheet (Figure 5.24). As the scene changes, the backdrop changes as well. You can even draw the backdrops on a curtain and slide them using hooks or hoops.
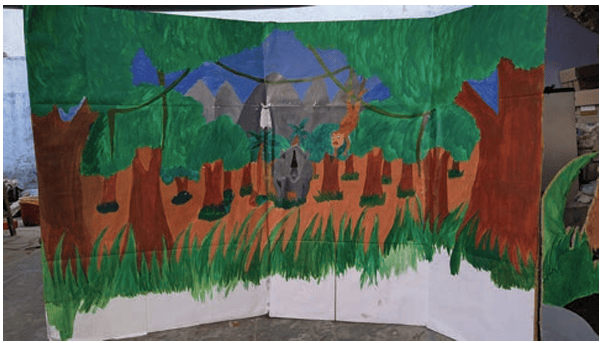
- Briefly describe the backdrop(s) you have prepared.
c. Props
The kind of props will depend on how they are to be used. For example, we can use thick cardboard to create a chair, bed, or a throne, and so on. However, if the prop is being used or held by the puppeteer, it must be very light. Props can be made using simple materials, such as paper (e.g., newspaper, chapati), aluminium (e.g., sword, knife), cardboard or disposable containers (e.g., gas stove, plates) (Figure 5.25).
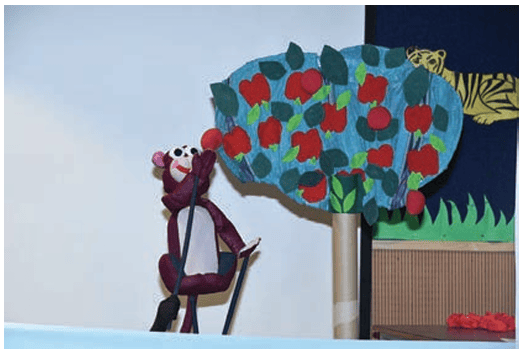
- Briefly describe the props you have prepared.
d. Voice
Voice modulation plays an extremely powerful role in puppetry; the puppeteer acts through her or his voice. You must assign distinct voices to each puppet to differentiate the characters. For example, a lion puppet could have a deep, commanding voice, while a rabbit could have a high-pitched, playful voice.
To make sure the audience understands what you are saying, speak clearly and loudly. Practice showing emotions, like happiness, fear, or excitement using voice 133Storytime with Puppets modulation. For example, sound fearful during a chase scene, or whisper during a suspenseful moment.
Refer the script you wrote. Try to do voice acting with puppets for dialogues. Practice playing sound or singing together wherever required. Practice is key for the success of your efforts.
e. Sound and music
You should have different types of sounds in the puppet show depending on the script – background music or sounds effects, like thundering of clouds before rain. You can use musical instruments or create sounds by tapping on the floor or the desk using a pencil, scale or your fingers. You can tap on a glass or bottle with different levels of water to create music for your show. You can experiment with different sound effect using the sound system; for example, whistling into a microphone creates the sound of the wind (Figure 5.26).
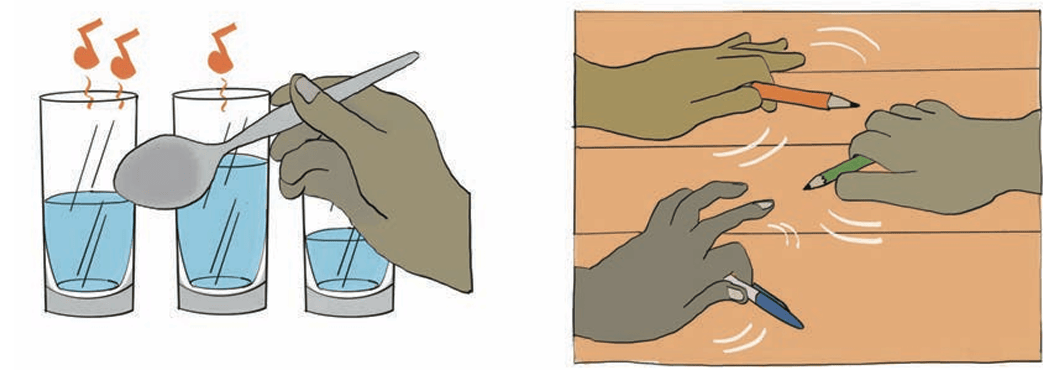
You can search for music online using the keywords: exciting + celebration + music + no copyright
f. Light
Light is needed in puppetry both to ensure the audience can see the puppets and for effects. If the show is outdoor in the daytime, light does not play a role. However, if the show is in a dark space, you need to plan the placement of lights. For example, you can use a torch behind curtains to show the moon, sun or a magic lamp. You can also use fairy lights, table lamps, earthen pots (diya), etc.
Refer to your script (Table 5.3) to decide lighting effects and how you will generate them.
g. Puppeteer
The puppeteer needs to rehearse the dialogues well. Remember, the puppet is speaking, not you. You should also know when the puppet will enter the stage— ‘in’ and when to exit the stage — ‘out’.
Secondly, the puppeteer should look at the puppet while the puppet talks to the audience. This means that as a puppeteer your face needs to be flat without emotions, so that the audience looks at the puppet and not at you.
Activity 8: Putting up a puppet show
Now, it is time for the show. Do not forget to take a look at the checklist in table 5.5 before the show:
| S. No. | Questions | Yes/No |
|---|---|---|
| 1. | Is your script ready? | |
| 2. | Have you made the puppets for each character? | |
| 3. | Is the costume for the puppets ready? | |
| 4. | Can you move the puppets? | |
| 5. | Have you finalised the sequence and dialogue? | |
| 6. | Is the stage ready? | |
| 7. | Are the props ready? | |
| 8. | Have you finalised the background music, sound and light effects? | |
| 9. | Have you done a rehearsal? | |
| 10. | Have you decided who will introduce the show and who will introduce the cast post the show? |
Draw a sketch of the stage and seating area in the space below.

After everything is set in place, you can organise a show during the Kaushal Mela.
Post the show, the performers should bow and a team member should introduce the cast. Do remember to acknowledge the author of the story and mention the names of all those who helped you to put up the show.
You can list the cast members in table 5.6. Their roles could be as a puppeteer, script writer, music, artwork, puppet-making, lights, and so on.
| S. No. | Name of the Artist | Role |
|---|---|---|
| 1. | ||
| 2. | ||
| 3. | ||
| 4. | ||
| 5. |
After the show, get feedback from the audience about the performance.
You can ask the audience the following questions:
- Which part of the show did they like the most?
- What are their suggestions to make it better?
What did I learn from others?
You might have taken help and guidance from your community or friends. It could be for making puppets, sound and light show, for costumes or for setting up the stage. Please write down the three most important things you learnt.
What did I learn from others?
It is important to understand how much time is required for an activity to be completed.
Calculate the approximate amount of time in hours you spent on each activity. Mark them on the timeline below. If you did more than the activities suggested in the book, please add the number and time taken.

What else can I do?
- Include more movement in your puppets. You can add movements in the hands, legs, or neck depending on the requirements of the show.
- Explore using light, mirror and reflection to create light effects.
- Can you use puppets and computer software for creating animations?
Hint: You can make paper-cutouts and create movements using stop-motion application.
Think and Answer
- What did you enjoy doing?
- What challenges did you face?
- What will you do differently next time?
- Compare your script and puppet show with a film, TV show, cartoons or animation, or any other performance. What are the similarities and differences between them?
- Identify a few examples of jobs related to the work you just did. For example, script writing, puppet maker, costume designer, voice modulation, light and sound technician. Look around, speak to people and write your answer.