Note to The Teachers
Dear Teacher,
Let us take our students deeper into the fascinating world of visual arts, ideas and communication. In this grade, the focus is on broadening their exposure to visual art processes and traditions while honing their skills and techniques. It is important that you read every chapter carefully. You can modify the activities to suit your local context and the specific needs of your students.
To create the best learning experience for every student consider the following points.
The Visual Arts classroom requires
- Ample space for students to work comfortably.
- Sufficient light and ventilation.
- Organised storage and easy access to art materials, tools, basic stationery and audio-visual facilities.
- Space for showcasing and exhibiting artwork periodically.
Visual Arts pedagogy would need to
- Use storytelling and everyday examples to introduce concepts and processes.
- Encourage students to freely express their original ideas, imaginations, emotions and curiosities in their artwork.
- Encourage students to create original artwork inspired by their observations of everyday life and experiences, rather than copying images from other sources.
- Allow students to explore, investigate, experiment, collaborate and have dialogues in the classroom.
- Include outdoor activities and field trips to explore and observe the life and culture around them.
- Organise visits to museums, heritage monuments and melas.
- Invite local artists and craftspeople for interactive sessions, workshops for hands-on experience.
- Inculcate simple habits of cleaning up after working, putting back used materials and maintain art materials with care.
- Encourage students’ participation and decision- making in selecting artwork for classroom display or exhibitions.

Visual arts, assessment should be based on the following Competencies for the Middle Stage.
| C-1.1 | Expresses confidently their personal and everyday life experiences through various visual art forms. |
| C-1.2 | Demonstrates flexibility in the process of collaboratively developing visual arts practice. |
| C-2.1 | Creates visual artwork based on situations or stories that challenge stereotypes observed in their surroundings (such as gender roles). |
| C-2.2 | Connects visual imagery, symbols, and visual metaphors with personal experiences, emotions, and imaginations. |
| C-3.1 | Demonstrates care and makes informed choices, while using various materials, tools and techniques in the Visual Arts. |
| C-3.2 | Refines ideas and techniques of visual expression from the stage of planning to the final presentation, and reviews the entire process. |
| C-4.1 | Demonstrates familiarity with various local and regional forms of art. |
| C-4.2 | Describes the life and work of a few local artists in their region and across India. |
| Learning Outcomes that can be assessed across chapters | ||||
|---|---|---|---|---|
| CG | C | Learning Outcomes | Teacher | Self |
| 1 | 1.1 | Exhibits artworks and confidently shares ideas, feelings and processes | ||
| 1 | 1.2 | Tries new ideas and takes suggestions while collaborating with each other | ||
| 3 | 3.1 | Carefully uses, cleans and stores art materials in an organised way | ||
| 4 | 4.1 | Discusses the scale, appearance, material and themes seen in artwork (e.g., sculptures/paintings seen in local art forms and heritage monuments) | ||
| 4 | 4.2 | Uses art terminology while discussing or writing about artwork | ||
| 4 | 4.2 | Enquires about the work and socio-economic conditions of local artists | ||

15
OBJECTS IN ICONS
AND SYMBOLS
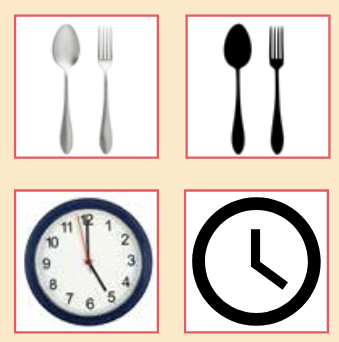
Visuals help us communicate with one another. Examine the visuals on this page. Each one gives you information quickly and directly. Such visuals are called icons.
An icon is a simplified visual representation of an object, place or idea. Icons do not show too many details. For example, a mobile phone display has icons depicting the clock, remaining battery charge, network connections, applications, and so on. Below are a few other icons that you come across regularly.
In this chapter, you will learn how objects can be represented as icons and symbols to convey information. You will explore how these visual elements are used in logos, signages and even as emojis while texting. Through various activities, you will practise drawing objects to make them appear two-dimensional or three-dimensional and learn to convert them into icons.
You will also explore how objects take on other meanings when used as symbols.
ACTIVITY 15.1: UNDERSTANDING SIMPLE ICONS
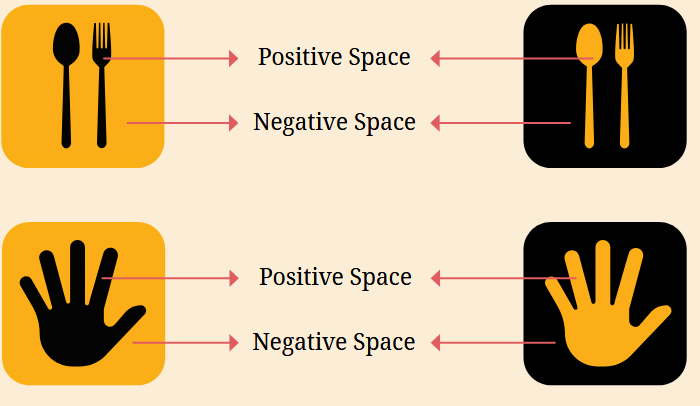
Look at the two icons of the fork and spoon.
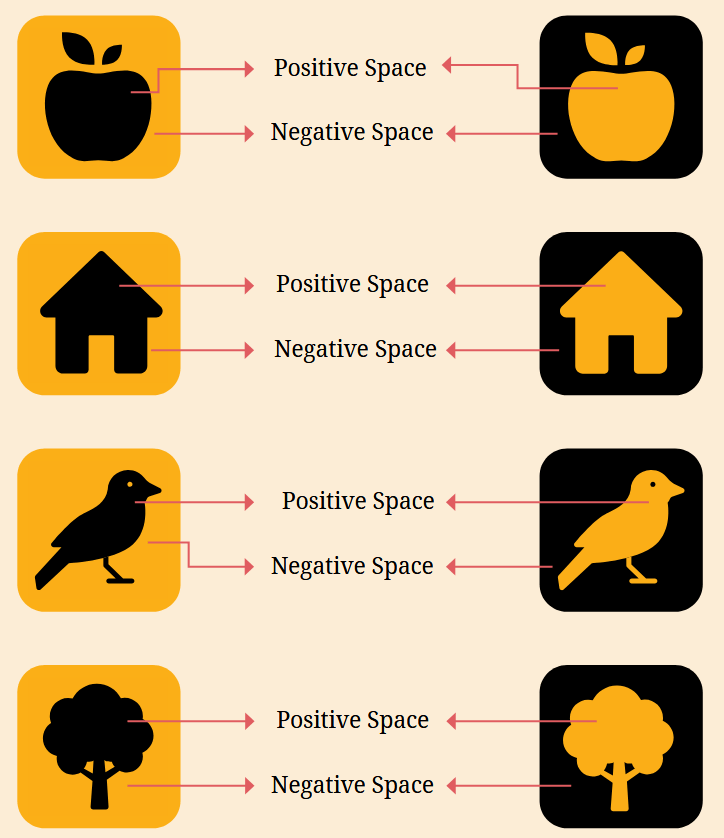
The positive space depicts the objects.
The negative space is the blank space.
Thus, black is positive in one image and negative in the other. Observe the positive and negative spaces in the other icons. Icons generally have a lot of negative space.
This helps the main object to be visible even in very small sizes.
CREATE STENCILS FROM THE OBJECTS
Materials: Old newspapers or magazines, scissors, plain A4 paper, pencil and eraser.
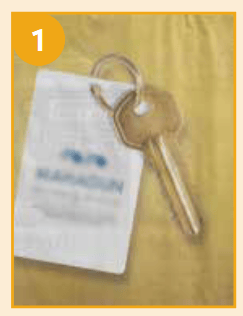
Step 1:Look through old newspapers or magazines and identify two or three objects that are completely and clearly visible.
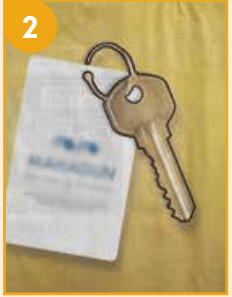
Step 2: Now, carefully highlight the outline of this object.
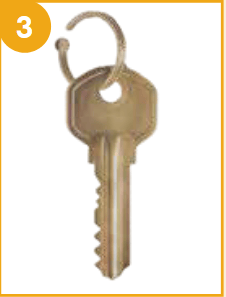
Step 3:Choose an object and cut out the section containing it.
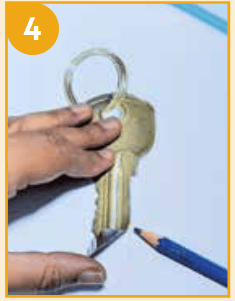
Step 4:Cut the object along the outline. This is called a stencil
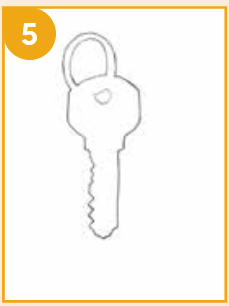
Step 5:On a sheet of paper, use this stencil to draw the object.
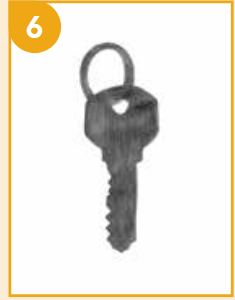
Step 6:Colour within the outline, and notice the positive and negative space, thus created.
Show this to your friends and ask them to identify the object. Repeat stencilling with other objects. Can your friends identify the object from the shape created by the stencil?
ACTIVITY 15.2: DRAWING ONE OBJECT IN DIFFERENT WAYS
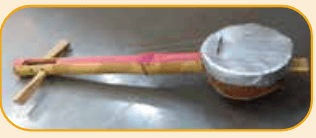
An object can be drawn using different techniques to create two-dimensional or three-dimensional forms.
See the example below.
Contour of the object
- This is an outline.
- Looks transparent.
- Object looks two-dimensional.
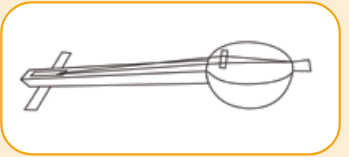
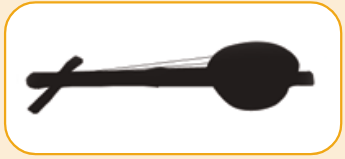
Silhouette of the object
- This is a coloured flat shape.
- Looks opaque.
- Object looks two-dimensional.
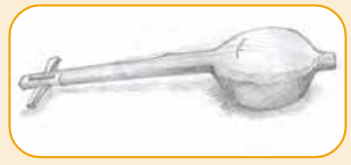
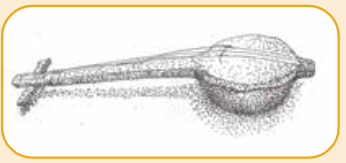
Shading the object
- Captures light and shade through tonal variations using techniques like cross-hatching and stippling.
- Object looks three-dimensional.
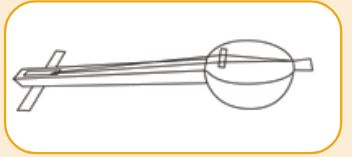
Icon of the object
- Simplified image with essential details.
- Object looks two-dimensional.
Choose an object and get ready to draw it.
Materials: Five sheets of A5 size (half of A4) paper, sharpened pencil, eraser, colours and pen.
MAKE A CONTOUR OF AN OBJECT OF YOUR CHOICE
Take an A5 paper and a pencil.
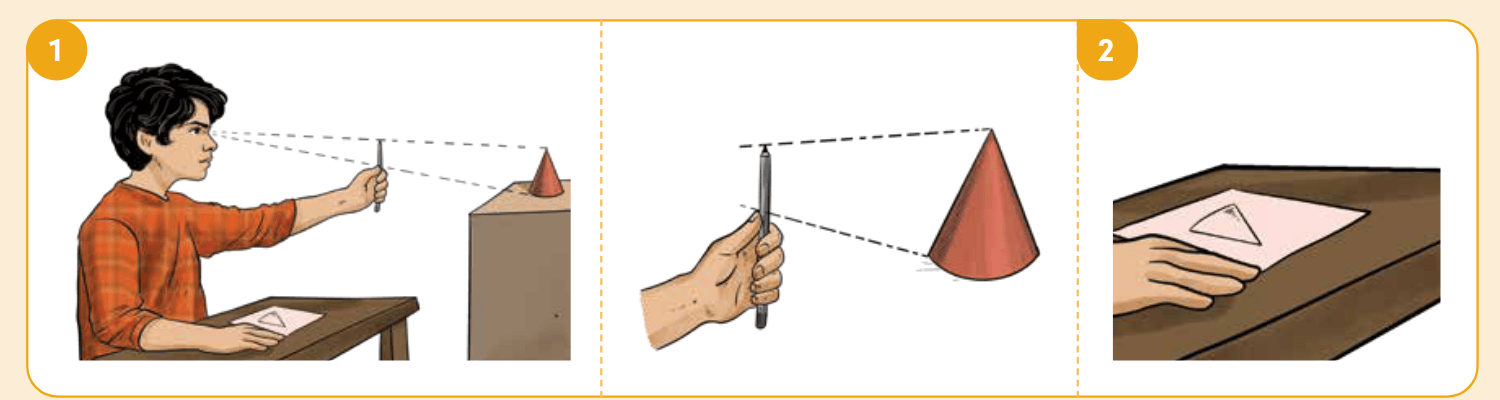
Step 1: Observe and measure.
- Keep the object at more than 2–3 feet distance.
- Closely observe the shape and size of the object.
- Use your pencil as a measuring tool as shown.
- Place your thumb on the pencil, align it with the object to measure its parts.
- Measure and mark the proportions of the object on your paper.
Step 2:Draw the contour.
- Keep looking at the object as you draw each part till you complete its contour.
Note to the Teacher:
- Each student should individually choose an object to draw.
- Ensure that they use the same object for each artwork in this activity.
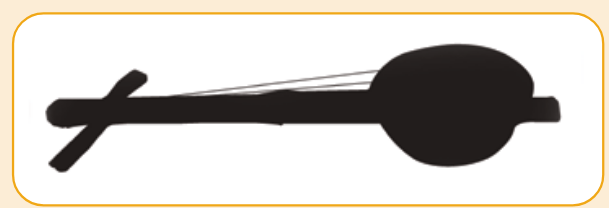
MAKE A SILHOUETTE OF YOUR OBJECT
Take an A5 paper and a pencil.
- Draw the contour of the same object again or trace it from the first contour drawing.
- Colour inside the contour to make it look flat.
- Use a different colour to fill the negative space around the object.
Optional: On another A5 sheet, make an inverse image of the silhouette by switching the colours of the positive and negative spaces.
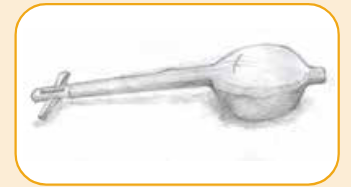
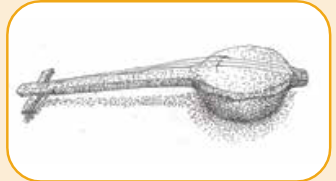
SHADING YOUR OBJECT
Draw your object and make it appear three- dimensional using these two shading techniques:
- Cross-hatching is a shading technique that uses criss-cross lines.
- Stippling is a shading technique that uses dots.
Closely overlap lines in different directions to create darker tones.
Loosely overlap lines to create lighter tones.


Place the dots close to one another to create darker tones.
Increase the space between dots to create lighter tones.
Use a separate sheet of A5 paper for each technique.
Step 1:Take the same object you chose for making a silhouette and place it in front of you.
Step 2:Observe and draw its contour.
Step 3:Observe how light falls on the object.
Step 4:Create light and dark tones using cross-hatching technique.
Step 5:Complete your work and keep it aside.
Step 6:Take another A5 paper and draw the contour of the object.
Step 7:Create light and dark tones using stippling.
MAKE AN ICON OF YOUR OBJECT
Gather your drawings — the contour, silhouettes, cross-hatching and stippling.
Which of these will you use to make an icon?
Remember that an icon is a simplified image. But it also needs to be identified quickly. It should, therefore, contain clear shapes and have only important details. Sometimes the silhouette of the object can be the icon.
Make your icon on an A5 sheet and complete it with colour.
It takes practice and keen observation to be able to make good icons. If you had to use your icon to communicate information, what would it be?
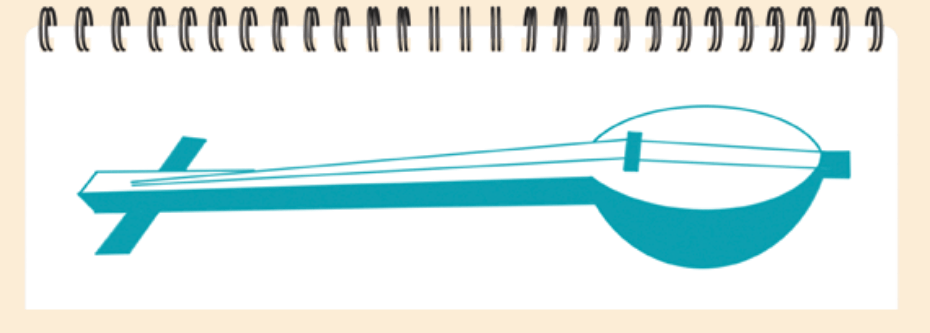
ACTIVITY 15.3: ICONS FOR SIGNAGES
Signage informs us where a space is and what it is used for. In this activity, you will create signages using icons of objects for your school.
Step 1:Choose a space in your school such as the entrance, washrooms, play area, a space for eating meals, library, a space to keep your bags, shoes, and so on.
Step 2:Make a list of the objects that come to your mind when you think of this space.
Step 3:Choose the most important object in this space. For example, the door in an exit signage signifies its importance. If you have chosen two objects, try different ways of combining them to create one icon. For example, signage for a dining area can have a spoon and a fork; signage for an art room can have a palette and a brush.
Step 4:Remember that an icon is a simplified drawing that represents the object.
- Experiment with contours and sihouettes.
- Add only those details that characterise the object. Use only one colour.
Step 5:Create the icon in two or more ways.
Step 6:Choose the icon that expresses your purpose best and can be used as a signage for the chosen space. Create this icon on an A5 sheet.
Show the signage to your friends and ask them what they think about it.
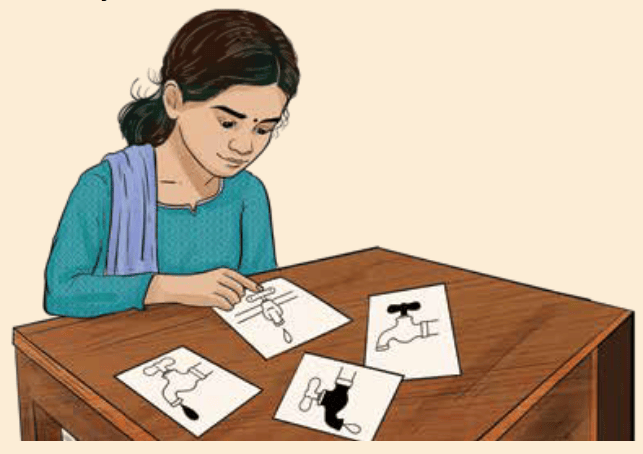
Note: Think of the objects that you use regularly while creating icons. For example, you may not use a fork and spoon when you eat. So can you think of alternative icons to represent your food?
ACTIVITY 15.4: OBJECTS AS SYMBOLS
You have seen that images of objects are created for various purposes. These could be signages for spaces or icons in your surroundings. Objects also become symbols.
Symbols have a deeper meaning and represent ideas or emotions. They may not directly relate to the visual they represent.

The Dharma Chakra forms the centre of our national flag. It is a navy blue wheel with 24 spokes. It is a depiction of the ‘wheel of the law’ taken from the Lion Capital of Sarnath made in the 3rd century BCE by the Mauryan Emperor Ashoka.
- Blue represents the sky and ocean.
- Wheel represents progress.
- The spokes represent 24 hours of the day.
The symbol of the round spectacles in this logo of Swachhata Abhiyan represents Mahatma Gandhi. The bridge of the spectacles is the national tricolour. It signifies the entire nation uniting to achieve the vision of Mahatma Gandhi for a clean India.
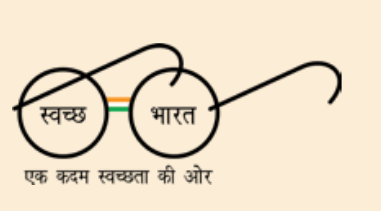
Everyday objects like spectacles and a wheel. These become powerful symbols when their meaning is accepted to represent larger ideas. Can you think of other objects that are used as symbols?
Look at the logos of companies, institutions and political parties where you see objects used as symbols. What meanings do they symbolise?
Is there a difference between icons and symbols?
Remember that symbols have a deeper meaning.
Icons can also be symbols if they are given more meanings. Symbols need not resemble what they stand for.
For example, Indians can associate round spectacles with Mahatma Gandhi, his values and work. People who cannot make that connection may simply see it as a pair of spectacles.
Match the illustrations with the terminology
| Silhouette |  |
|
| Stencil |  |
|
| Cross-hatching | 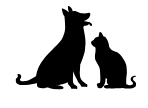 |
|
| Stippling |  |
 |
| Icon | 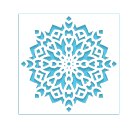 |
|
| Signage | 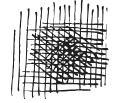 |
|
| Symbol | 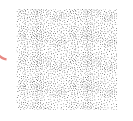 |
PEER ASSESSMENT
Look at the signages created by your peers. Write a few lines on these points:
- Are there any icons in the signage? Describe them.
- Is the information on the signage clear and easy to understand?
- What two qualities did you like about the signage?
- What do you think can be improved in its design?
| CHAPTER 15: OBJECTS IN ICONS AND SYMBOLS | ||||
|---|---|---|---|---|
| CG | C | Learning Outcomes | Teacher | Self |
| 1 | 1.1 | Observes objects carefully and tries to draw them exactly like they look | ||
| 2 | 2.2 | Creates own icons that depict familiar objects | ||
| 2 | 2.2 | Describes the meanings conveyed by familiar icons, symbols and logos | ||
| 3 | 3.1 | Identifies the positive and negative spaces in icons and symbols | ||
| 3 | 3.1 | Applies various rendering techniques to show light, shade and shadows in an artwork | ||
| 3 | 3.2 | Designs, creates and displays own signages | ||
Teacher’s Comments and Student’s Observations