
Chapter - 16
Nature’s palette
Nature showers us with colour every day. A rainbow displays the entire range of colours the human eye can see.
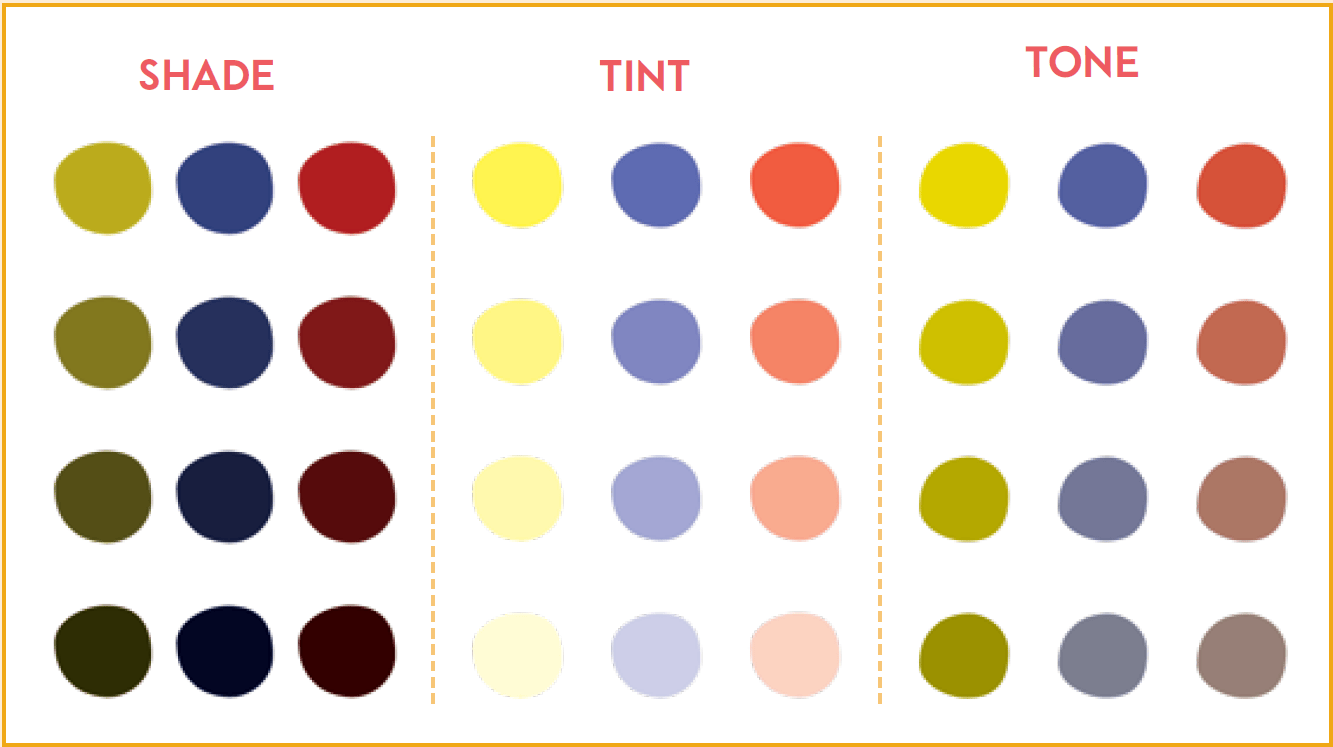
Colours are visible because of light. When light changes, the appearance of colours also changes. A bright red tomato may look dull and dark in a dimly lit room. When there is too much light, everything appears white. When there is no light, everything appears black. In visual art, such effects of light are shown by creating tints, shades and tones of colour.
Colour is an important element of visual art. With regular practice, you will improve your techniques of making, mixing and working with colours. You will learn to use the colour wheel not only for your work, but also to appreciate other artworks.
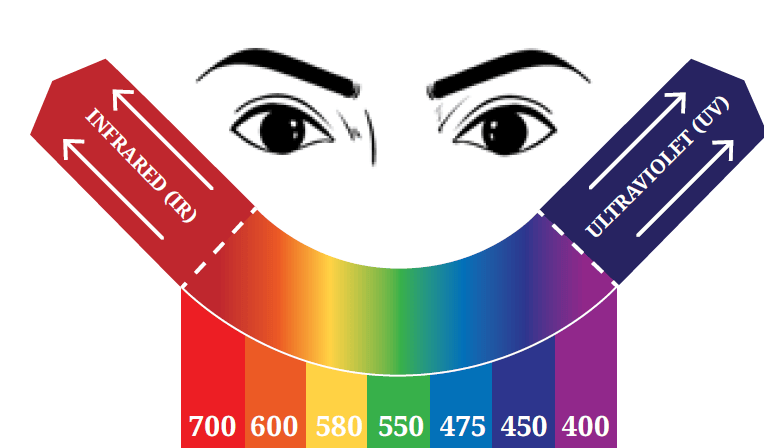
The colour spectrum visible to the human eye
DO YOU KNOW?
Not all people see colours the same way. It is important to be sensitive to how each person sees colour. Those who have colour vision impairment, commonly called colour blindness, see a few colours differently. Red may appear brown or they may find it difficult to differentiate between blue and green. There are many visual artists and designers with vision impairment of various kinds. They have excelled in their careers by finding creative solutions to work with their impairments.
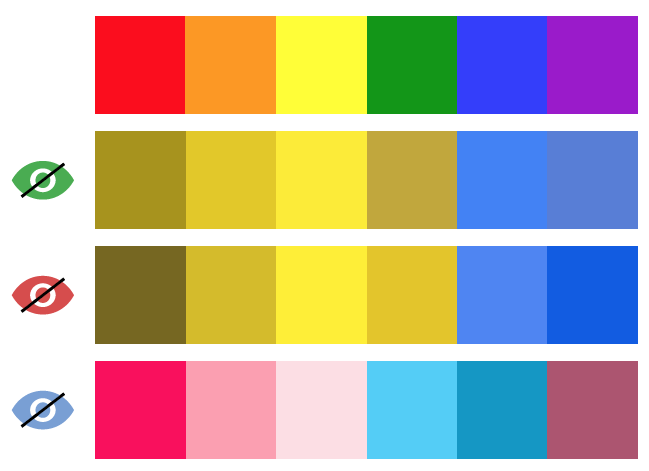
Colour range visible to people with varying colour vision impairments
ACTIVITY 16.1: EXTEND THE COLOUR WHEEL
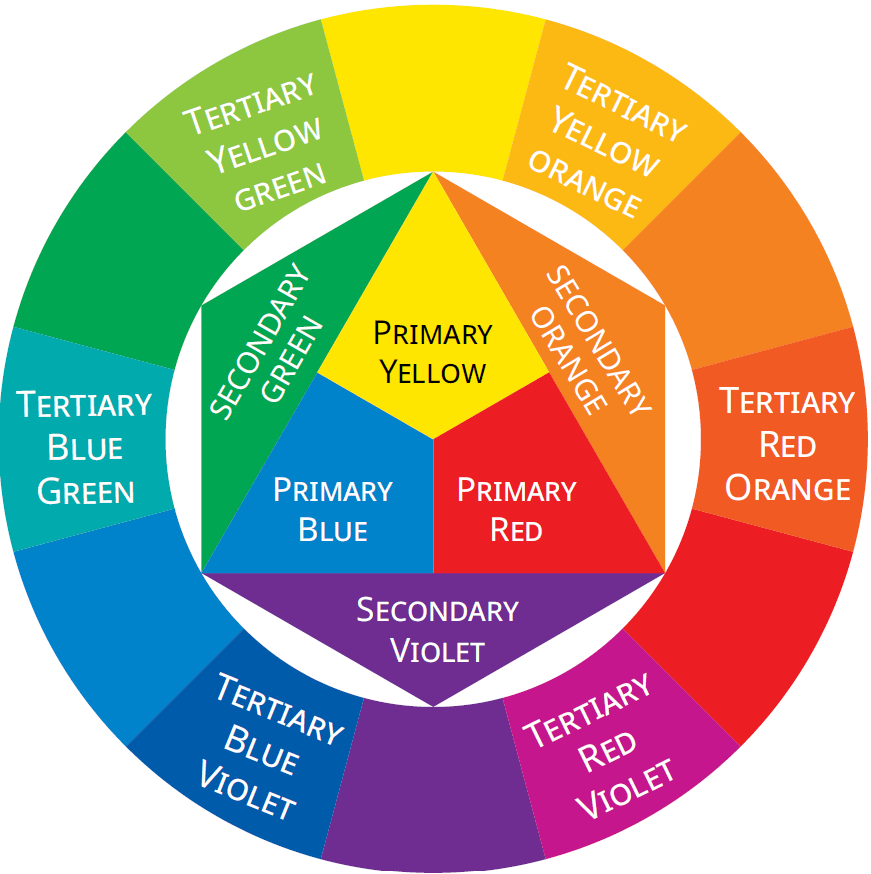
Look at the colour wheel here. In the centre, you find three primary colours — yellow, red and blue. These cannot be made by mixing any other colours.
Mixing each pair of primary colours produces a secondary colour.
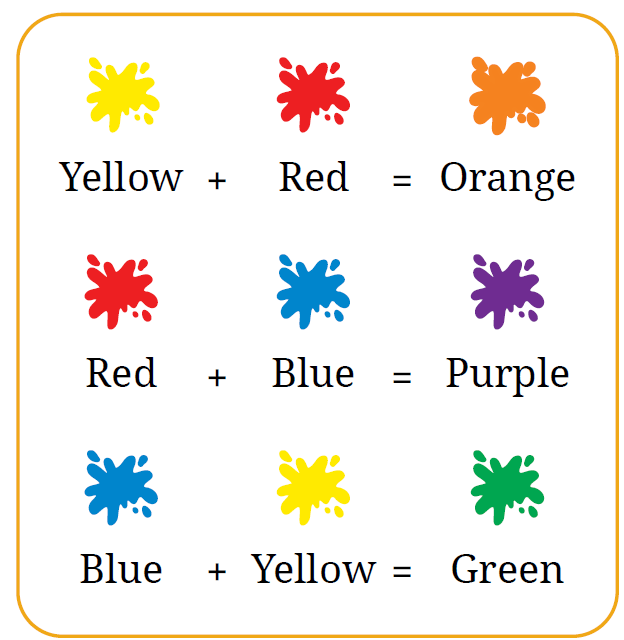
Now, you will learn to make tertiary colours. These are formed by mixing any secondary colour with one of its primary colours. For example, green is a secondary colour that is made by mixing yellow and blue (primary colours).
The tertiary colours made from green are:
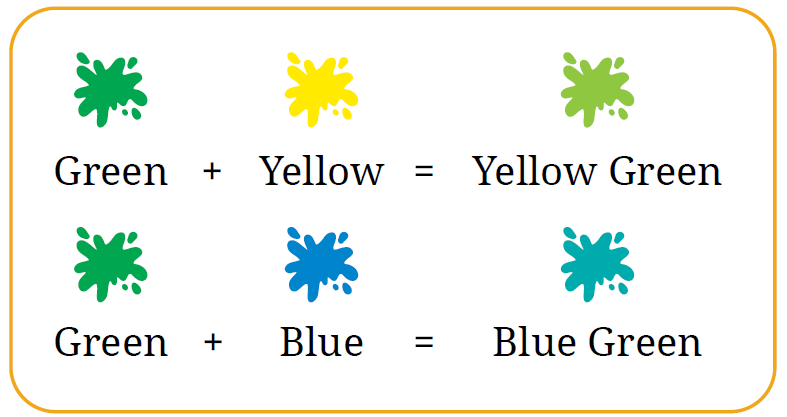
Look at the colour wheel and write the names of the other tertiary colours. Mention the colours that are mixed to make them.
Paint or paste swatches of tertiary colours in the box.
........+.......=........
........+.......=........
........+.......=........
........+.......=........

MAKE A COLOUR WHEEL
Materials: Watercolours or poster colours are more suitable for this activity. However, you can also experiment with other dry mediums like crayons, colour pencil, colour powder, etc.
Step 1: Design your colour wheel to clearly demarcate the primary, secondary and tertiary colours.
Step 2: Mix your colours using only red, blue and yellow to make all the other colours. This is the most important step.
Step 3: Look at the image on the previous page for reference. Paint the colours in appropriate sections. Use a variety of strokes, patches, dots or any other pattern you like.
Step 4: Display your complete colour wheel and keep it handy for other activities, you will be doing soon.
ACTIVITY 16.2: MAKE COLOUR TONES
You have learnt to create light and shade using cross-hatching and stippling. Let us practise creating light and shade with colour.
TECHNICAL TIP
While using paints, it is important to change the water in your bowl and rinse your brush well, after mixing each colour. This will help you get the right tints, shades and tones you want.
MAKE TINTS AND SHADES OF ANY TWO COLOURS
- Create at least four gradations of tints and shades.
- Begin by mixing small quantities of black or white to the colour.
- Increase the quantity of black or white for each gradation.
MAKE TONES OF THE CHOSEN TWO COLOURS
- Tones are produced by mixing a colour with grey. But how do you make grey?
- Mix black and white to make grey.
- Mix this grey with other colours to make their tones. Try to get four tonal gradations.
ACTIVITY 16.3: PLANT STUDY IN COLOUR
Plants change form and colour as they grow through different seasons. Fruits and vegetables are often green when they are raw and change colours as they ripen. Let us create artistic studies of plants to understand colours better.
STUDY A PLANT THROUGH DRAWING
Step 1: Select a stem with a few leaves or a single flower (in any stage of its life).
Step 2: Place it in front of you and do not disturb its position.
Step 3: Sit at least two feet away and observe its shapes and the space around it.
Step 4: Using light lines, make quick drawings from two different angles.
Step 5: Next, choose one of the angles that you tried and start another drawing.
Step 6: Cover the maximum space on your paper and draw slowly to capture the details.
Step 7: Complete the drawing and keep it ready to start colouring.
ADD COLOUR TO YOUR PLANT STUDY
Step 1: Choose any medium for colouring such as crayons, colour pencils, pastels, watercolour and poster colour.
Step 2: Observe the colours on the plant and find the right shades, tints or tones from the colour wheel.
Step 3: Mix the required colours, and show light, shade and shadows in your artwork.
Step 4: Complete your artwork and have a class display.
SELF-ASSESSMENT
1. How many sketches did you make?
2. What were you able to do well?
3. Write about the challenges you faced and the improvements you would like to see in your work.
DO YOU KNOW?
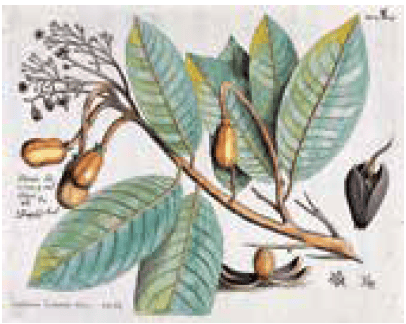
This botanical illustration is from a book called Hortus Malabaricus. It means ‘Garden of Malabar’. This book has recorded thousands of medicinal plants found in the Malabar coast of India during the 17th century.
COLOURS IN MINIATURE PAINTINGS
You might be aware that paintings can be made on a variety of surfaces such as rocks, walls, clay, palm leaf, paper, fabric, wood, metal, glass, rubber and other synthetic plastics that are available today.
Natural colours and pigments for artwork are sourced from soil, minerals and plants, that are extracted in many ways. Colours fade and disappear over time if they are exposed to excessive light, moisture and touch of various living organisms.
This timeline shows important phases in Indian painting and the evolution of colour over time.
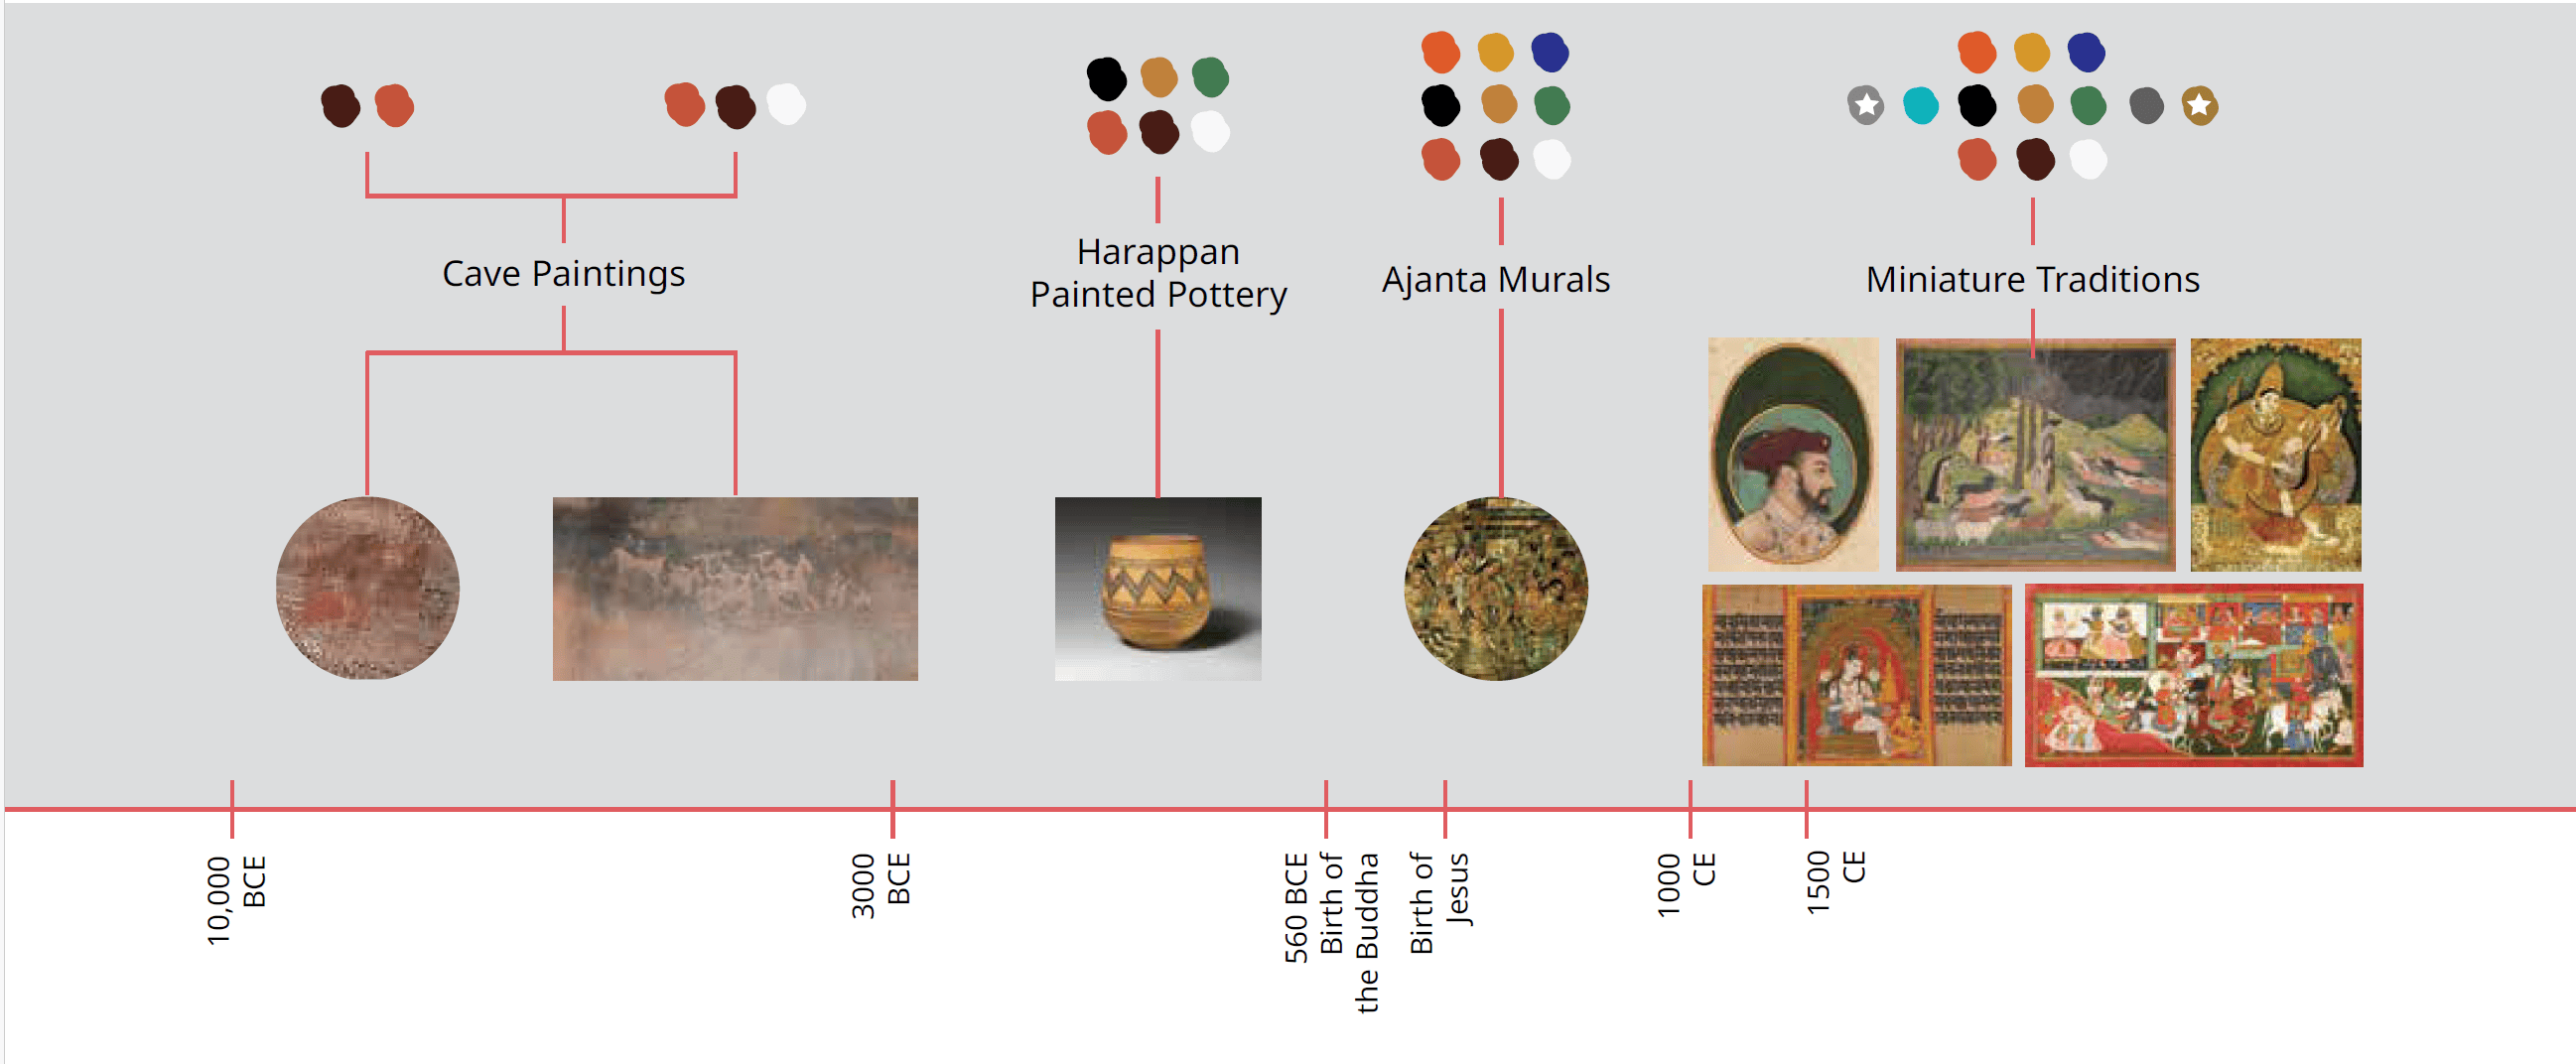
Miniature paintings are of many styles and are generally small in size. In India, these were initially done on palm leaves. From the 12th century CE, artists began to use paper as the base for miniature paintings. Their themes included religious texts, mythology, nature, portraiture and court life.
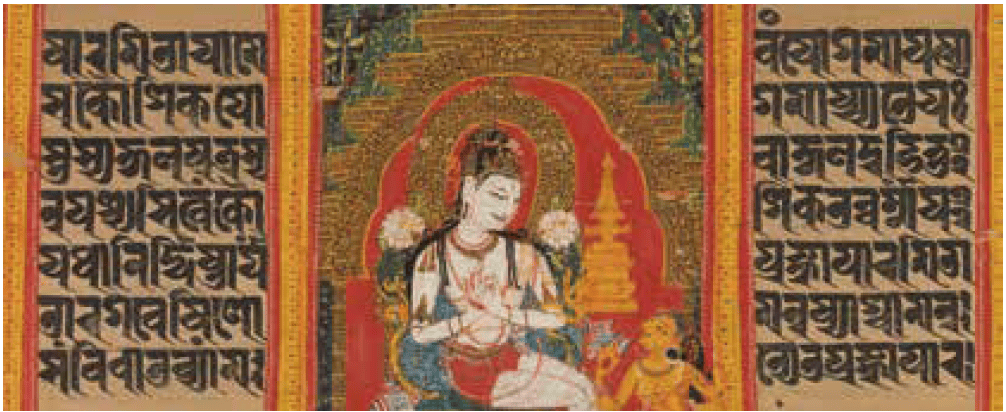
Palm leaf manuscript
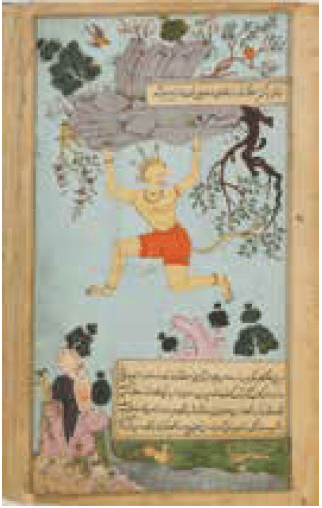
Mughal miniature
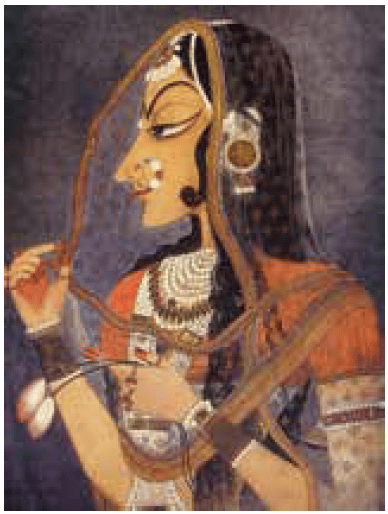
Kishangarh miniature
DO YOU KNOW?
The word ‘miniature’ originates from 'minium’, a red-coloured pigment that was used to draw outlines and write text in medieval manuscripts.
The table below tells you about the source of some of the colours used in miniatures. These were processed and mixed with gum extracted from the Babul tree to act as a binder.
|
COLOUR |
SOURCE |
|
Bright red |
Sindhoor or vermillion |
|
Earthy red |
Geru or red clay |
|
Yellow |
Yellow stone or cow urine |
|
Green |
Malachite (copper carbonate) |
|
Blue |
Lapis lazuli/Indigo |
|
Black |
Carbon |
|
White |
Khariya or white clay |
DO YOU KNOW?
Gold and silver were also used in miniature paintings. Gold and silver are hammered into very thin sheets known as gold leaf and silver leaf. These are used in paintings and other crafts.
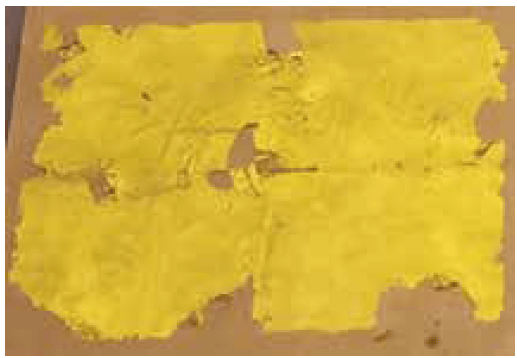
They used brushes made of soft hair from the fur or hair of animals such as camels, goats, cows, and hair from the tails of rats, squirrels and mongoose.
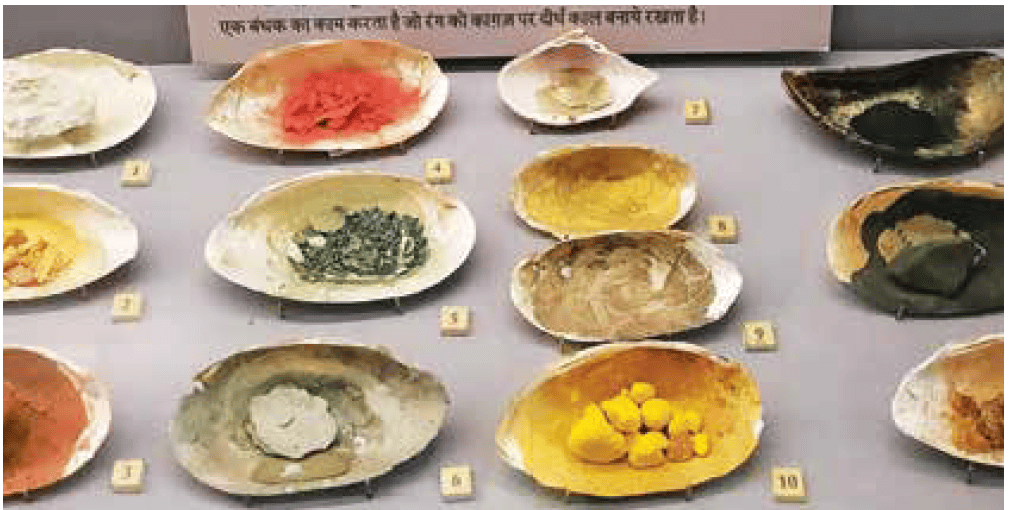
Natural colours used in miniature painting
Care for Art Materials and Tools
It is important to take care of the space we work in, as well as the materials and tools we use for artwork.
- Always clean your brushes, palettes and other tools thoroughly with soap after every use.
- Close paint tubes, bottles, sketch pens and markers with their caps, to prevent colour from drying.
- Store all materials in an organised way so that they can be easily found and used by others too.
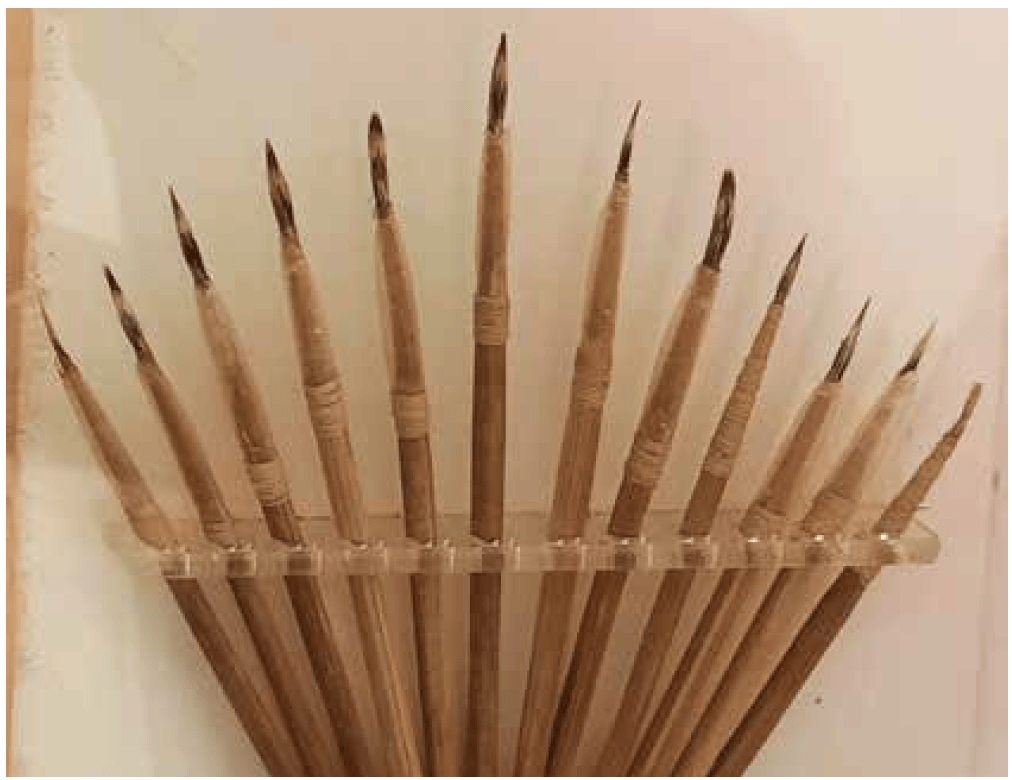
Brushes used in miniature painting
ACTIVITY 16.4: DECODE THE PALETTE OF A MINIATURE
Observe this Rajasthani miniature painting from the 18th century. The three people you see in the lush green landscape are the musician Tansen, his guru Swami Haridas and the Mughal emperor Akbar.
Discuss the points given below.
1. What is happening in this painting?
2. Can you guess the time and season?
3. What moods or feelings do you experience?
4. Analyse different shades of green you see here using the colour wheel.
5. Where is the biggest tree placed? Why do you think the artist did that?
6. Observe the patterns on the leaves and the fine lines of the clouds. What other details do you see in the painting?
Write a short paragraph on all that you have learnt about miniatures.
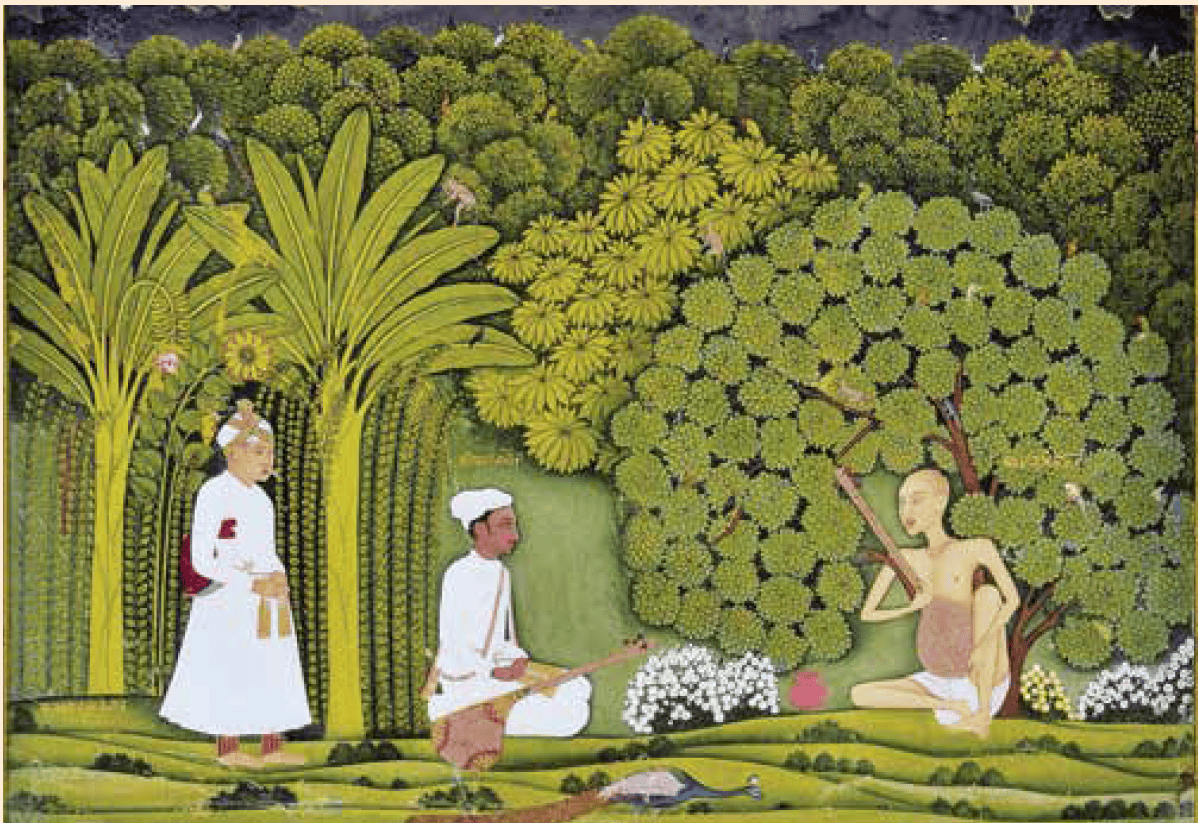
Swami Haridasa with Tansen and Akbar at Vrindavana, 1700–1760 CE, miniature painting from Rajasthan
ASSESSMENT
Observe the details and recognise moods, emotions and seasons expressed through colours in any given artwork.
ASSESSMENT
CHAPTER 16: NATURE’S PALETTE
|
CG |
C |
Learning Outcomes |
Teacher |
Self |
|
1 |
1.1 |
Observes, draws and colours any chosen part of a plant in detail |
||
|
2 |
2.2 |
Recognises moods, emotions and seasons expressed through colours in artwork |
||
|
3 |
3.1 |
Practises colour exercises to create the colour wheel, colour tints, shades and tones |
Teacher’s Comments and Student’s Observations
...............
...............
...............