17
PEOPLE IN PLACES


INTRODUCTION TO PERSPECTIVE
Paintings and drawings have the power to transport you to other worlds. Some appear two-dimensional and entice you with the beauty of lines, patterns, colours and textures. Some others appear three-dimensional as though they are popping out of the surface. Have you wondered how this happens?
Look at the pictures below. Although the lines on either side of the road are parallel, they appear to converge in the distance. You would see the same on railway tracks too.
Observe
- The horizon line aligns with the eye level of the viewer.
- The lines converge at a vanishing point, which is also at the eye level.
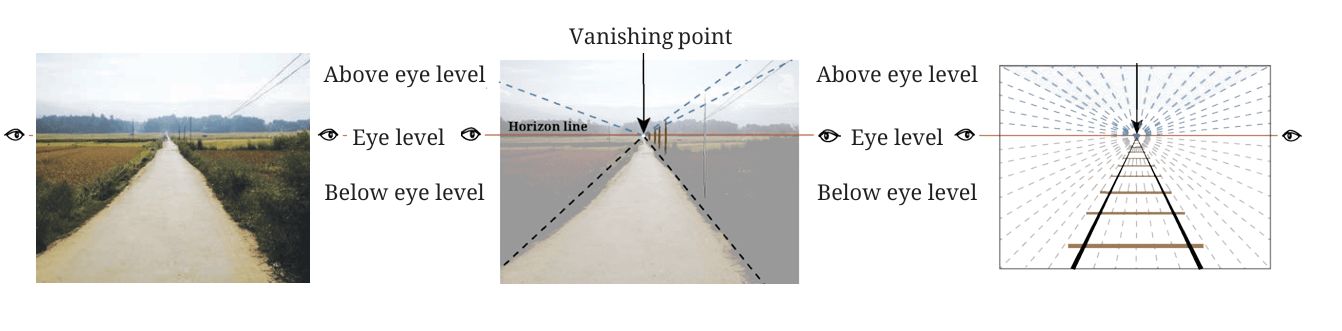
- Visualise your eyeball as a circle with its centre as the vanishing point.
- Imagine the horizontal line across the centre of eye as the horizon line.
- Imagine other lines radiating from the centre in different directions.
To draw in perspective, three things are important —
- Identifying the horizon line at eye level in the scene.
- Visualising the vanishing point.
- Observing the angle of lines that converge at the vanishing point.
Perspective can help you observe, and draw buildings and architectural monuments in a way that looks realistic. Take the example of the image printed on the 100 rupee note.
Notice how the lines of the upper and lower storeys of the stepwell appear to converge at the vanishing point.
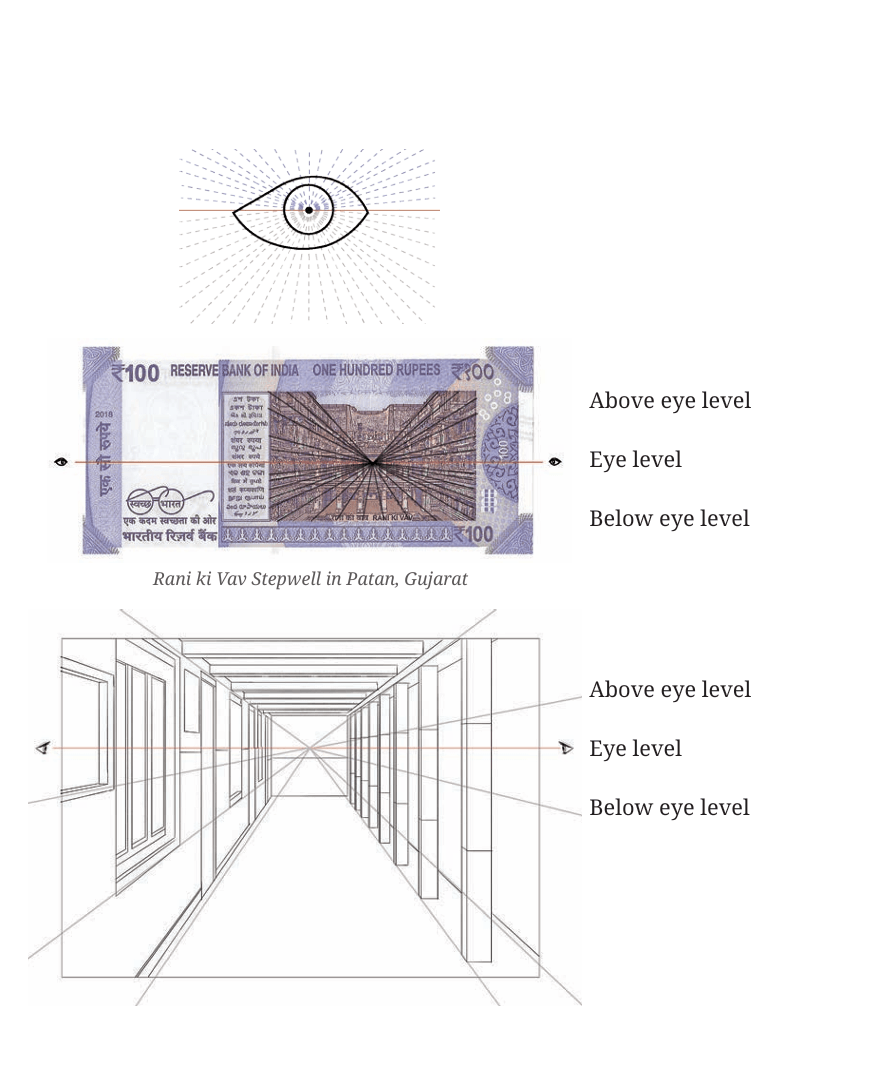
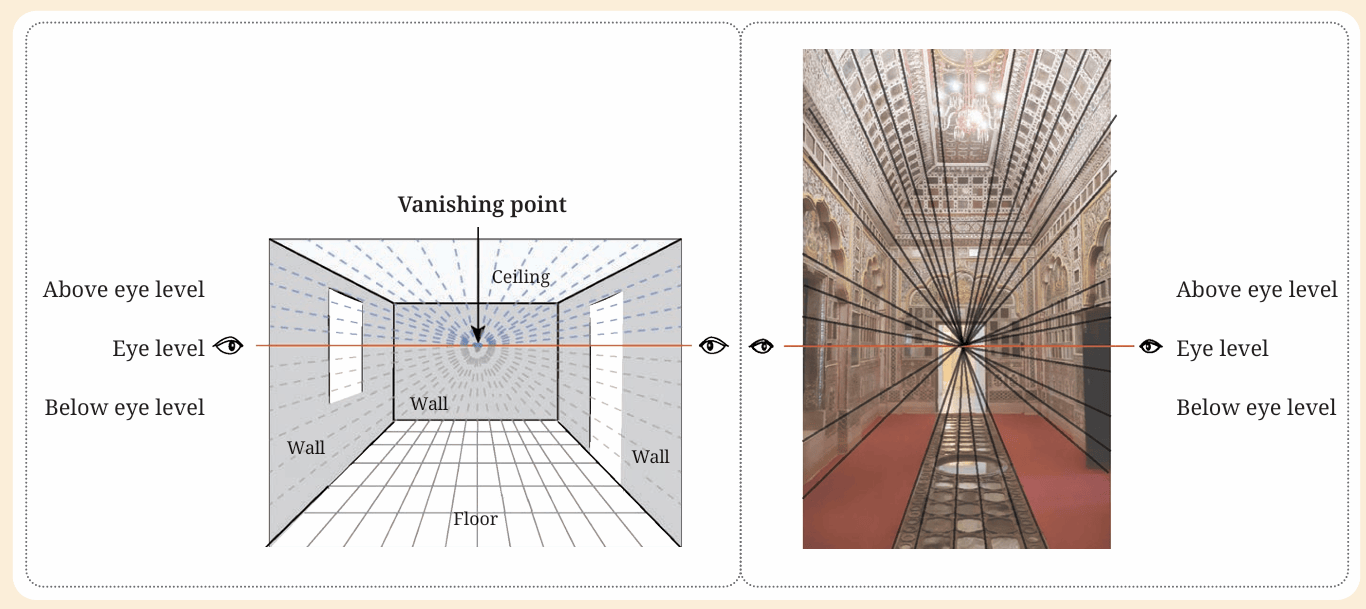
Similarly, observe the lines converging at the vanishing point in other photographs of building interiors.
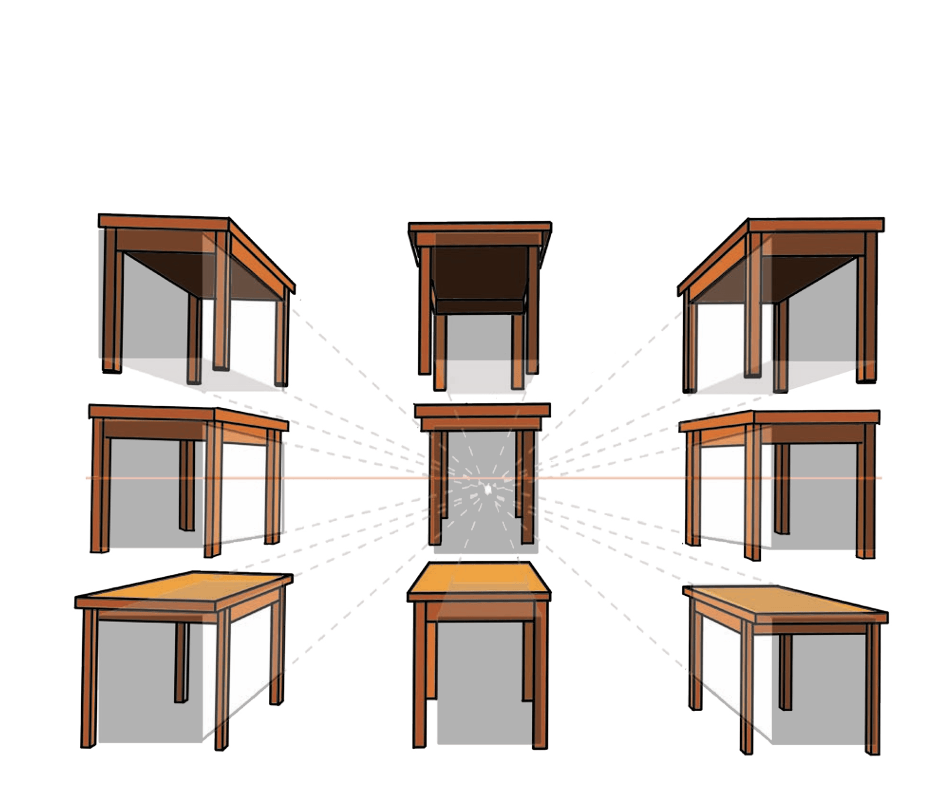
Once you learn and understand the principles of perspective drawing, you will find it easy to draw simple objects from different angles.
Materials:Unusued or discarded transparent sheet measuring scale, ball point pen or permanent marker, and scissors
Procedure:
- Cut the transparent sheet of A4 size.
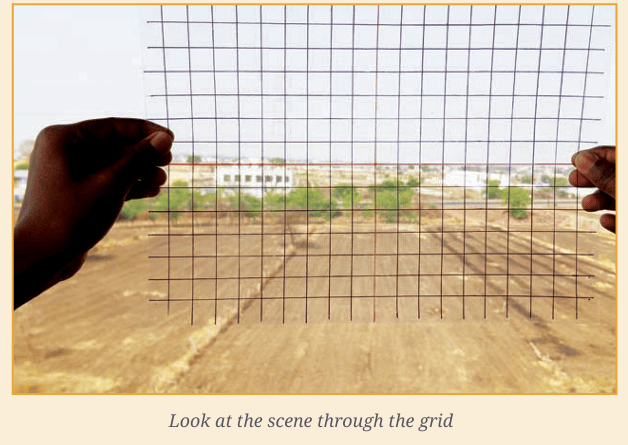
- Use a measuring scale and mark the grid with a ball point pen or permanent marker as shown in the photo. This will be your viewing grid.
- Look at your surroundings through the viewing grid. Hold it straight and still, during the process.
- Align the horizon line on the grid with your eye level.
- As you look at the scene through the grid, find lines that align with the horizon line.
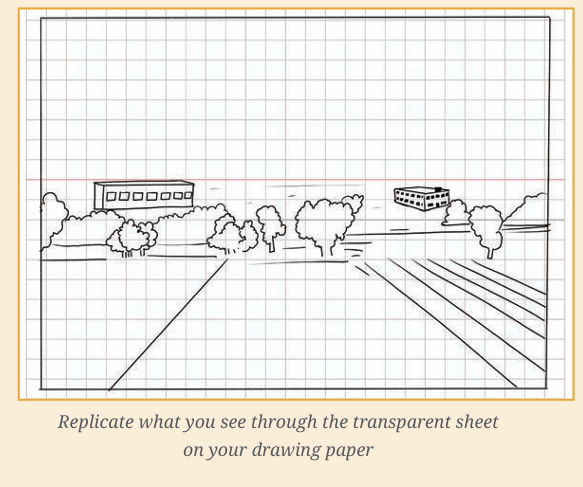
- Observe the other lines and the shapes of objects in relation to the lines and squares on the viewing grid.
- Compare the angle of lines in objects that are near with those that are far.
- Choose a scene that you want to draw.
- Replicate what you see through the transparent sheet on your drawing paper.
You can use the same viewing grid to draw different scenes to show perspective. With more practice, you will be able to draw without a viewing grid.
HUMAN ANATOMY
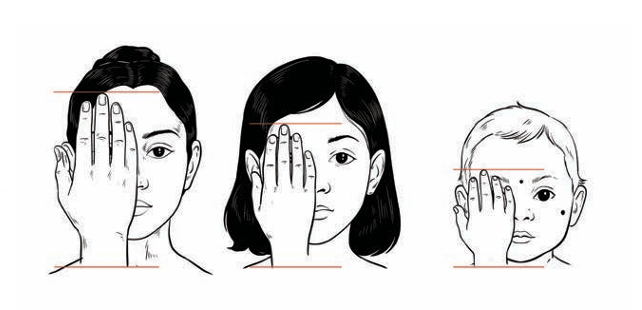
The structure of the human body is called anatomy. Look at your old photographs and notice how your body structure has changed from the time you were a baby till the present. Over the years, some parts of your body grow more than the others.
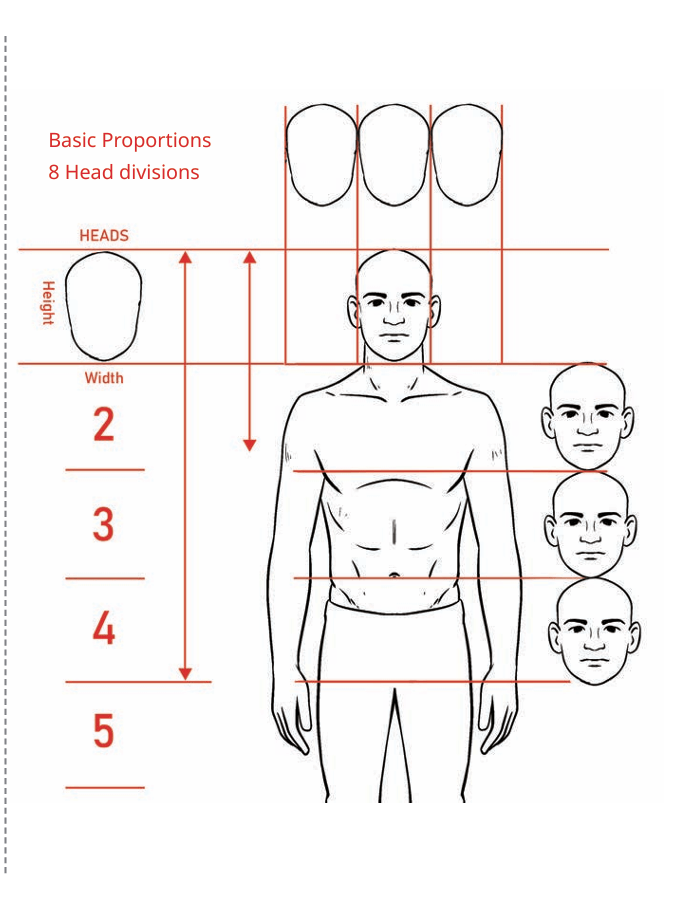
The relationship between the different parts of the body is measured, and expressed in ratio and proportions. For example, if the head is one part, we can find out which parts of the body are of the same size (1:1), which parts are twice the size of the head (1:2) and which parts are thrice the size of the head (1:3).
The system of measuring the ratio and proportions of the human body has been a central part of Indian painting, and the sculpture traditions. Texts from the Shilpa Shastra mention different ratios and proportions for depicting divine beings, people of royalty, warriors, children, animals and various other mythological beings. The system is known as the Tālamāna Paddhati, where the unit of one tāla is equal to the length of an adult hand measured from the bottom of the wrist to the tip of the middle finger.
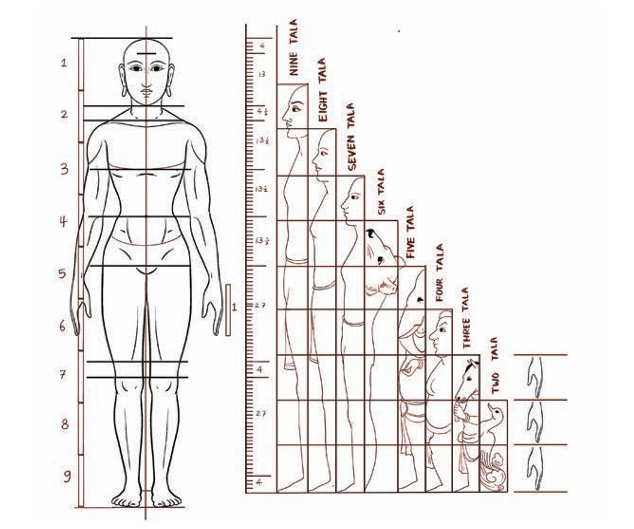
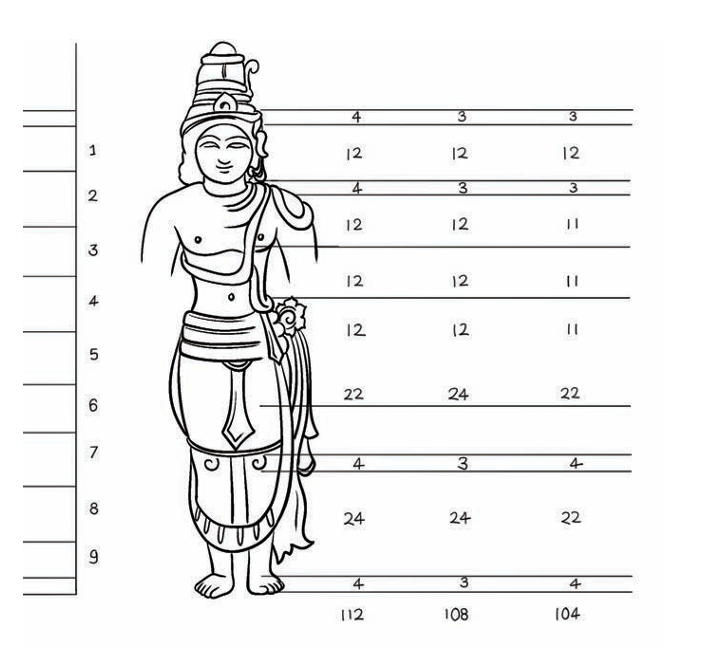

Note to the Teacher:
Help students connect and apply their mathematical skills while explaining ratio and proportions of the human body.
- Mark the size of the head using two horizontal lines.
- Measure the distance between the two lines and use the same to mark more horizontal lines along the length of the body.
- Count the number of times the head repeated in each human figure.
- Write the ratio of the height in relation to the head.

Note to the Teacher:
Discuss this activity with the Mathematics teacher and ask students to take their help to understand and write the ratios and proportions.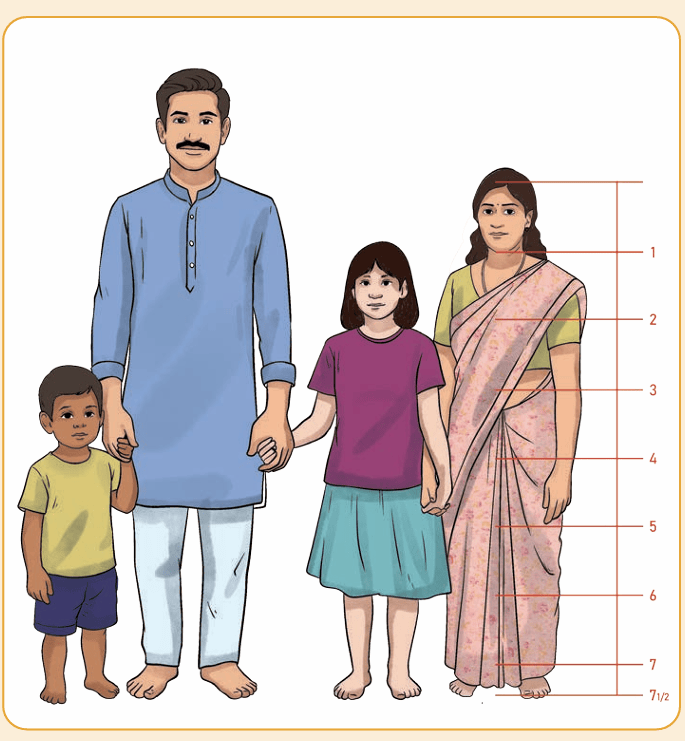
Observe the body proportions of your own friends and peers, and make drawings from it. Take turns to pose in standing positions so that you can observe and draw the whole body.
Step 1: Start with the head and note the proportions. You have learnt to use your pencil as a measuring tool while drawing still life objects. In the same way, use your pencil to measure the size of the head and note the number of times it repeats in the body.
Step 2: Based on the proportions that you have measured, make rough markings so that your drawing of the entire body fits comfortably on your paper.
Step 3: Continue to measure and verify the proportions as you draw each part. Focus on capturing the proportions that you see.
Step 4: Complete your drawing and share it with your friends. Take feedback from your teacher on the parts of your drawing that look proportionate and where you can improve.
BODY POSITIONS AND POSTURES
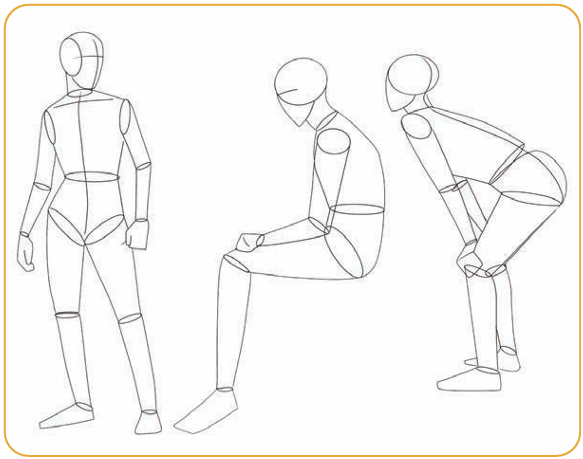
After you make one or two drawings of the standing f igure, observe the body proportions in different postures and positions, such as sitting, bending, lying, squatting, and other positions. Request your friends or family members to pose for you as you draw them.
Show them your drawings and tell them the fascinating things you have learnt about the proportions of human body.
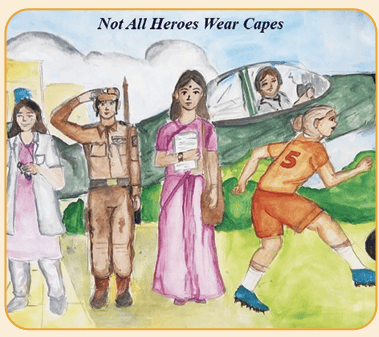
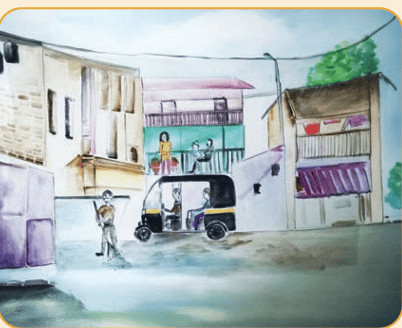
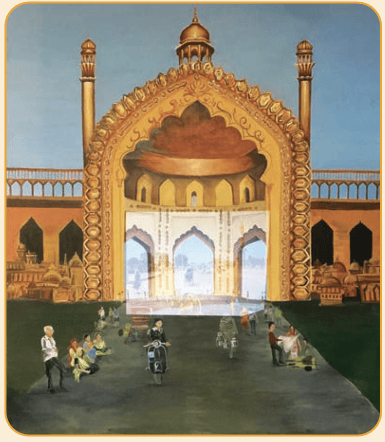
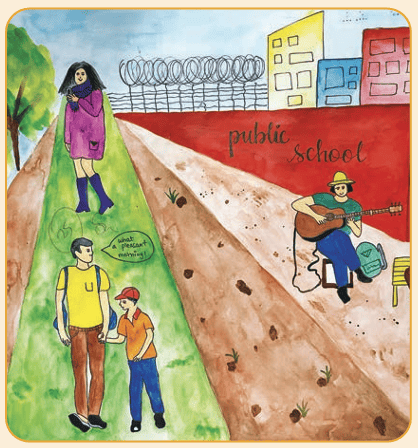
Now that you have learnt about perspective and human proportions, it’s time to create your own compositions that show people in indoor or outdoor settings.
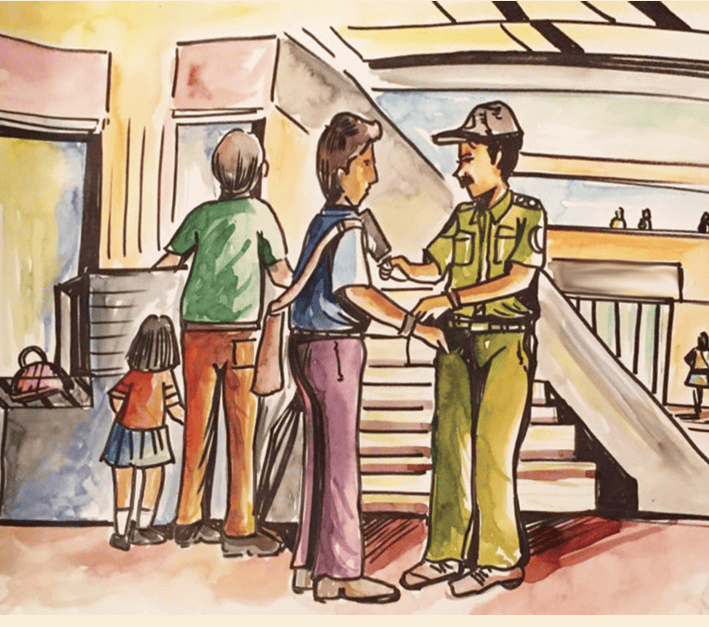
Step 1: Make a few preparatory sketches for the layout of your composition
- Use your earlier drawings to plan the foreground, middleground and background elements.
- Mark the horizon line and it vanishing point.
- To begin, use three human figures shown in varying distances — one can be near and another in a distance.
- Using your knowledge of proportion and perspective, draw the other elements, such as furniture, objects, trees, roads, vehicles, buildings, etc.
Note: The human figures should be proportionate to the landscape or indoor setting they are placed in.
Step 2: Choose one layout
Show your preparatory sketches to your teacher, take their suggestions and discuss your choice for your final artwork.
Step 3: Begin the final artwork
- Line drawing — Using the reference of your preparatory sketches, start drawing.
- Edits and changes — Make small changes or additions to your compositions while you draw.
Step 4: Colouring process
- Choose any medium to colour your artwork (colour pencils, pastels, crayons, watercolours, poster colours, acrylic colours, natural colours, etc.).
- Choose your colour theme based on seasons, time of the day, mood and so on.
- Try different combinations on your preparatory sketches.
- Now, you are ready to execute your final artwork.
Step 5: Title your artwork
- Jot down a few thoughts about your artwork (your ideas, inspirations, memories and personal connections).
- Based on these thoughts, write a short phrase that could be the title of your artwork.
Note: The teacher can display everyone’s work and have a class.
ASSESSMENT
| CHAPTER 17: PEOPLE IN PLACES | ||||
|---|---|---|---|---|
| CG. | C | Learning Outcomes | Teacher | Self |
| 1 | 1.1 | Observes visual elements around them and visually records them in a journal | ||
| 2 | 2.2 | Identifies and applies visual principles in artworks | ||
| 3 | 3.1 | Use a variety of materials for journalling | ||
| Overall participation | ||||