Creativity in
Light and Sound

Imagine you are just waking up and you open your eyes to a fantasy world made entirely of light. Soft lavender clouds glow beneath your feet, pathways shimmer in patterns of turquoise and gold, and towering trees made of sparkling beams sway gently as if alive. Neon green fireflies zip past, leaving trails like strokes of paint in the air. You look above, to see the sky with ripples of rainbow colours.
In this magical place, light doesn’t just show the world. Light creates it. And amazingly, this is not far from reality. With today’s stage lighting technology, designers can shape colours, moods, worlds, and emotions just like this, turning imagination into a living experience on stage.
Lighting: How It All Started
From the time of early cave dwellers to modern Broadway shows, we humans have always told stories. The human mind loves telling and listening to stories. The only thing that has changed over time is the way these stories are told. From using simple props and puppets to the use of sophisticated modern technology, each development has brought about a change in the experience of the audience.
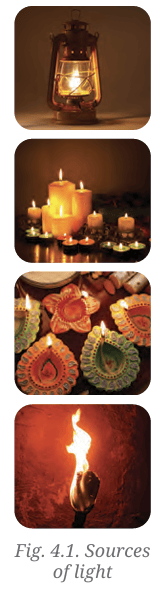
Although the use of artificial stage lights is relatively recent, humans have experimented with the use of light and shadow since ancient times— initially, through sunlight and fire, and later, candles and lamp.
Since the mid 1900s, tungsten light bulbs formed the foundation of theatrical lighting. The recent years, however, have seen a rapid development in lighting technology, leading to the widespread use of LED lighting on stage. This has had a dramatic effect on the way we design lighting and the level of control we have in bringing our imagination to reality.
Why is lighting important?
Light is what enables us to see. We see objects when light from a source, such as the Sun or an artificial light source, falls on objects, gets reflected off them, and reaches our eyes. If an object neither emits nor reflects light, it would not be visible to us.
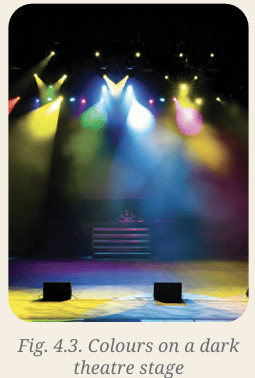
This is why most theatres take a ‘black box’ approach to the overall design of the stage. It means one starts with a dark space — an auditorium with no light — like a black box. It ensures that stray and unwanted reflections are minimised. Lighting design is about precise control of light.
Do you know?
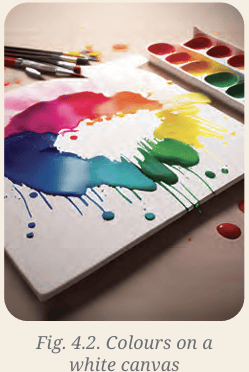
Creatively, you may view lighting design as painting with light. While visual artists may use pigments such as paints to create their artwork, lighting designers usually start with a dark space and use lights of different colours to bring their vision to life.
Objectives of stage lighting
The original purpose of stage lighting was simply to make performers and objects visible on stage. When performances moved indoors and sunlight could not be used, the versatility led to lights becoming a powerful tool for storytelling in performance. The basic uses of stage lighting are listed below:
- Visibility
- Information about the scene (day/ night, indoor/ outdoor)
- Creating mood (joy, dull, mystery, aggression, etc.)
- Visual composition and highlighting specific areas (stage balance)
- Drawing attention to a part of the stage, object, or person
- Conveying symbolism and special effects
The designer uses numerous types of lights, lenses, circuits, and light placements in order to achieve various effects. An in-depth knowledge of equipment and technology for each effect is important for a designer.
Stage lighting equipment
Floodlight
It is one of the simplest fixtures. Floodlights, as the name suggests, are designed to ‘flood an area with light’. Floodlights typically consist of a light source and a reflector. There are no lenses in a tungsten floodlight and you have very little control over the size and shape of the beam. This usually produces a lot of heat when kept on. LED floodlights avoid this problem.
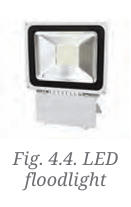
Fig. 4.4. LED floodlight
PARs (PARcans)
These have been used in stage lighting for many years. PAR stands for Parabolic Aluminised Reflector and refer to the type of lamp used. A PAR lamp has the lens, reflector, and light source in a single container. They produce very intense beams of light that are slightly oval in shape. The size or shape of this beam cannot be changed. PARs are used for general stage coverage as they provide bright, even spread of light. PARs have a basic control with pan (move left and right) and tilt (move up and down).
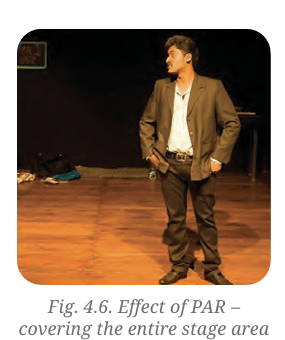
Fig. 4.5. PARs (PARcans)
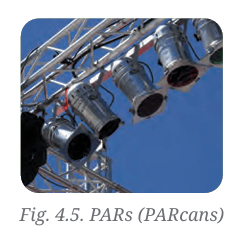
Fig. 4.6. Effect of PAR – covering the entire stage area
Fresnel
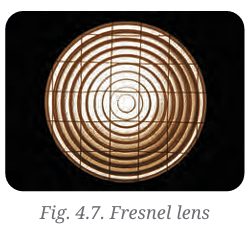
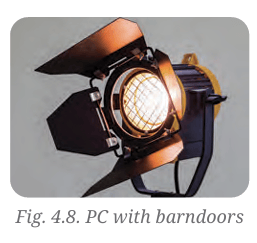
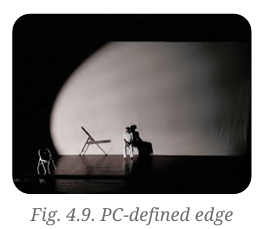
Pronounced as ‘fray-nel’, these lights offer us some control over the size and shape of the light beam. It is easily recognisable by the concentric rings on the lens. The fresnel has another version known as ‘PC’. A PC uses a Plano-Convex lens (hence the name) and functions in a similar way. Compared to a PAR, a PC has a more defined beam edge that can be shaped using barndoors — an accessory fitted in front of the light to shape the beam and prevent unnecessary spillage.
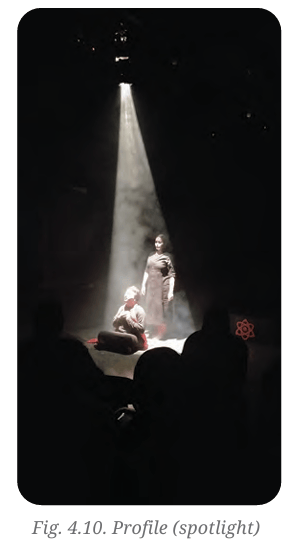
Profile (spotlight)
It offers the most control over the light that they emit. Profiles can project light with either hard or soft-edged beam, focused on a specific area. The size and the shape of the beam can be controlled.
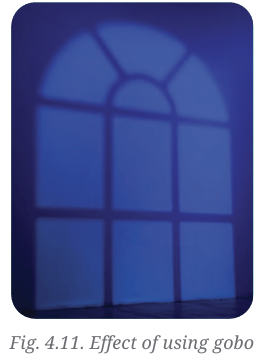
Profiles can also project patterns that give a sense of texture to the light beam by using a gobo. They are a set of four framing shutters that allow for precise shaping of the beam. A gobo can also be used to project a pattern (like a window) which can add an extra dimension to the design.
Activity 4.1
Making a simple spotlight and gobo
In groups of 5–6 students, make one spotlight and gobo.
Materials (per group):
- 1 torch or flashlight or phone torch
- Black chart paper
- Thick black paper or thin cardboard
- Tape and scissors
Making a spotlight:
- Wrap the black chart paper near the source of light of the torch or flashlight like a tube. This should prevent light from any leak or spread. Attach it securely to the torch or flashlight using a tape.
- Switch on the torch and observe how the tube narrows and focuses the beam.
Making a simple gobo:
- Draw a simple shape or pattern on a black paper (tree branches, window bars, rain lines, stars, etc.).
- Carefully cut out the shapes, like a stencil (the teacher to assist).
- Tape the cut-out in front of the spotlight tube. Adjust the distance between the light source and gobo to get sharp shadows.
- Shine the light onto a wall. You will now see patterned light.
Performance challenge:
- Each group must create a 1-minute scene using the gobo image as the centre of the scene. For example, if your gobo is that of a tree, create a scene about how a woodcutter comes to cut the tree for timber, but a child stops him and protects the tree.
Combination of lights
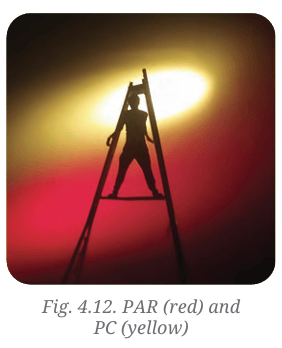
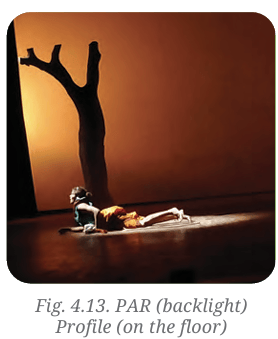
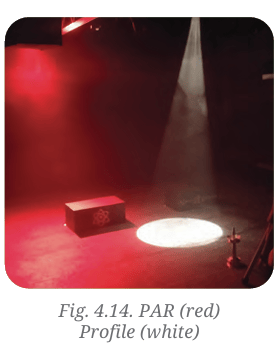
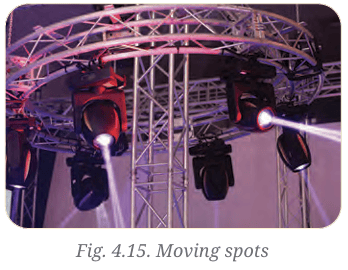
Fig. 4.15. Moving spots
Moving lights
Here, beams can be repositioned as required. Moving spots function like profiles which allow change of colour, use of gobos, adjustment of size and edge of the beam. A moving wash light behaves more like a PAR.
Light console
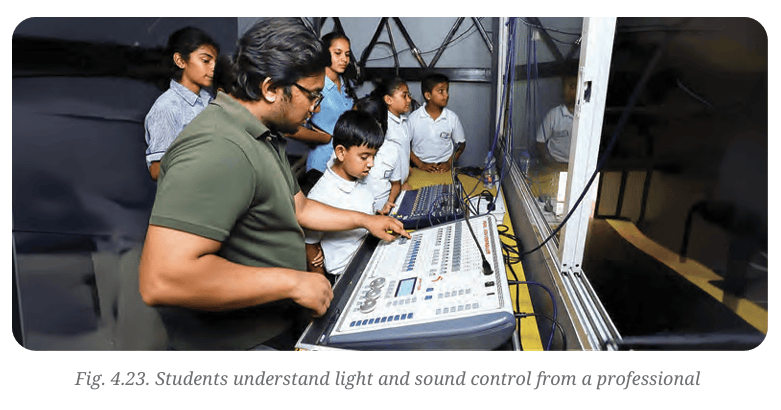
This is a key component of the lighting system. Most modern consoles have a digital interface that is used to program the lighting, but some still have faders for manual control. The console enables selection of lights to be used, sets their intensity, changes colour (if the light supports it) and records the design plan that is created for repeated usage. All the lights are controlled solely from the console during a show.
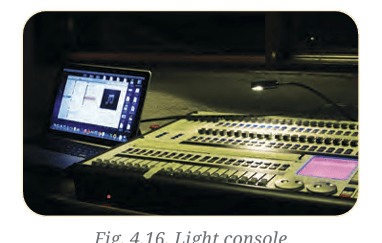
Fig. 4.16. Light console
Lighting design
Knowing what lights you have is like having brushes and paint. Knowing how to use them on stage is the true artwork of the artist on canvas. This is called lighting design.
Lights placed at different positions and angles create a variety of effects. In theatre design, understanding the spatial logic of lighting is essential.
- Cross lights shape the actors from the sides.
- Backlights add depth and silhouette.
- Top lights create a natural overhead effect.
- Footlights illuminate actors from the bottom for special effects.
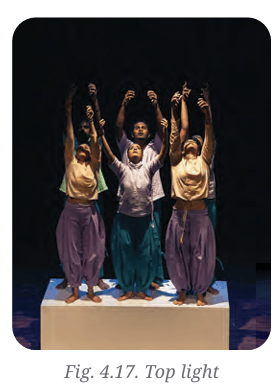
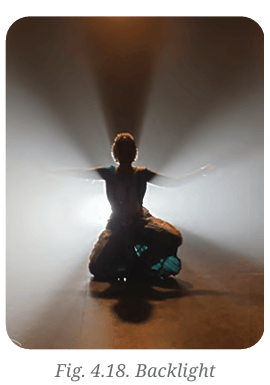
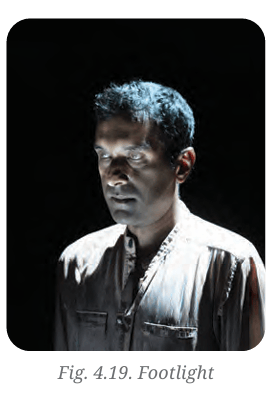
Each lighting choice serves a specific purpose—highlighting emotion, directing attention, or symbolising ideas. The colours used in lighting must harmonise with costumes and sets, as mismatched tones can wash out actors or distort the intended visual mood.

Sound Design for Theatre
Sound design for stage is the art of creating and implementing audio to enhance a theatrical production. It is a collaborative process using sound effects, music, and dialogue. Sound effects and music have to add to the story without overpowering the actors’ dialogue.
Sound equipment
If the acoustics of the auditorium is well-designed, there would be no necessity for microphones for actors. Even a whisper from the corner
of the stage would be audible to the audience. However, since that may not be possible in every venue, such equipment becomes inevitable.
Most theatre sound systems consist of three main categories of components. Within these, you can choose which devices would best suit your set-up. Keep these categories in mind as you plan your sound design.
1. Input: This equipment captures sound from different sources like actors’ speech, musical instruments on stage, and devices playing recorded music/ sound like laptops, music players, or smartphones.
The microphones used to capture sound are of different types:
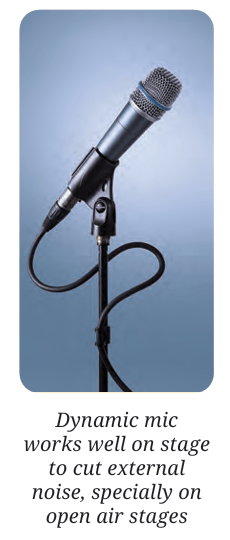
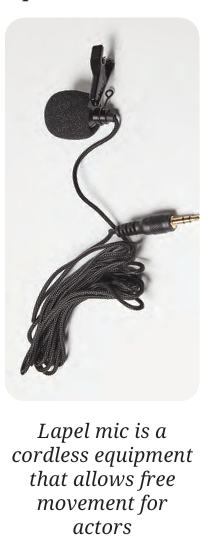
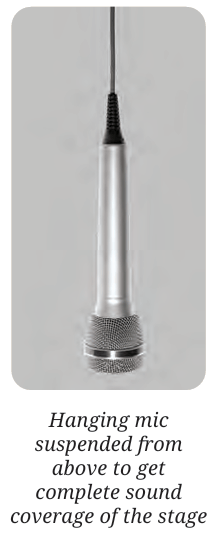
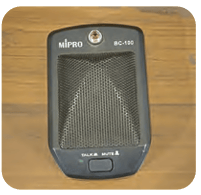
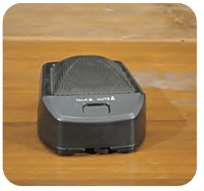
Fig. 4.20. Different types of mic
2. Signal routing, processing, amplifying: The stage is where the mixer plays a major role. Once the signals from input devices are converted into electrical signals, they are sent to a mixer, known as sound console. This allows volume adjustment and combination of multiple inputs into a common output.
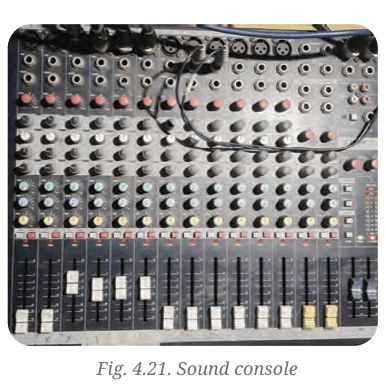
Fig. 4.21. Sound console
Their capacity varies based on the channels. It is identified as a vertical strip of knobs and faders on the mixer. It ranges from a simple four-channel mixer to mid-range mixers of 12–20 channels to professional mixers which can exceed 96 channels!
3. Output: Speakers are the sound outputs and the final components in the sound system. They convert the electrical output from the amplifier into acoustic sound. Within these speaker set-ups, there are different speaker configurations, like mono, stereo and Left Centre Right (LCR).
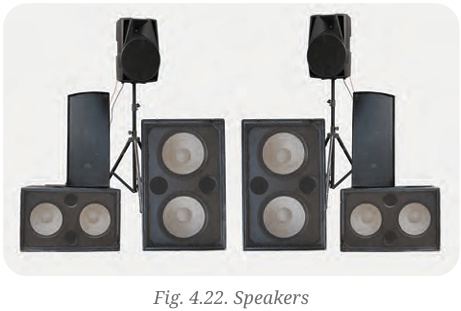
Fig. 4.22. Speakers
Sound design complements the theatrical world by creating emotional layers through music and sound effects, while ensuring that the actor’s voice remains clear and expressive. Together, lighting and sound transform the stage into a living environment, shaping not just what the audience sees and hears, but also how they feel and interpret the story.
Activity 4.2
‘Design the moment’ — A light and sound simulation exercise
Materials Needed:
- Different light sources (torches, phone flashlight, bulbs)
- Coloured transparent sheets (or paper of different colours)
- Speakers or classroom audio system
- Everyday classroom objects—stationery, water bottle, bag, or lunch box
- Simple stick puppets (details in the ‘Theatre’ section in Grade 6 textbook Kriti)
- A set of short dramatic situations
Process:
-
The teacher introduces a 10–15 second dramatic situation. For example:
- A lost child in a forest;
- A hero discovering a hidden treasure; and
- A magical door opening.
-
Students work in small groups to discuss the following:
- Which colour light best suits the mood?
- Which direction should the light come from (top, side, front)?
- What sound would accompany the moment?
- How to plan the scene using bags, water bottles, and other classroom objects as props and puppets in place of actors? For example, the water bottle could represent a tree, and a pen and small pencil could be a parent walking with a child. (As learnt under object improvisation in previous grades.) Puppets may also be used to represent the parent and child.
- One student in each group holds the torch covered with a coloured sheet and points it in the chosen direction towards the small object on their desk (such as a pen or notebook) to simulate stage lighting.
- Another student plays the selected sound clip from a phone or laptop.
- The group presents their ‘designed moment’ to the class, explaining why they chose those particular lights and sounds.
Artificial Intelligence (AI) technology
- Smart lighting systems now use AI to analyse a performance in real time, automatically adjusting colour, intensity, and focus in response to the movement of actors on stage.
- In sound design, AI tools can generate adaptive soundscapes that respond to live performance, enhancing ambience, and emotional impact.
Discussion circle
- Imagine yourself as a character on stage. If your character had a theme sound, what would it be? A drum, a flute, or a soft wind, and why?
- Which colour of lighting creates the strongest emotional impact on you? Why? What does it make you feel?
- Have you ever heard a sound that instantly made you imagine an entire setting or mood? What was it?
EXERCISES
-
What is the purpose of using lights for a play? How many types of lights are commonly used for stage lighting?
-
Suppose you have to design lighting for a battle scene and you are considering using red light. But the soldiers on stage are also wearing red-coloured costumes. Would you still go ahead with the red light? What would the effect be?
-
Match the type of mic with its purpose.
Type of mic Purpose i. Lapel mic a. Catches minute sounds ii. Foot mic b. Play performance iii. Dynamic mic c. Seminar/ talk by the chief guest