
Chapter 15
Mediums and
Techniques in
Visual Art
Now that you have gone through the essential warm-up activities like sketching and journalling, get ready for exploring the next level of Visual Art.
The choice of materials, tools, and techniques has shaped every artist’s expression throughout history. Think of the range of surfaces and materials from the prehistoric cave paintings made with earth pigments to the digital drawing devices of today! Many artworks have survived changing weather and climatic conditions as well as other external threats and damage. The fact that we can still see and experience artworks that were made thousands of years ago proves that artists had deep knowledge and advanced techniques of using various materials in art processes.
Let us recall
Some pottery and metal casting techniques that are practised today are more than 5,000 years old.Talking About Mediums
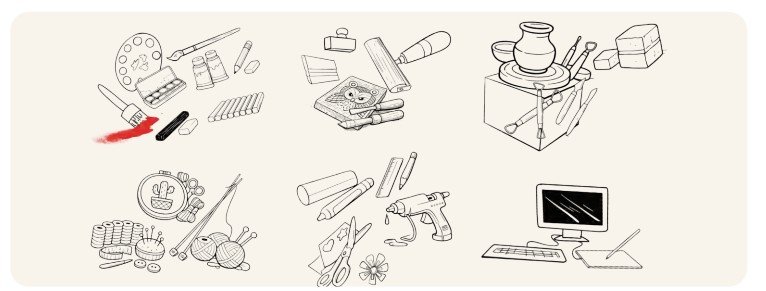
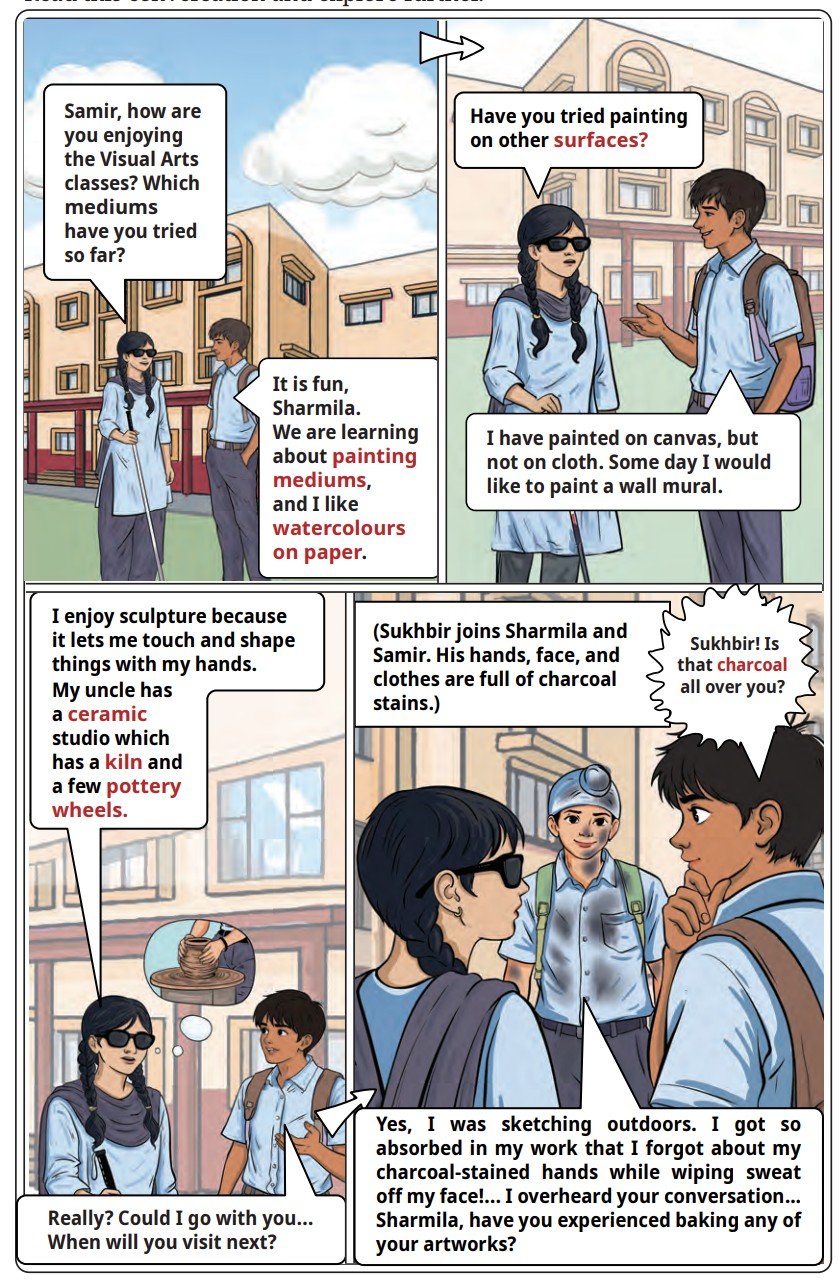
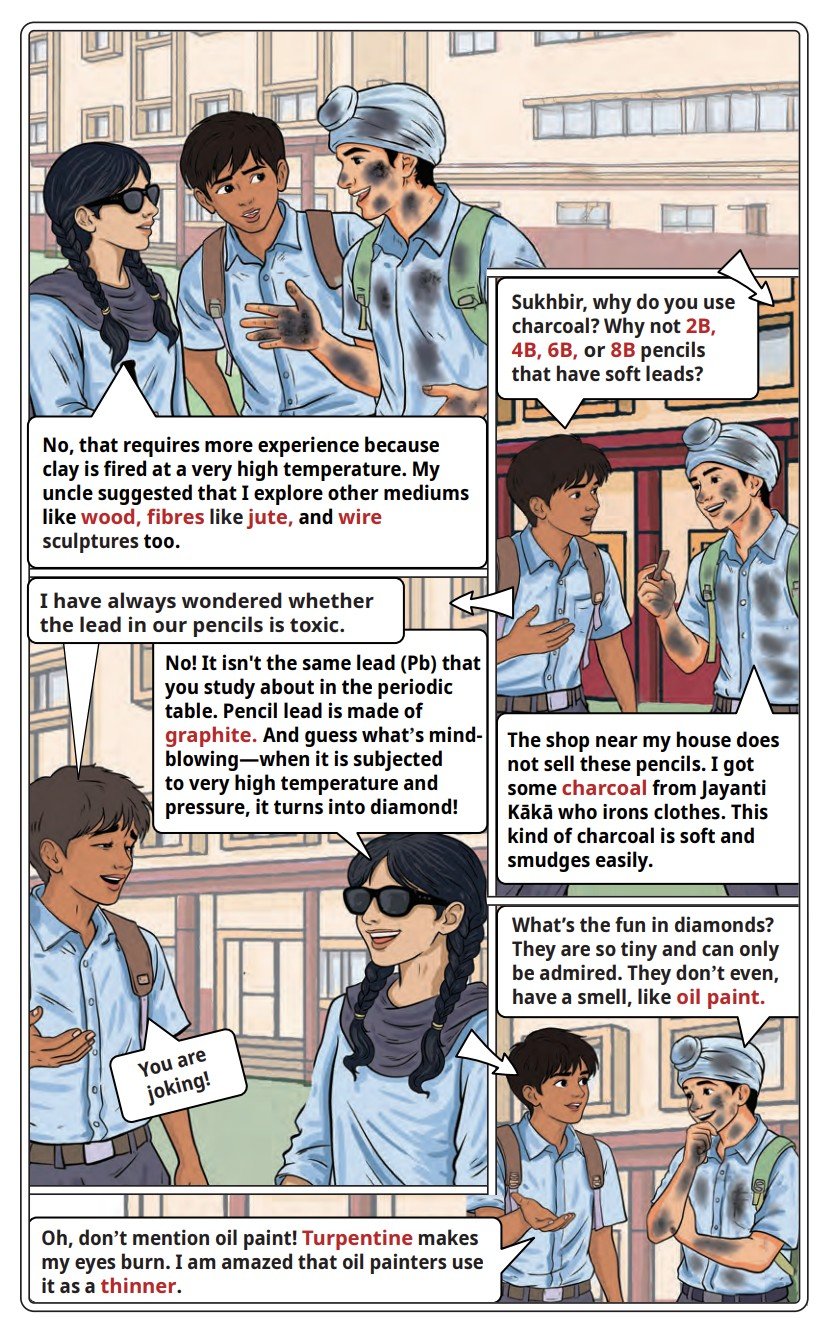
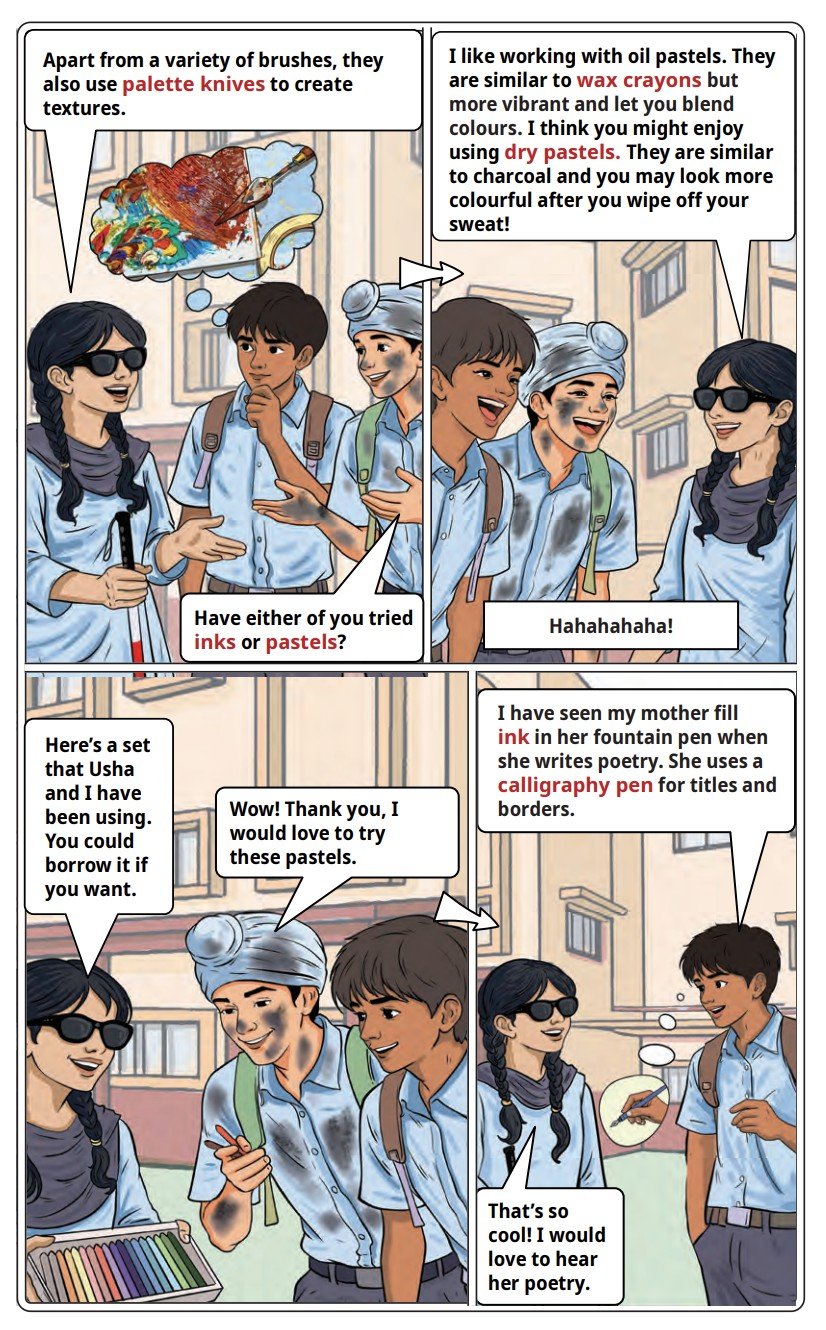
The word ‘medium’ is a common term that refers to the materials, tools, and processes used in making visual artwork.
Read this conversation and explore further
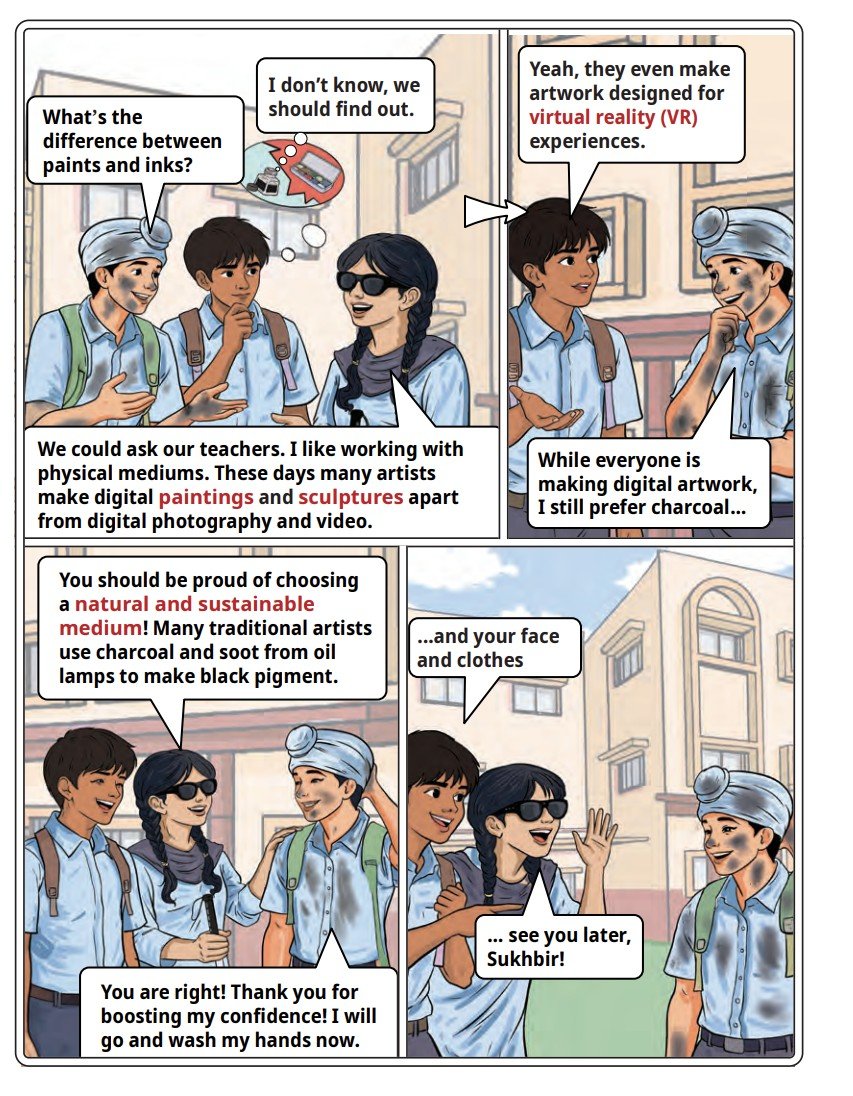
Activity 15.1
Which mediums are you interested in? Note down a list of all the mediums mentioned above. Try to find the ones that are easily available and use them in your artwork.Care, Maintenance, and Responsible Storage of Materials
It is important to be organised and careful while using and storing materials. This not only ensures that they can be shared with others but also preserves the vibrancy and longevity of artworks. Here are some useful practices that can be followed:
Source consciously
- Choose non-toxic and sustainable materials as much as possible.
- Reuse paper and experiment with recyclable materials.
Handle and maintain with care
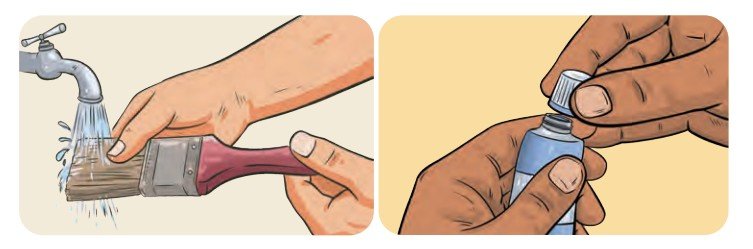
- Clean brushes immediately after use. Wash them with soap and rinse thoroughly. Shape their bristles and dry them horizontally or upright (with bristles facing up).
- Close paint tubes tightly and properly, and replace the cap of markers and ink bottles after using to prevent drying.
- Do not touch artworks with dirty or oily hands.
- Dispose of inks, acrylics, and chemical waste like turpentine responsibly.
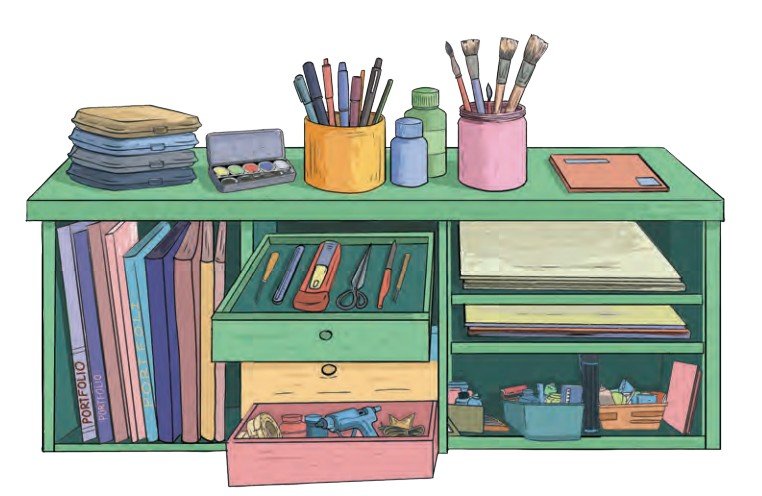
Responsible storage
Visit a stationery store or an art supplies store to see how paper, books, and other stationery are stored carefully in a limited space.
- Store paper, canvas, and drawings in dry, flat spaces.
- Store sharp objects like cutters, scissors, needles, and sculpting tools safely in a box at a safe space, away from young children, animals, and vulnerable others.
- Keep food and water away from artwork, as they are susceptible to fungi and other organisms that destroy artwork.
The Sculptural Crafts of India
Every region in India has a rich variety of craft traditions that add colours and textures to our cultural fabric. There are a number of artist communities which have gained recognition for keeping the knowledge of these arts alive through generations. Look through the gallery on the next page. It showcases handcrafted objects made of stone, metal, terracotta, wood, grass, palm, beads, and fabrics.
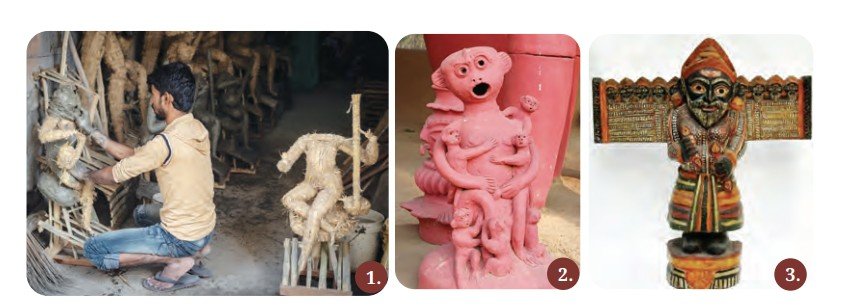
Materials in India᾽s Sculptural Craft
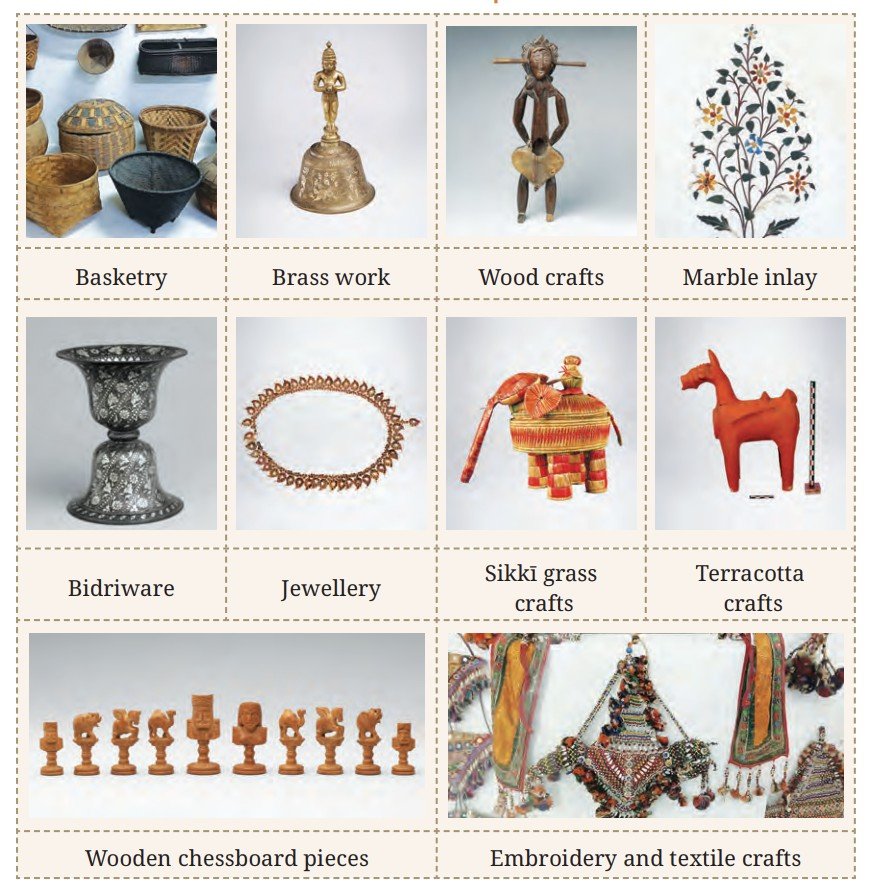
Let us learn about two unique traditions used to make head gears.
Sumok Thyāktuk are traditional bamboo hats made by Lepchas in Sikkim. These are worn during festivals, rituals, and special occasions.
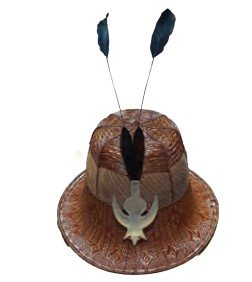
The hats are made using cane and bamboo. Each hat takes a month to weave. The first step of preparation involves making the fine threads of cane and bamboo. Following this, the hat is woven in four layers, each with its own pattern and symbolic meanings.
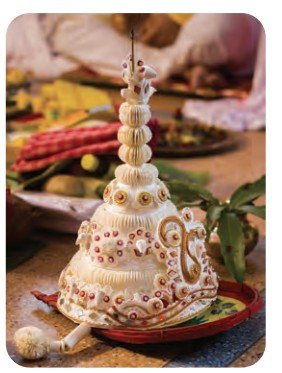
Śholāpith is a crafts tradition practised in West Bengal and Odisha. A similar tradition practised in Tamil Nadu is called Neṭṭī. Artists of this tradition extract a milky-white spongy core (pith) of the śholā plant (scientific name: Aeschynomene aspera) to make intricately carved decorative objects. Traditionally, śholāpith was used to craft garlands, headgear for brides and grooms, as well as idols of deities, and as decorations during festivities. The craft is practised by artisans called malakars (garland-makers), although they craft much more than garlands these days.
Activity 15.2
Find out about any two Indian sculptural crafts
Use these prompts and write a one-page report in your journal that includes drawings/ photos.
- Name the art tradition and region where it is practised
- Name an artist who practices it, if known.
- Mention the materials and mediums used.
- Describe the technique or process.
- Mention the source of your information.
Activity 15.3
Handcraft a three-dimensional object
- Choose easily available materials like clay, fabric, natural fibres, or soft wood.
- Your artwork can be a functional object like a pen stand, decoration for the home, headgear, jewellery, etc.
- Explore traditional materials and processes that would be suitable.
- Plan your process and create your artwork.
- Innovate on your own if you are working without an expert’s guidance.
- Display your artwork and share your experiences with others.
Note to the teacher:
Invite an artist who can conduct a workshop to teach students any Indian handcrafting process.Explore Mediums with Colour Theory
The Chitra-sūtra of the Viṣhṇu-dharmottara Purāṇa elaborates on every aspect of sourcing, extracting, preparing, and using colours. It lists the basic colours as white, yellow, red, blue, and black. When these are mixed, they produce innumerable colours.
The text also mentions that the secondary colours yield many variations of tints and shades by adding varying amounts of white and black respectively.
Activity 15.4
Make a mixed media colour wheel
- Make a colour wheel with the primary, secondary, and tertiary colours. Use a variety of mediums in your colour wheel— pencils, crayons, pens, markers, collage with printed matter, pasting fabric scraps, and other materials.
- Map the warm and cool colours.
- Practise making tints, shades, and tones of different colours.
Looking at Fig. 15.7, map the complementary and analogous colours on your colour wheel.
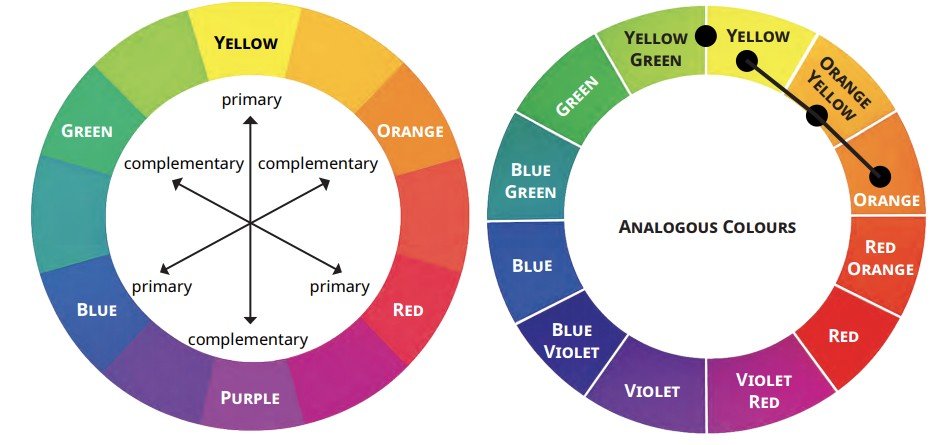
Complementary colours are seen directly opposite to each other on the colour wheel.
- How many pairs of complementary colours can you list?
- Which combination do you like the most and why?
Analogous colours lie next to each other on the colour wheel.
- Make a list of analogous colours in groups of three.
- Which combination do you like the most and why?
Perspective Techniques
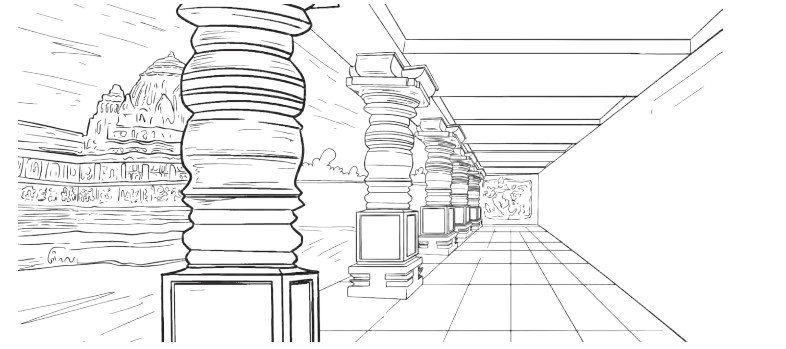
Perspective is a drawing technique that is used to show the three-dimensionality or spatial depth on a two-dimensional surface. There are two kinds of perspective techniques, which are explained below.
Linear perspective
This is the method where lines that are parallel in reality are drawn to converge towards a vanishing point on the horizon. For example, the parallel lines of a corridor are drawn to converge in the distance, which creates the illusion of spatial depth (Fig. 15.8).
Activity 15.5
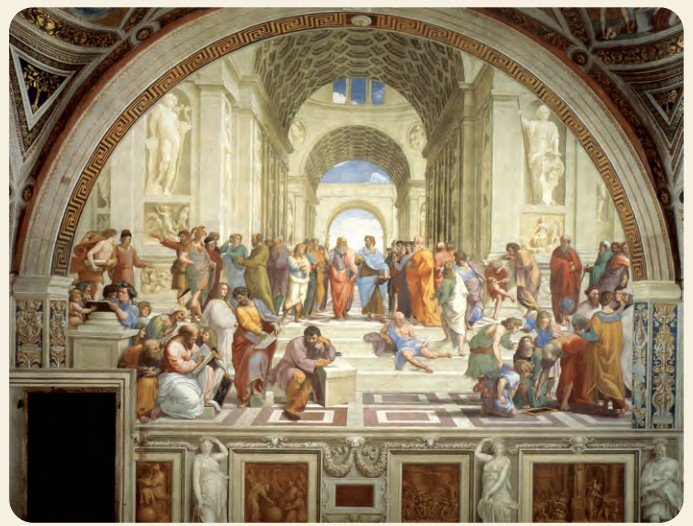
Mark the vanishing point and draw converging lines
In Fig. 15.9, the lines in the architecture converge at the centre of the painting where Aristotle and Plato are surrounded by a gathering of philosophers, scientists, and mathematicians, which include Socrates, Pythagoras, Archimedes, Heraclitus, and many others.Find out more about the painting on the internet with your teacher’s help. Use a pencil to mark the vanishing point on this painting. Draw the lines below eye level and above eye level, which converge at the vanishing point.
Aerial perspective
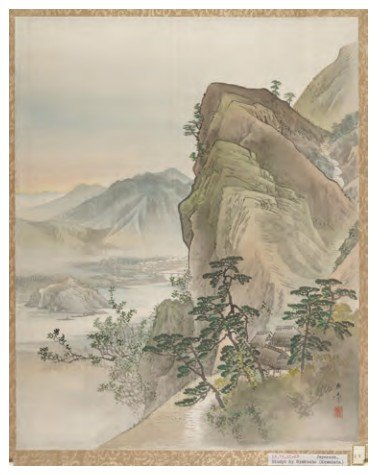
Also known as atmospheric perspective, aerial perspective uses colour tonalities to depict distance and depth.
In this landscape painting, the mountain on the right side of the painting is painted with richer colours than the mountains in the distance, which appear to be hazy behind a layer of mist. The plants and trees that are closer to the viewer are painted with more detail than those in the distance.
Let us recall
It is important to know how to make colour tints, tones, and shades to create atmospheric perspective.Activity 15.6
Analyse the painting
Analyse the use of perspective in Fig. 15.11:- What kind of perspective do
you see?
- Linear perspective
- Aerial perspective
- Both
- No perspective
- In which parts of the painting do you see linear perspective?
- In which parts of the painting do you see atmospheric perspective?
- Would you say that this painting represents a confluence of different perspectives? Explain your views.
Do you know?
The term ‘perspective’ is also used to refer to a person’s opinions and attitudes, which are based on their experiences.Activity 15.7
Create an artwork using perspective techniques
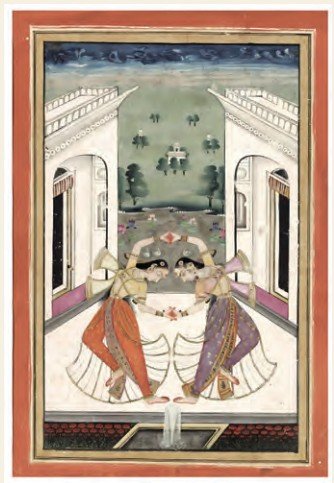
Size of artwork: Approximately A4Take inspiration from the Deccan miniature painting to re-imagine dancers from your life and time. Create an artwork depicting dancers and apply the techniques of linear perspective and aerial perspective. Do not copy the miniature painting.
Step 1: Recall dance forms you have seen around you and visualise a scene of two or more people dancing together.Step 2: Visualise their postures, actions, expressions, costumes, and jewellery.
Step 3: Choose either an indoor or outdoor setting with some architectural elements like your school building, a wedding venue, a street, a monument, etc. Be imaginative!
Step 4: Make a sketch of the scene in your journal and plan how you will use linear or aerial perspectives.
Step 5: Share your sketch with your peers and teacher, and get their feedback.
Step 6: Focus on linear perspective while making your finalised drawing.
Step 7: Focus on aerial perspective when you colour your artwork.
Step 8: Complete your artwork and display it in class.
Step 9: Review the artworks done by others and make notes in your journal.
EXERCISES
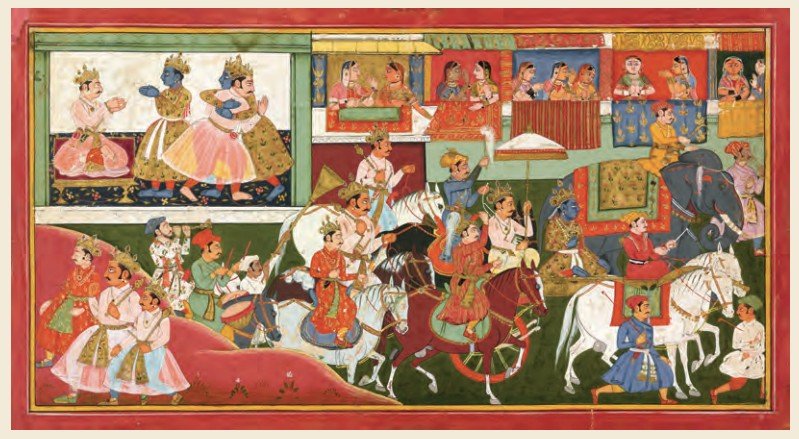
Q1. You have learnt that traditional artists used soot from oil lamps to make a black pigment. Explore vegetables, food, and nature in your surroundings and list five or six natural sources for obtaining colours.Q2. List two pairs of complementary colours and two pairs of analogous colours seen in the painting shown in Fig. 15.12.
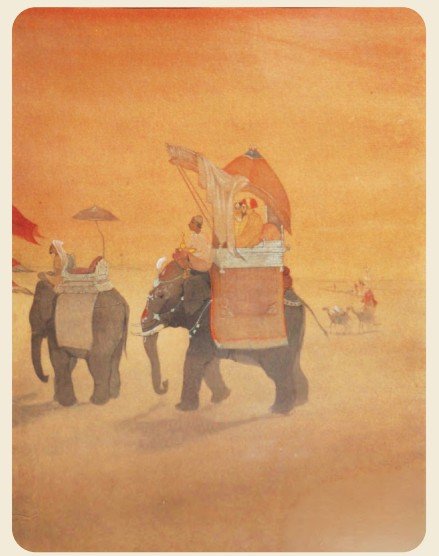
Q3. Write a paragraph about the painting in Fig.15.13 by covering the following points:
- Describe the scene.
- Analyse the use of perspective.
- Which medium would you use to blend colours as seen in the painting?
Q4. Reflect on the various visual arts mediums you have used and write a paragraph on them.
Notes
------------------------------------------------------------------------------------------
---------------------------------------------
---------------------------------------------
---------------------------------------------