16
Visual
Composition

Composition is a term used across art forms. A good visual composition is created when the elements of art are arranged by applying the principles of visual design.
Compositions can be either two-dimensional, like paintings and textiles, or three-dimensional, like free-standing sculptures, installations, and reliefs.
- The terms ‘realistic’ or ‘naturalistic’ are used for artworks where the images resemble objects, nature, and people as they appear in reality.
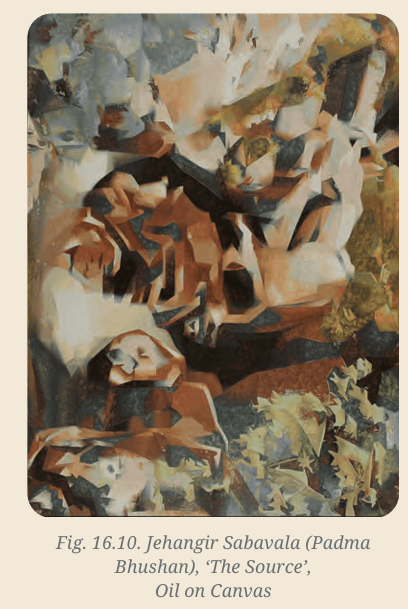
- The term ‘abstract’ is used to describe artworks which are imaginative creations, which may not have any direct resemblance to objects seen in reality.
- Some compositions are a combination of both naturalistic and abstract imagery.
Look at these examples and relate them to the terms described above.
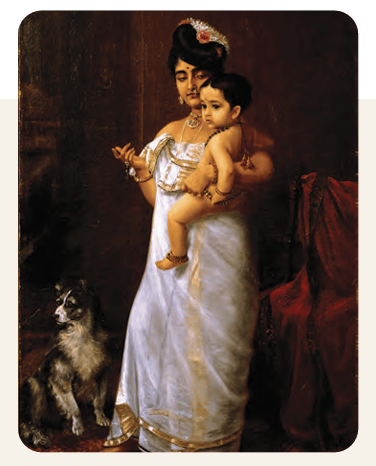
Fig. 16.1. ‘There comes Papa’ by Raja Ravi Varma, Oil on canvas, 1893
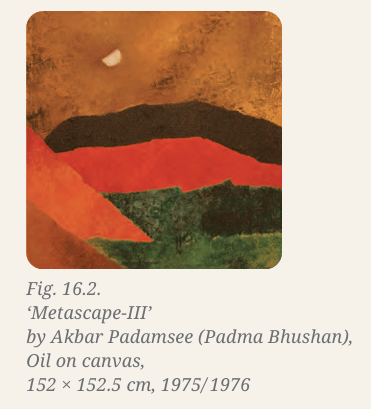
‘Metascape-III’
by Akbar Padamsee (Padma Bhushan),
Oil on canvas,
152 × 152.5 cm, 1975/1976
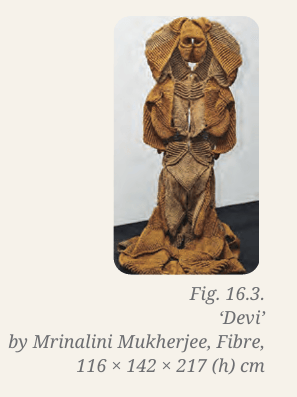
‘Devi’
by Mrinalini Mukherjee, Fibre,
116 × 142 × 217 (h) cm
Compositional layout is the arrangement of all the visual components of an artwork, where the size, position, alignment, colour, and proportion of each component correlate with the rest to form a harmonious picture. For example, a product advertisement in a newspaper has text of varying sizes and colours which are placed along with images to convey a specific message.
A compositional layout can have multiple possibilities and arrangements, which influence the visual impact, meanings, and emotions it conveys. Therefore, it is important to experiment with different images and arrangements in the layout before finalising one. Each version that is created in the process is called an iteration. For example, you could create three layouts where you change the size or placement of a person/ object in each iteration.
Create compositions
Choose one option from below and create a two-dimensional composition.
The processes for each of the options are discussed below.
Option A: Create a four-part graphic story or comic strip
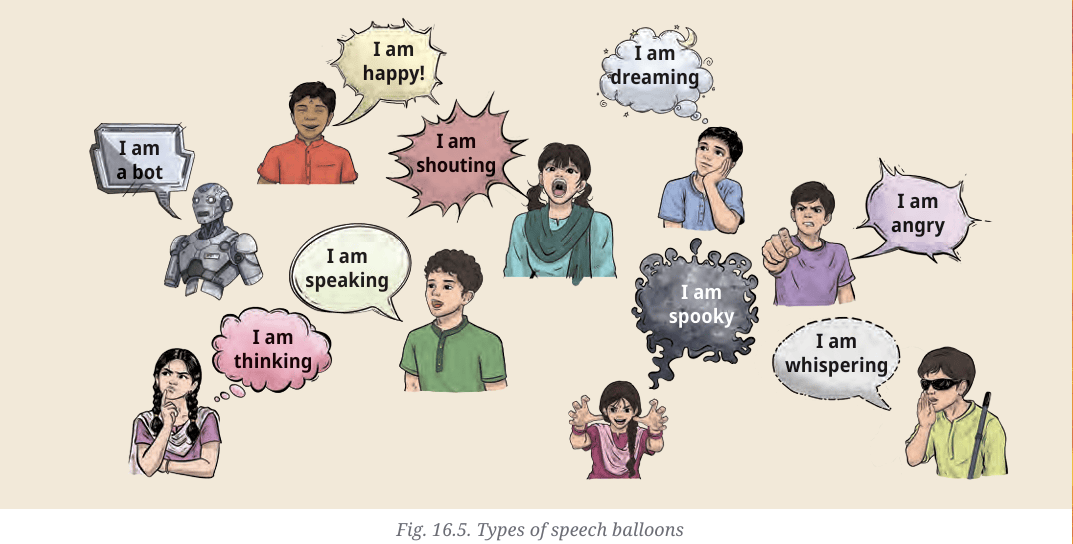
Graphic stories and comic strips tell stories in picture sequences. The text that narrates dialogue between characters is usually placed inside graphic symbols called speech balloons or speech bubbles.
The previous chapter has an example of a conversation in the format of a graphic story. Most newspapers have a section of short comics. Do you have any favourites among those that you have read?
In this activity, you will create a comic strip with four parts or four scenes. It should have:
- at least two characters created by you;
- a setting: indoor, outdoor, or imaginary; and
- continuity from one scene to another.
Step 1. Ideation
- Visualise four scenes of a story sequence that are based on incidents or conversations from your life.
- Decide the number of characters in the story.
- Visualise the setting for each of the four scenes. It could be indoor, outdoor, or imaginary.
- Plan the text or dialogue for each scene.
Step 2. Choosing the size, format, and sequence
Use an A4 sheet and divide it into four parts. Arrange the scenes in a way that you find suitable for your story design. You can also have a combination of small and large parts to add variety in your scenes and narration. See these options for some ideas.
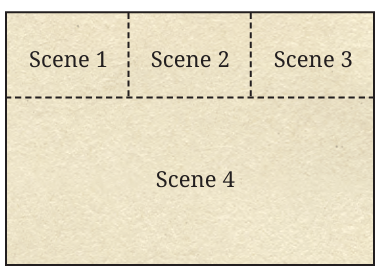
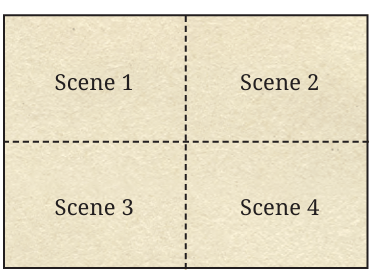
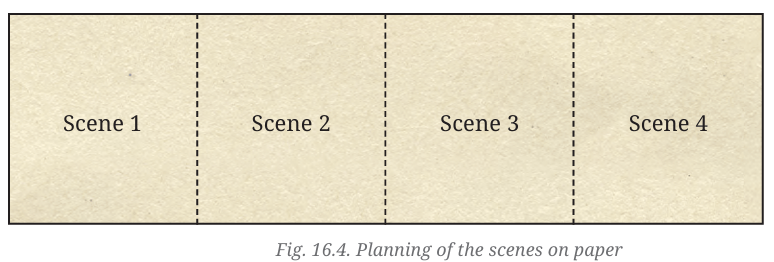
Fig. 16.4. Planning of the scenes on paper
Step 3. Character sketches
Since the same characters may repeat in more than one scene, keep your drawings simple.
- Make multiple sketches and iterations of each character.
- They can be based on people you know, characters from other stories, or entirely from your imagination.
- Show their actions, expressions, and clothing.
Step 4. Speech balloons
- Write the text for each scene in short sentences.
- Choose the type of speech balloon for each scene based on what kind of thought, dialogue, or sound effect it should convey. Look at these examples for some ideas.
Step 5. Composition of scenes
- Create two or three compositional layouts for each scene.
- In each iteration, play with the size and placement of characters, setting, and speech balloons (For example, zoom into the face in some scenes, or show the body partially).
- Pay attention to the proportions, focus, and balance in each scene.
- Edit the text to fit inside the speech balloons or vice versa.
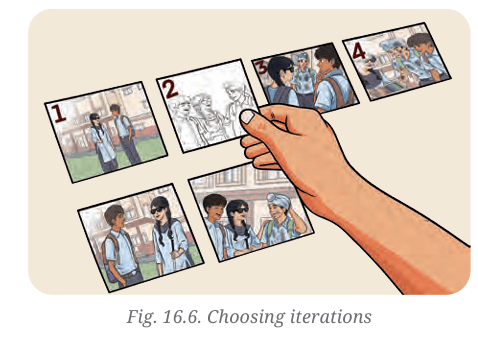
Step 6. Arrange the sequence: Select the iterations that work best and finalise the sequence of four scenes.
Step 7. Refine: Finalise the drawings.
Step 8. Colour: Use suitable colour combinations and contrast to colour each scene.
Step 9. Display your completed artwork and review it among your peers.
Option B: Thematic painting
In this activity, you will choose a theme for your composition and present it in the form of a coloured drawing, painting, or collage.
Step 1: Select a medium based on the availability of materials and resources
- Make sure they are economical, locally available, sustainable, and familiar to you.
- Check with your peers for the possibility of sharing materials.
Step 2: Decide the size of your artwork
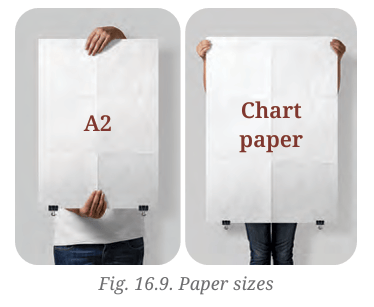
Your artwork could be of any dimension larger than A4 (21cm × 29.7cm) and smaller than A2 (42cm × 59.4cm).
Step 3: Choose a theme or topic
- Look through your sketch-book/journal to find inspiration and ideas.
- Choose a theme or topic of your interest.
- Create images that are either from your observation or imagination.
- Avoid copying another artwork/ artist’s ideas as well as stereotypes.
- Create images that authentically depict how you feel and think.
Step 7: Colour your artwork in a planned sequence
- Colour the images that are in focus first. This will help you adjust the tone and intensity of colours in other areas such that they complement and highlight what is in focus.
- Use the materials and tools with care as you colour and try a variety of experiments to achieve different visual effects.
- While painting, experiment with different brushes and the amount of water used, layering, spray-painting, etc.
Step 8: Add the final details and complete your work.
Step 9: Think of three titles for your artwork and choose one after discussion.
Step 10: Remember that title and topic are different. Topic is related to the subject matter of your artwork. Title is a name that you assign to your artwork.
Step 11: Display your artwork in class and review it with your peers.
Option C: Collage (Group work)
In this activity, you will work in groups and decide a theme collaboratively for your composition and present it in the form of a collage. Follow the steps mentioned below:
Step 1: Choose your materials
Find materials that are easily available. If you choose to make a collage, ensure that your base surface and adhesive are suitable for sticking a variety of materials.
Step 2: Decide the size of your artwork
Your artwork could be of any size larger than A2 (42 × 59.4 cm) and not more than a full-size chart paper.
Follow Steps 3 to 6 as given in Option B: Thematic Painting.
Step 7: Experiment with the edges
As you make a collage, experiment with the edges of each fragment by tearing them with your hands or cutting with scissors.
Follow Steps 8 to 10 as given in Option B: Thematic Painting.
EXERCISES
Q1. Which pair of speech balloons suit the dialogues below?
Child: Maa! Look at what I have made!
Parent: Shhh... your sister is sleeping. Come closer and show it to me.
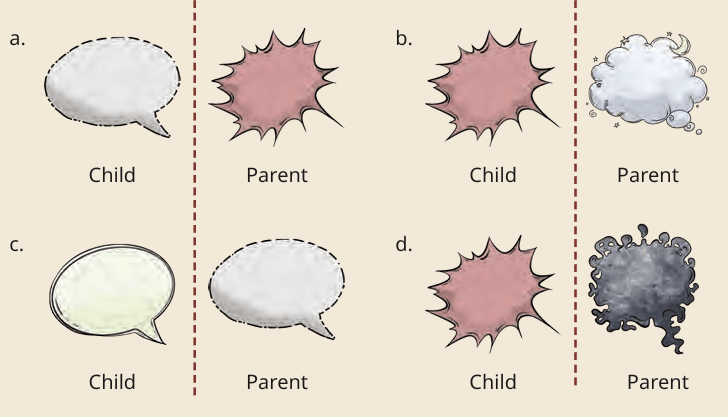
Write a dialogue that you have had with your parents, teachers, or other elders and place them in suitable speech balloons to capture moods and expressions.
Q2. Observe the paintings shown in Figs. 16.10 and 16.11 and answer the following:
- Explain the difference between the terms realistic and abstract.
- Which term would be used for each painting given below?
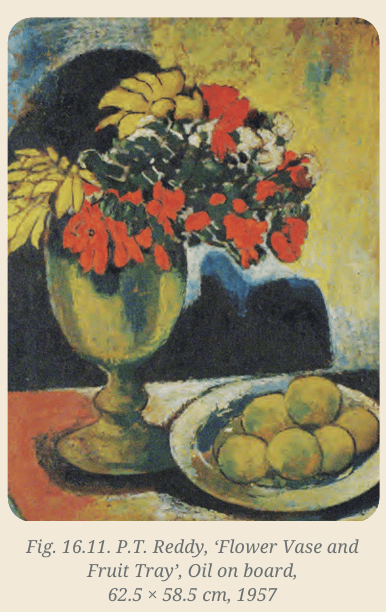
Q3. Why is compositional layout important? Explain this using your favourite artwork.
Q4. Reflect on the compositions you have made and answer the following:
- What was the inspiration behind choosing the subject matter?
- What were the challenges and how did you resolve them?
- What did you learn from making many iterations?